This post will take you through how to set up a very basic application using objects contained in multiple NIB files. After scouring the web I could find very few clear instructions on how to set this up and, while it turns out that it is quite simple, a step-by-step guide may prove to be helpful.
This tutorial assumes an intermediate knowledge of Cappuccino, include some familiarity with Interface Builder. You should have the Cappuccino framework and tools installed, as well as Xcode. This tutorial will be illustrated with screen captures from Xcode 6.1 and Mac OS X Yosemite.
Also a note on terminology: Cappuccino has CIBs (Cappuccino Interface Builder), Xcode has XIBs (XML Interface Builder), and many people refer to them as NIBs (NeXT Interface Builder) for historical reasons. In this article I will refer to them as NIB files, but this should be recognized as meaning a .xib file.
Getting Started
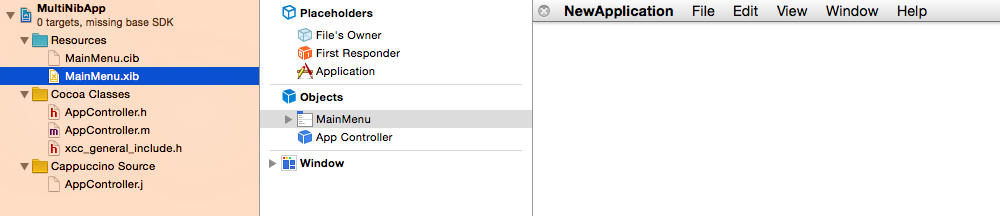
The first step is to start XcodeCapp and use it to create your application. Choose “Create Project…” and save your project. I called mine “MultiNibApp”. XcodeCapp will create a new NIB Application and then load up Xcode and display your project files. Click the disclosure arrow on the “Resources” folder and select the MainMenu.xib file. Your interface will become visible in the Xcode Interface Builder.
Adding NIBs
Next, let’s add a second NIB to the project. Right-click on the Resources folder, select “New file…”. In the template choice sheet, choose the “User Interface” section, and select a “Window” template. For the purposes of this tutorial, let’s simply call this “ExternalWindow”. Be sure to save it in your application’s “Resources” folder.
If you have XcodeCapp running, you will immediately see it picking up on the added file and converting it to a CIB file in the background for you.
Creating the Window Controller
The next step is perhaps the most confusing, and crucial, part of this process. We first need to create a Window Controller class that will manage this XIB, and then we need to wire it up in Xcode.
Open up your project in your favourite text editor and create a new file in your root directory called ExternalWindowController.j. Create a very simple stub class, extending CPWindowController:
@import <AppKit/CPWindowController.j>

@implementation ExternalWindowController : CPWindowController
{
}

- (id)init
{
    if (self = [super initWithWindowCibName:@"ExternalWindow" owner:nil])
    {
    }

    return self;
}

@end
Notice that we gave the init method the name of our ExternalWindow.xibname, without the file extension.
Next, open up your AppController.j file and add an import line for your new file:
@import "ExternalWindowController.j"
Now we need to add the corresponding object in Interface Builder. Open up your MainMenu.xib file. Find the “NSObject” component in the component library and drag it to your project. Select the new object, then choose the “Identity Inspector” in the right-hand column. If everything is wired up OK, you should be able to simply start typing “External” into the “Custom Class” box and it will auto-complete it for you. (If it doesn’t autocomplete, it’s a good indicator that something’s gone wrong. Check to make sure XcodeCapp is still running, that you’ve imported your class into your AppController, and that there are no syntax errors in your custom class.)

Now the crucial step. Choose your ExternalNib.xib file in your project. Select the “File’s Owner” object, and do the same thing: Change the “Custom Class” property to ExternalWindowController.
Doing this changes the “Connections” options for our “File’s Owner” object. With the “File’s Owner” object still selected, choose the “Connections” inspector pane and drag a connection line from the window item to the Window object.
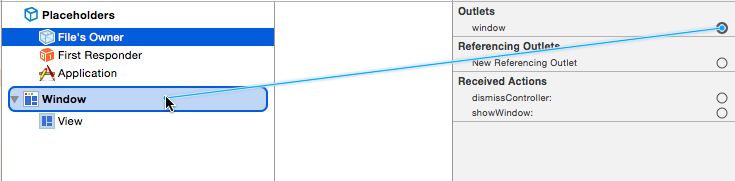
So, let’s take a step back and look at what’s happened. We created an ExternalWindowController object that extends CPWindowController. One of the properties of a CPWindowController is, unsurprisingly, a reference to the window that it will be controlling. We’ve just set that property using Interface Builder.
Cross-NIB Communication
The next step is to trigger the ExternalWindow NIB from within our MainMenu NIB. Fortunately this is very easy to do now that everything is connected.
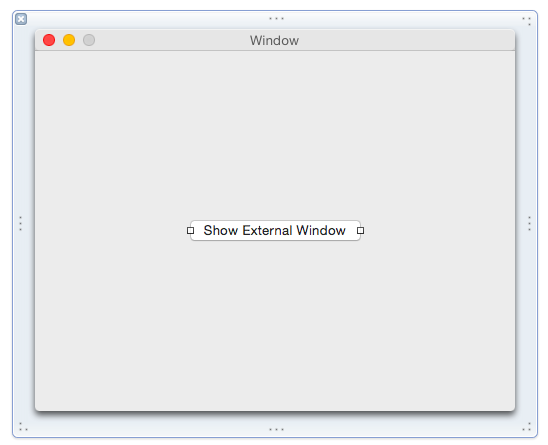
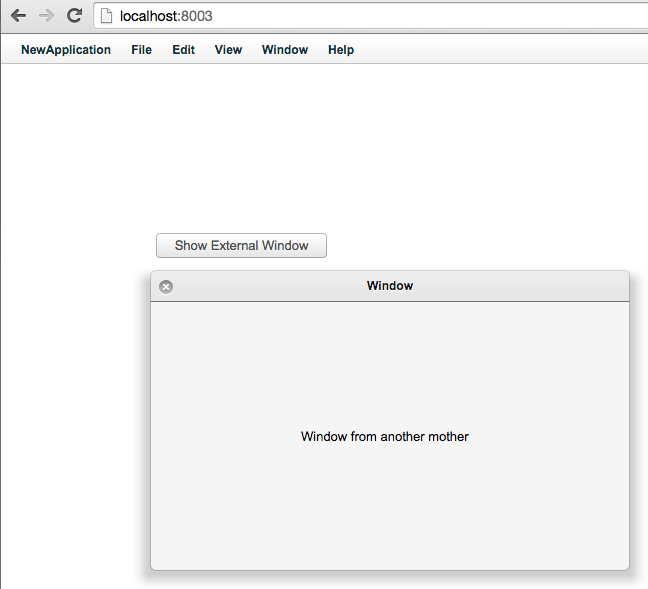
We need a control to activate the external window. Back in your MainMenu.xib file, choose the default Window object, delete the text field and slider, and add a button. I called mine “Show External Window.”
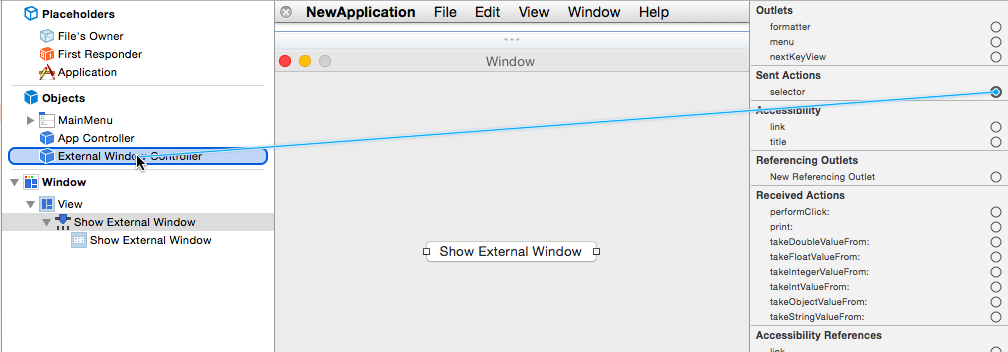
Then select the button we added to our Window in this view. Open the Connections inspector and drag a line from the selector property (under “Sent Actions”) to our External Window Controller object. When you release it, an option will appear: dismissController: or showWindow:. Choose showWindow:.
Now it’s time to test it out. Open your index.html file (I find it best to run $> python -m SimpleHTTPServer within the project directory, which will start a simple webserver on port 8000). Load your project, and click on the “Show External Window” button. Behold! The window appears!
Next Steps
Hopefully this gives you enough to get started writing your own multi-Nib applications with Interface Builder. Although this tutorial has focused on using a window controller, the process of using, for example, a view controller is very similar. The crucial part is customizing the “File’s Owner” object to point to a controller class.
