In this tutorial we will create a simple view-based outline view. CPOutlineView displays data in hierarchical format. You might know it as a ‘tree’ view from other frameworks. Although CPOutlineView is a subclass of CPTableView and inherits the row and column format, you use it in a slightly different way.
In this tutorial we will create an organisation chart of a company with the ability to expand and collapse items.
We will start out the same was as in the table view tutorial. First, go to the folder in which you want create the project and run:
capp gen -l -t NibApplication SimpleOutlineView
This will generate an empty new project using the Nib template.
To keep our code organized, we will create our data source model in a separate file. We want to structure our code according to the MVC pattern. In Employee.j:
@import <Foundation/CPObject.j>

@implementation Employee : CPObject
{
    CPString       _name      @accessors(property=name);
    CPString       _title     @accessors(property=title);
    CPMutableArray _employees @accessors(property=employees);
}

- (id)initWithName:(CPString)aName title:(CPString)aTitle
{
    if (self = [super init])
    {
        _name = aName;
        _title = aTitle;
        _employees = [CPMutableArray array];
    }
    return self;
}

@end
Open up AppController.j and add the import for our new file:
@import "Employee.j"
While we’re in the app controller, let’s add a var to hold our Employee model and some outlets.
@implementation AppController : CPObject
{
    @outlet CPWindow        theWindow;
    @outlet CPOutlineView   outlineView;
    Employee                _ceo; // This will hold our root item
}
Use a Cappuccino bordered window for this tutorial by sending setFullPlatformWindow:NO in the awakeFromCib method:
- (void)awakeFromCib
{
    [theWindow setFullPlatformWindow:NO];
}
In the init method we will define the data source using our Employee model.
- (id)init
{
    if (self = [super init])
    {

        // First we create our root item, the CEO.
        _ceo = [[Employee alloc] initWithName:"Ben" title:"CEO"];

        // Then we create other employees and add them under their respective managers.
        var simon = [[Employee alloc] initWithName:"Simon" title:"CFO"];

        // We have an array called 'employees' in our Employee class, to represent who reports to whom.
        // Simon reports directly to the CEO:
        [[_ceo employees] addObject:simon];

        var sarah = [[Employee alloc] initWithName:"Sarah" title:"Assistant to CFO"];
        // Sarah reports to Simon.
        [[simon employees] addObject:sarah];

        var maarten = [[Employee alloc] initWithName:"Maarten" title:"VP of Marketing"];
        [[_ceo employees] addObject:maarten];

        var donny = [[Employee alloc] initWithName:"Donny" title:"Head of Communication"];
        [[maarten employees] addObject:donny];

        var ronan = [[Employee alloc] initWithName:"Ronan" title:"Communication Specialist"];
        [[donny employees] addObject:ronan];

        var dick = [[Employee alloc] initWithName:"Dick" title:"Head of Legal"];
        [[_ceo employees] addObject:dick];

    }
    return self;
}
Our next stop is the oultine view documentation to see what methods we need to provide data.
(int)outlineView:(CPOutlineView)outlineView numberOfChildrenOfItem:(id)item;Returns the number of child items of a given item. If item is nil you should return the number of top level (root) items.
(BOOL)outlineView:(CPOutlineView)outlineView isItemExpandable:(id)item;Returns YES if the item is expandable, otherwise NO.
(id)outlineView:(CPOutlineView)outlineView child:(CPInteger)index ofItem:(id)item;Returns the child item at an index of a given item. If item is nil you should return the appropriate root item.
(id)outlineView:(CPOutlineView)outlineView objectValueForTableColumn:(CPTableColumn)tableColumn byItem:(id)item;Returns the object value of the item in a given column.
The easiest method to implement is numberOfChildrenOfItem.
The item will be nil when the outline view is asking about the root. In all other cases, we will be interested in how many “child nodes” the current item has. Recall that above we stored the children of each employee in the employees array.
- (int)outlineView:(CPOutlineView)outlineView numberOfChildrenOfItem:(id)item
{
    if (!item)
    {
        // We have one root item, the CEO only
        return 1;
    }

    return [[item employees] count];
}
The next step is to signal whether the item has subitems. Such items will be expandable in the outline view.
- (BOOL)outlineView:(CPOutlineView)outlineView isItemExpandable:(id)item
{
    if (!item)
    {
        return YES;
    }

    return [[item employees] count] != 0;
}
The next method is to provide the child items at a certain point in the tree. If item is nil, we are being asked about the child items of the root.
- (id)outlineView:(CPOutlineView)outlineView child:(CPInteger)index ofItem:(id)item
{
    if (!item)
    {
        // Our root item is the CEO
        return ceo;
    }

    return [item employees][index];
}
Finally, we need to provide the object values of the actual columns for a given item. Our first column is called “NameColumn” and the second is “TitleColumn”. We will set up these names later in the Interface Builder.
- (id)outlineView:(id)anOutlineView viewForTableColumn:(id)tableColumn item:(id)items
{
    var identifier = [tableColumn identifier];

    var view = [outlineView makeViewWithIdentifier:"NameCell" owner:self];

    if (identifier == "NameColumn")
    {
        [[view textField] setStringValue:[item name]];
    }
    else
    {
        var view = [outlineView makeViewWithIdentifier:"TitleCell" owner:self];
        [[view textField] setStringValue:[item title]];
    }

    return view;
}
Open up the main window by double clicking Window - Window in the Object navigator.
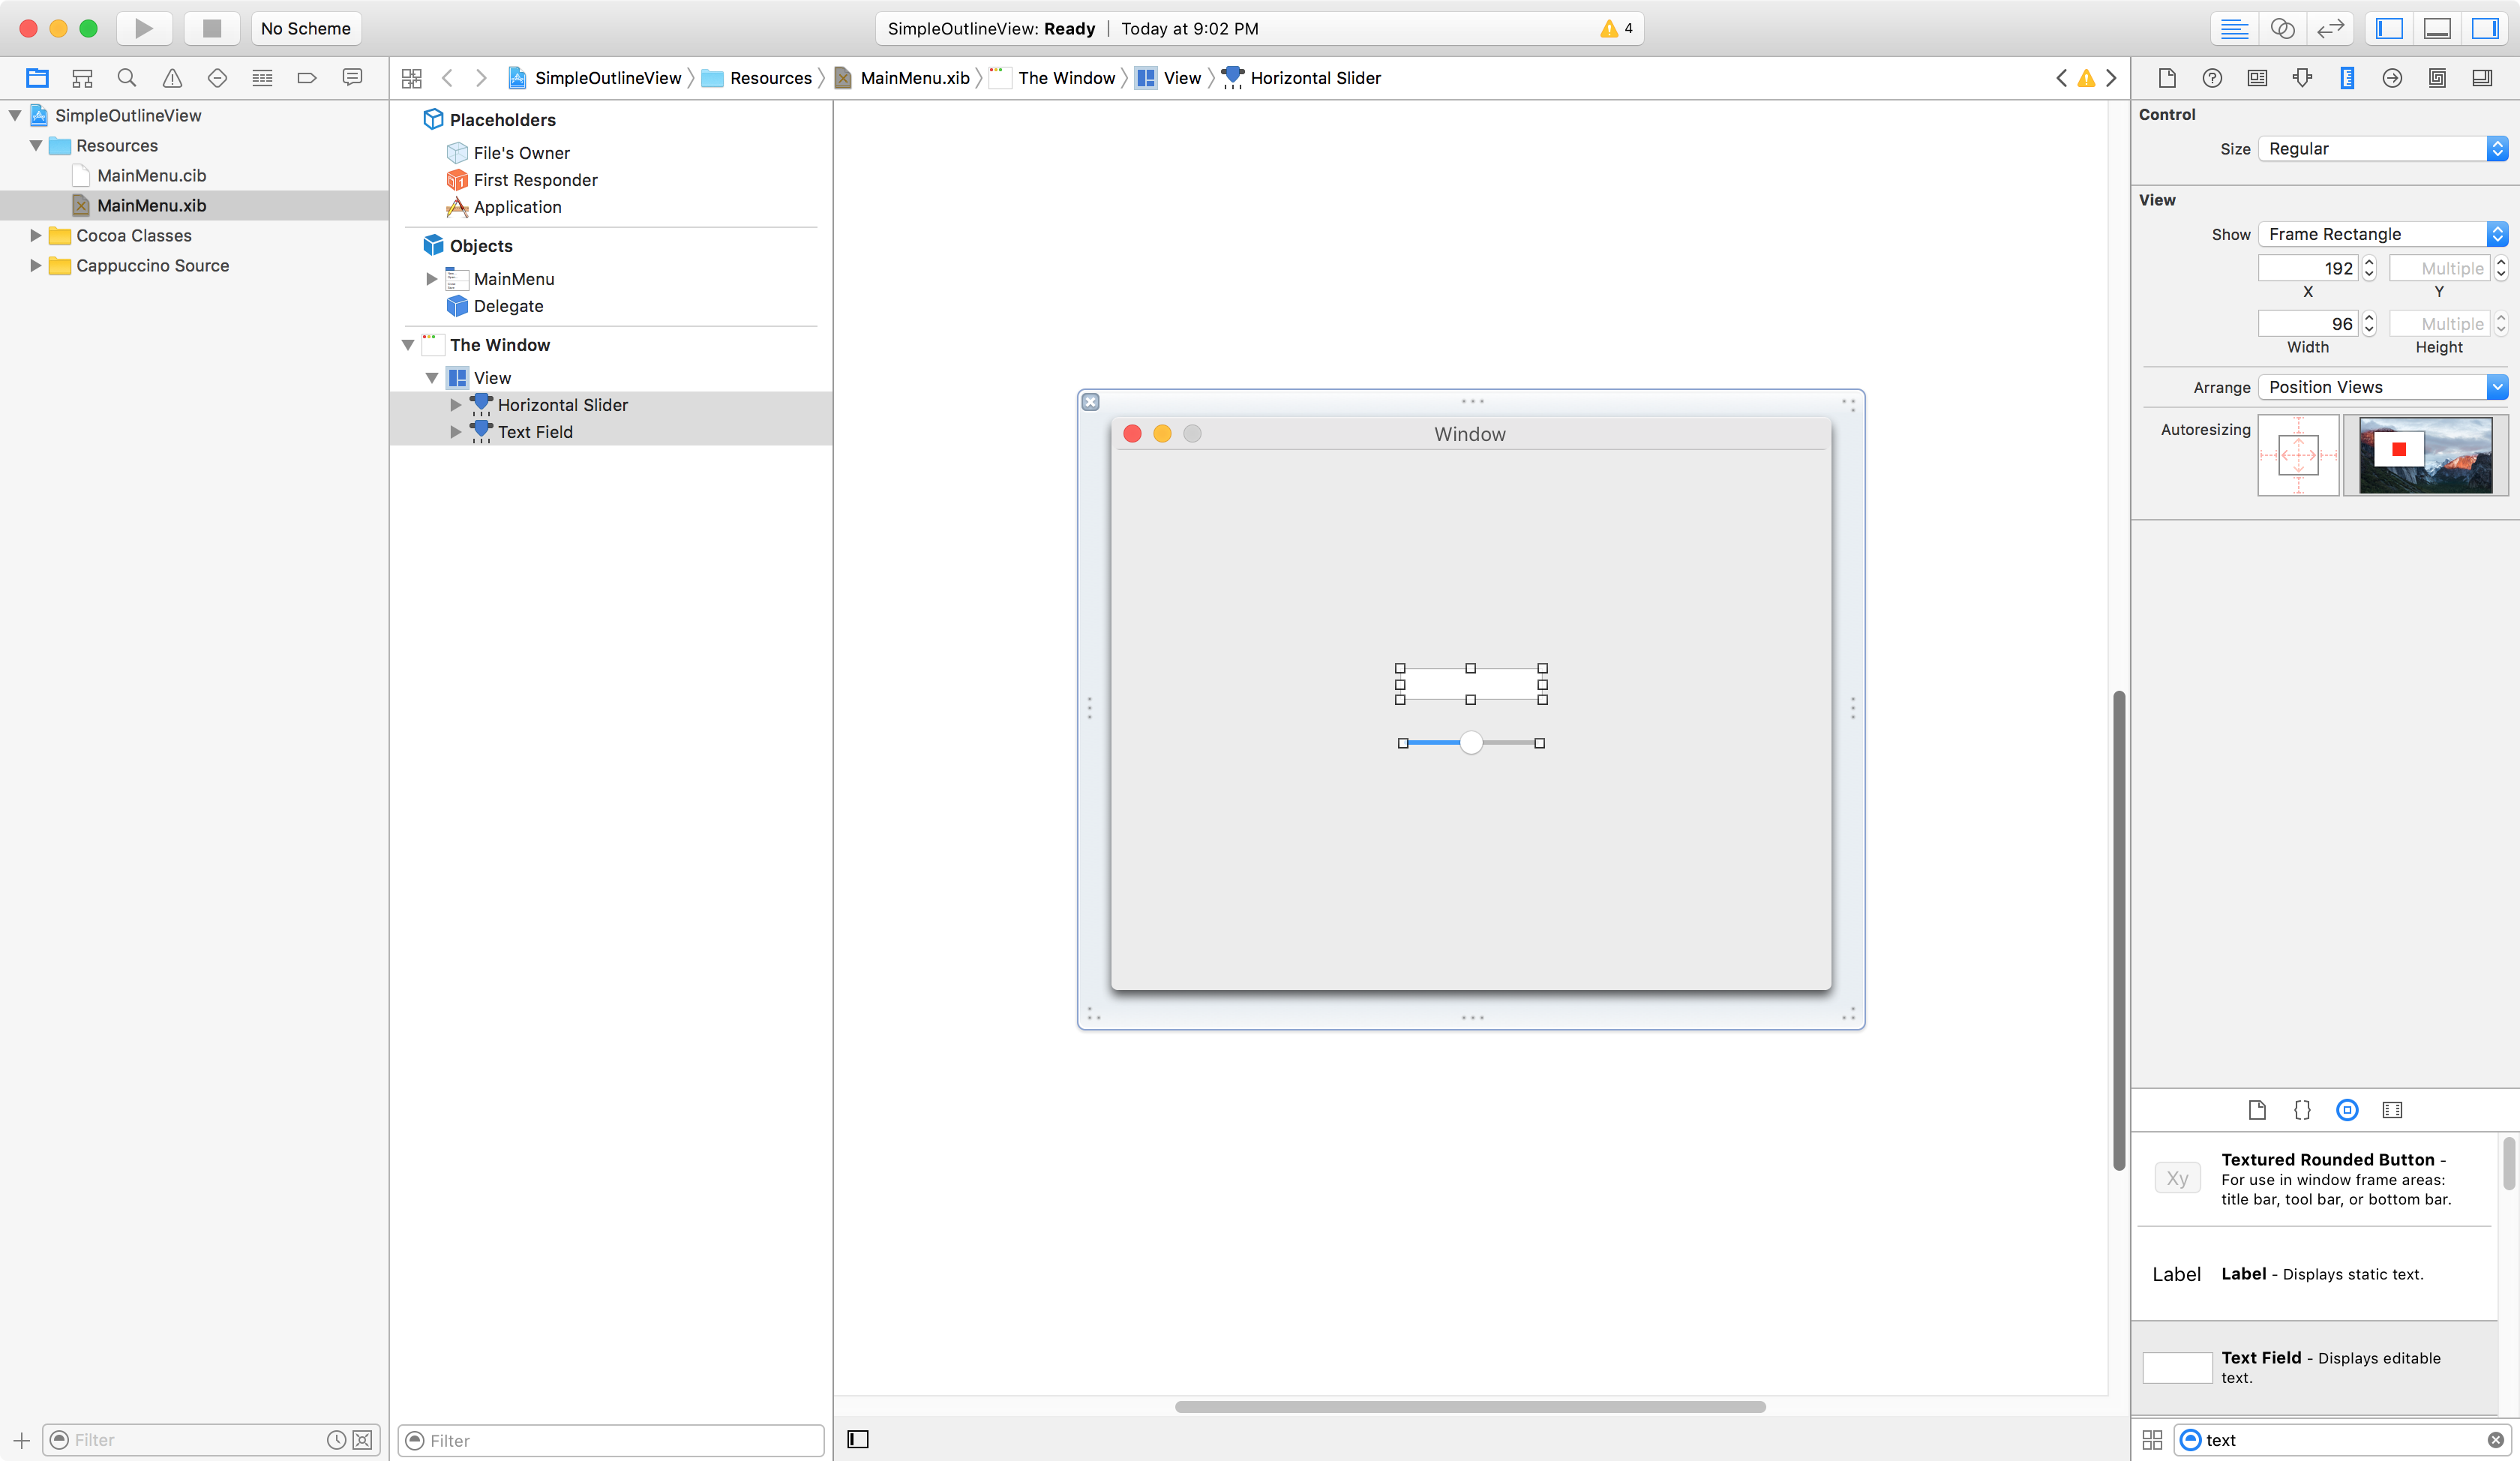
By default, there is a text field and a slider. Select and remove them (using the Delete key).
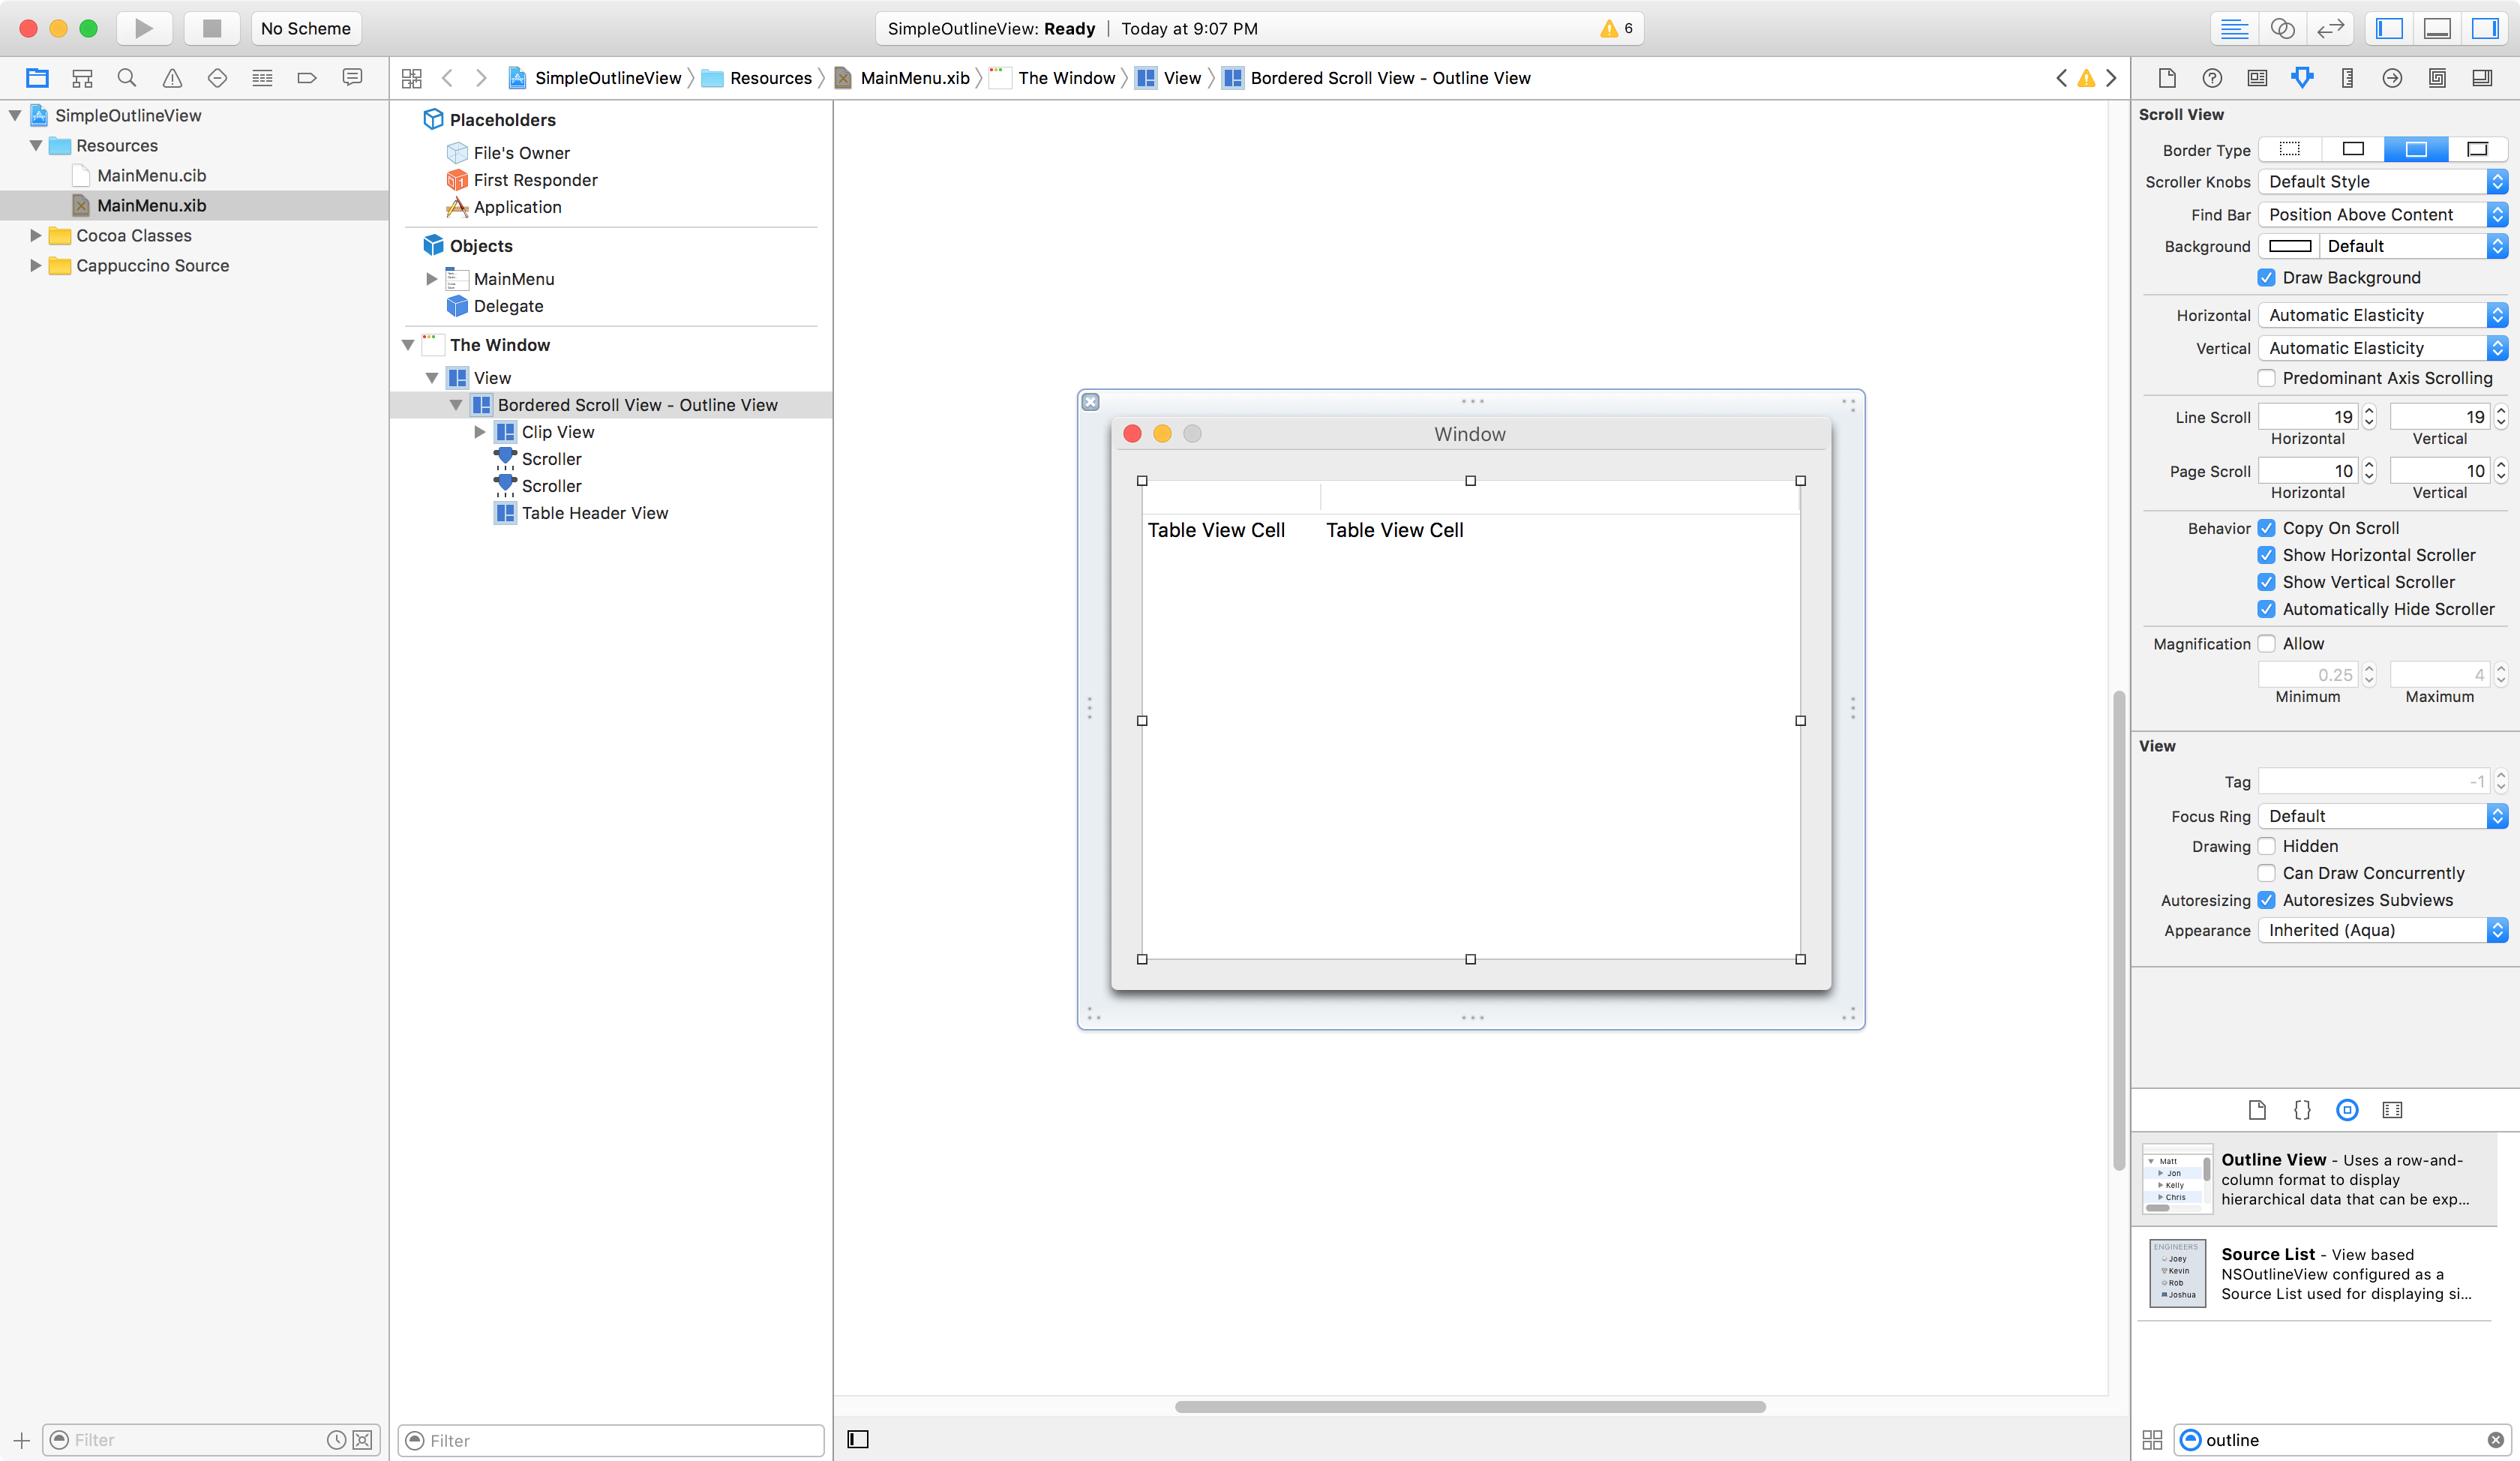
Choose “Outline View” from the Object Library.
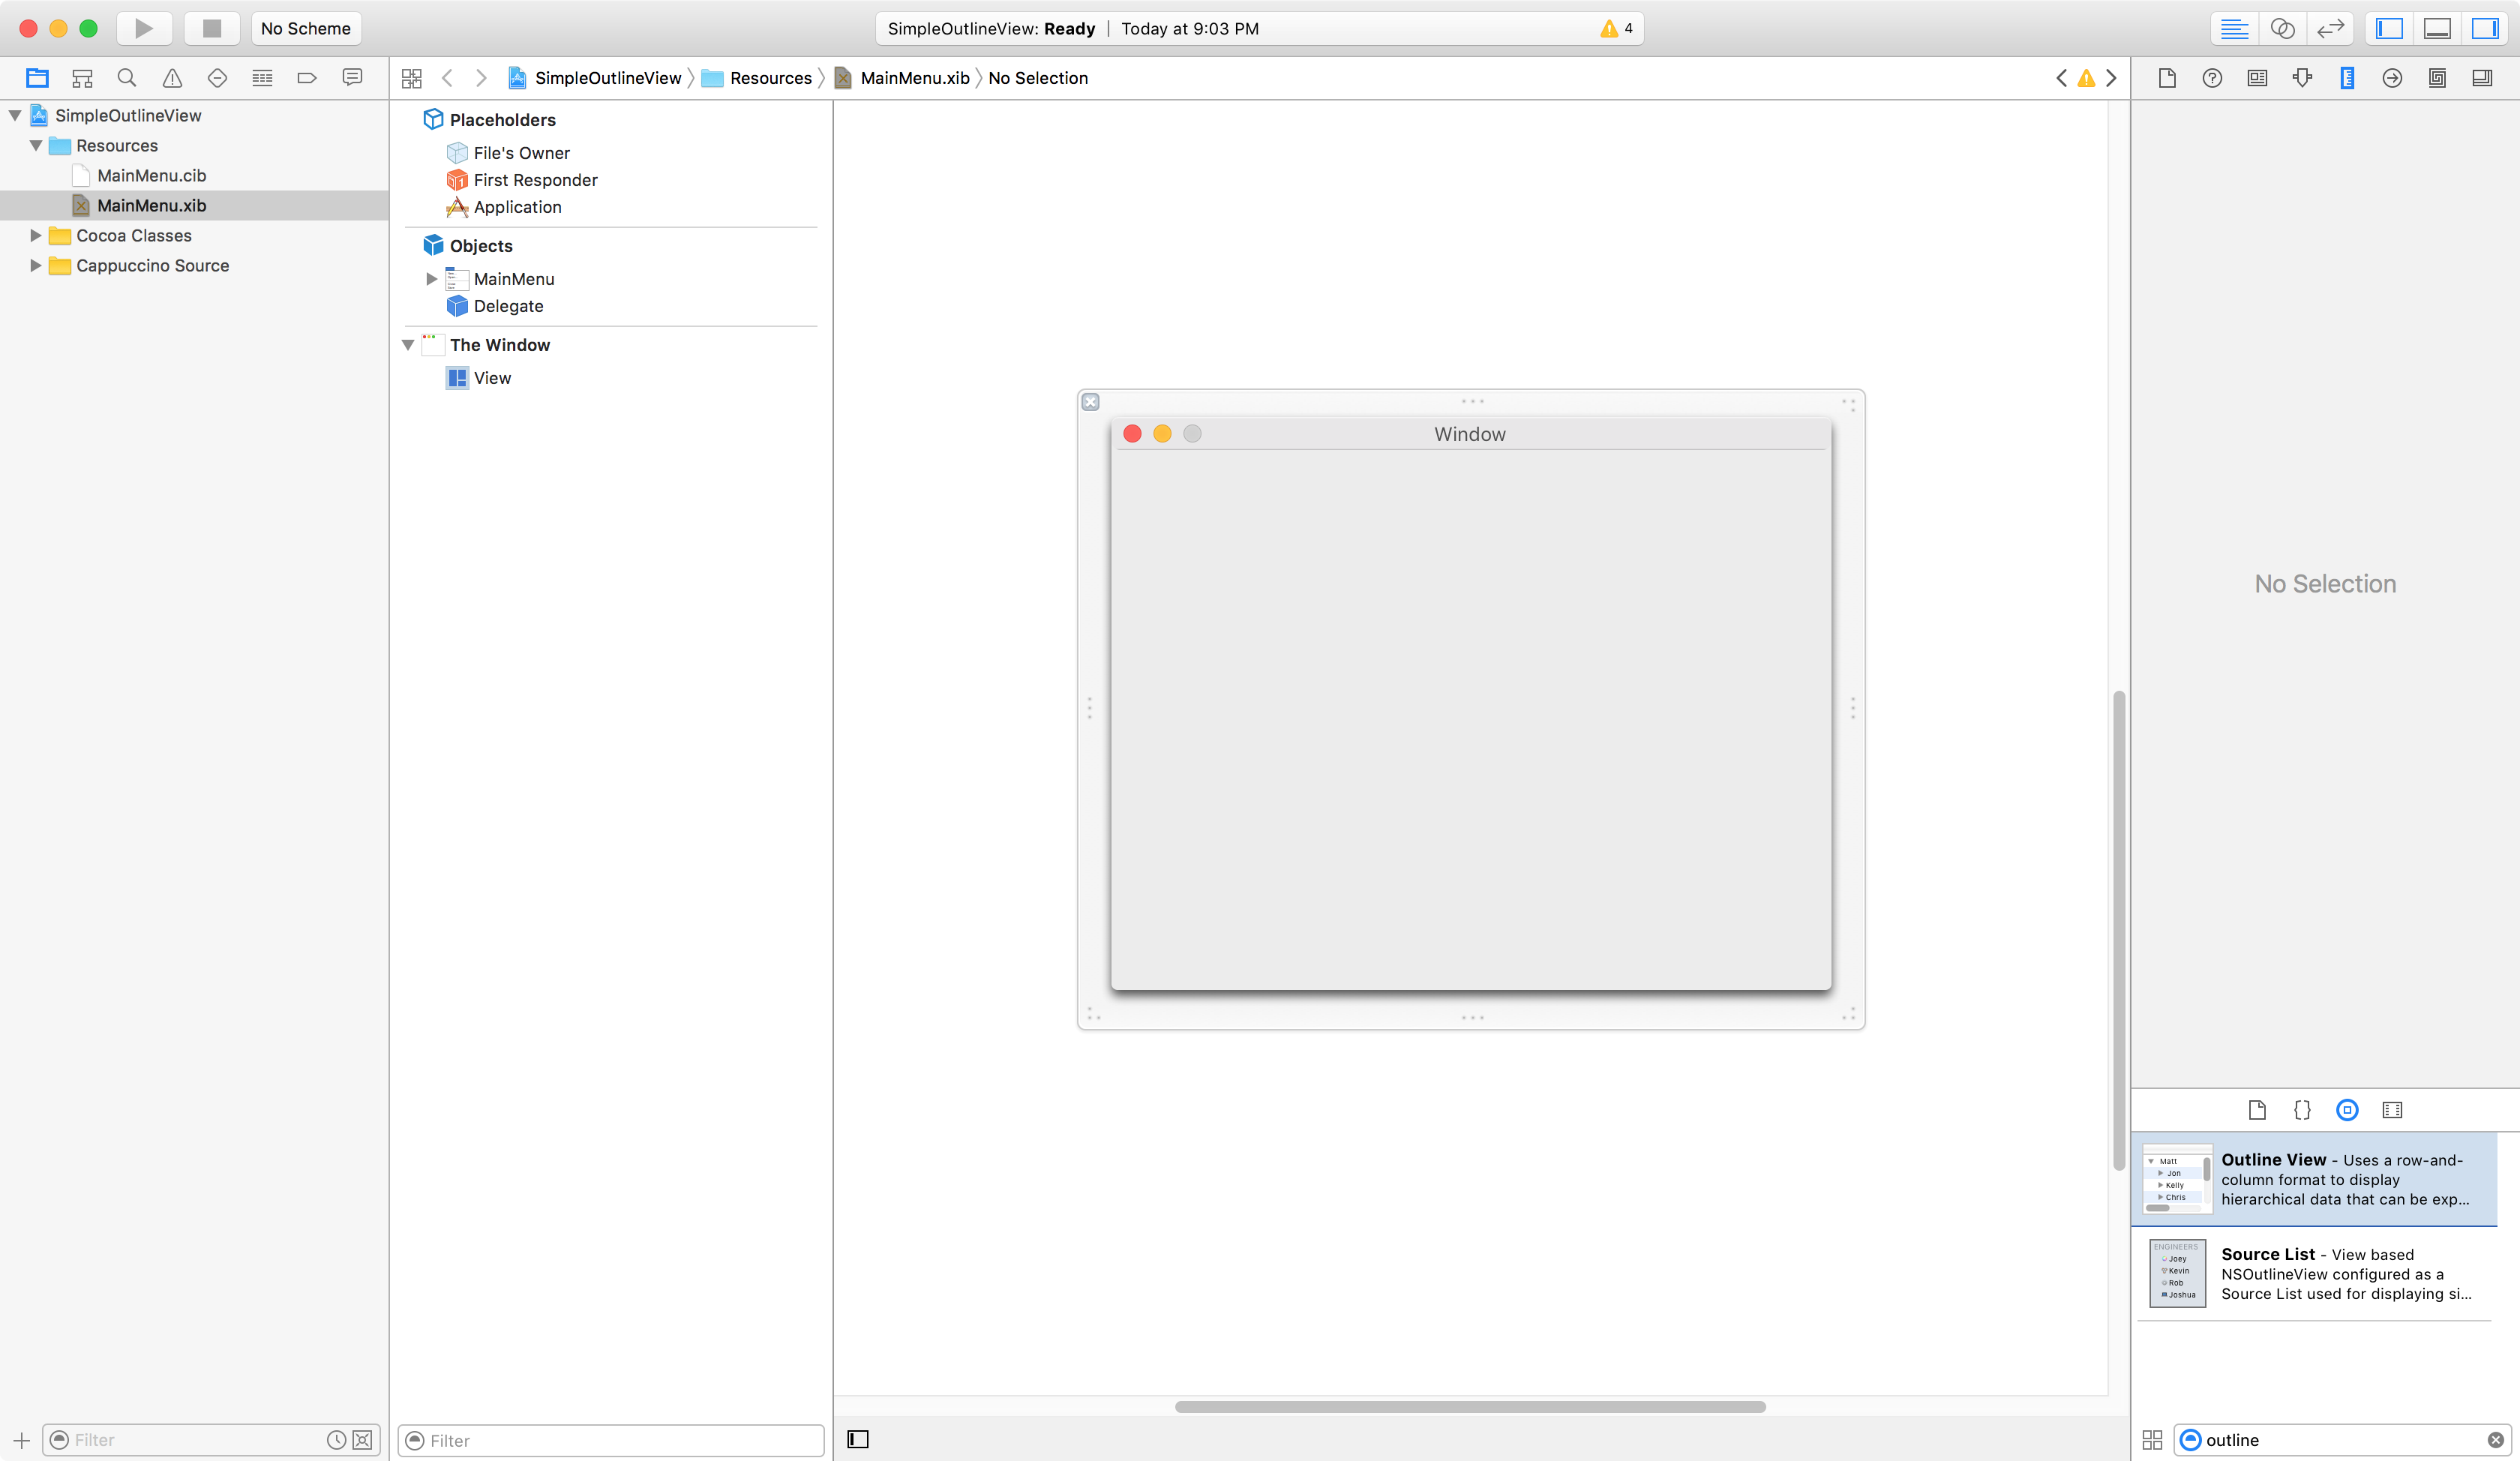
Drag and Drop an Outline View onto the Window.
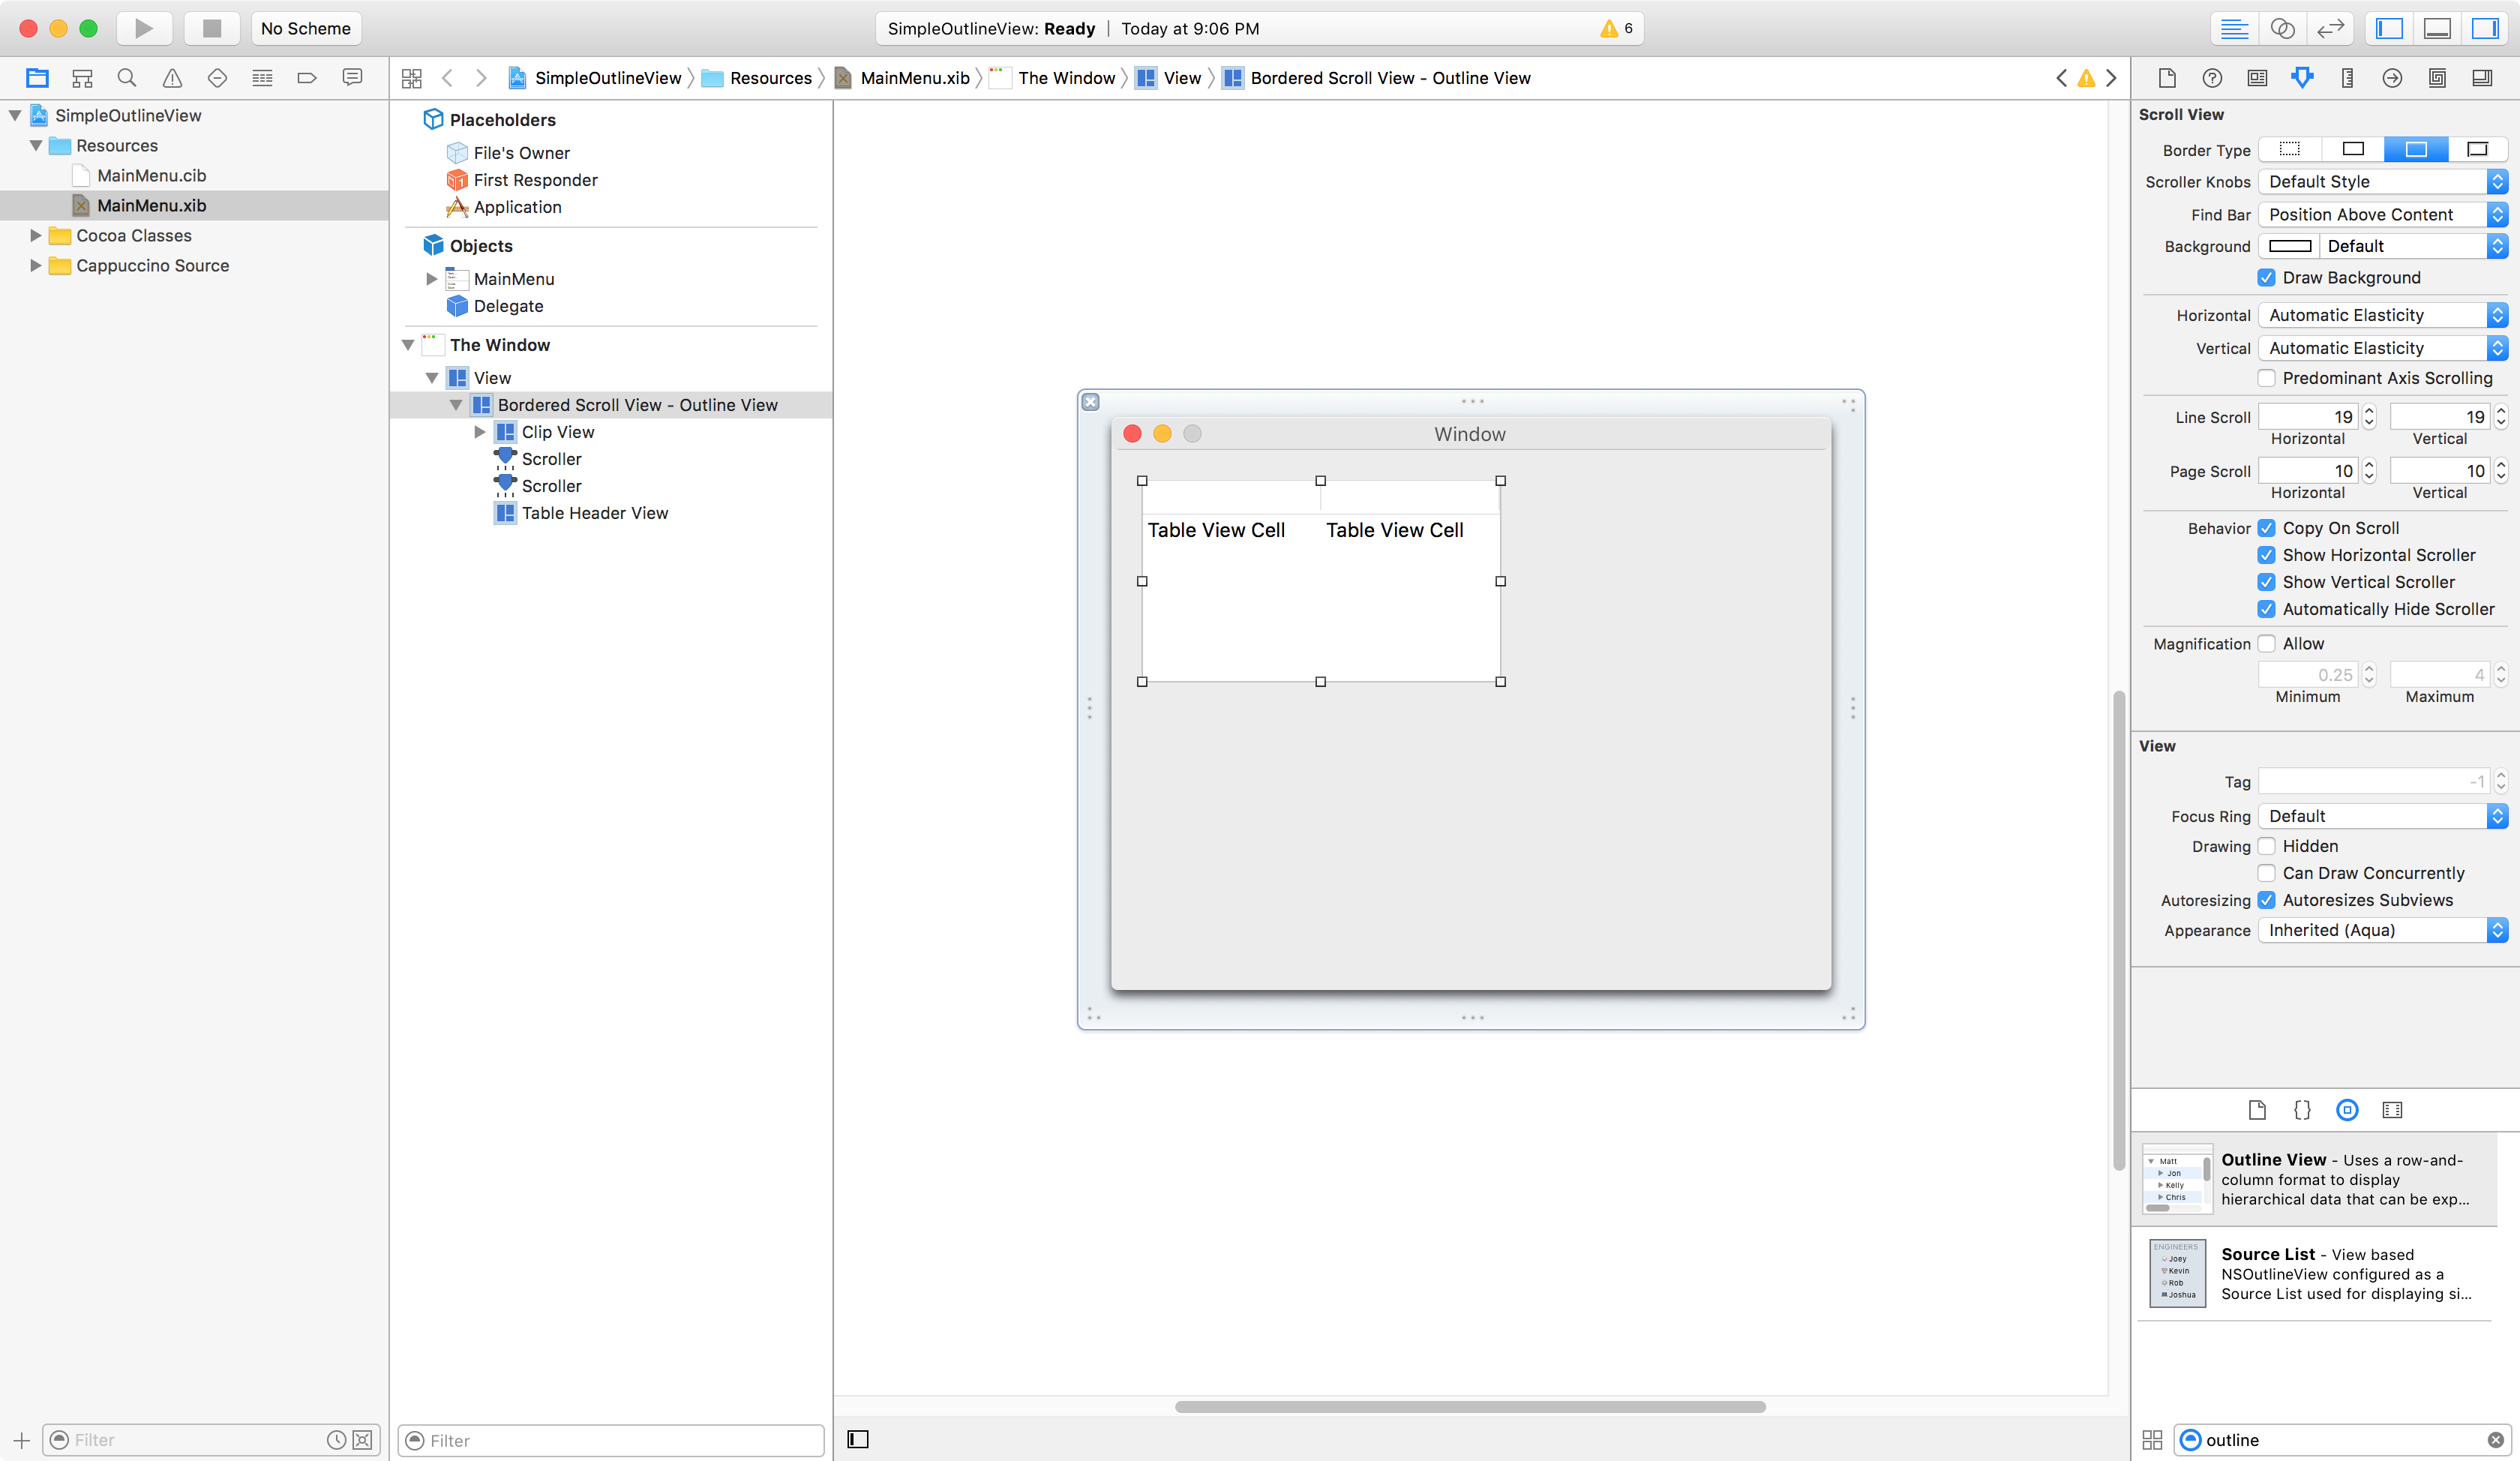
By dragging the right corner of Outline View, resize it to fill the Window.
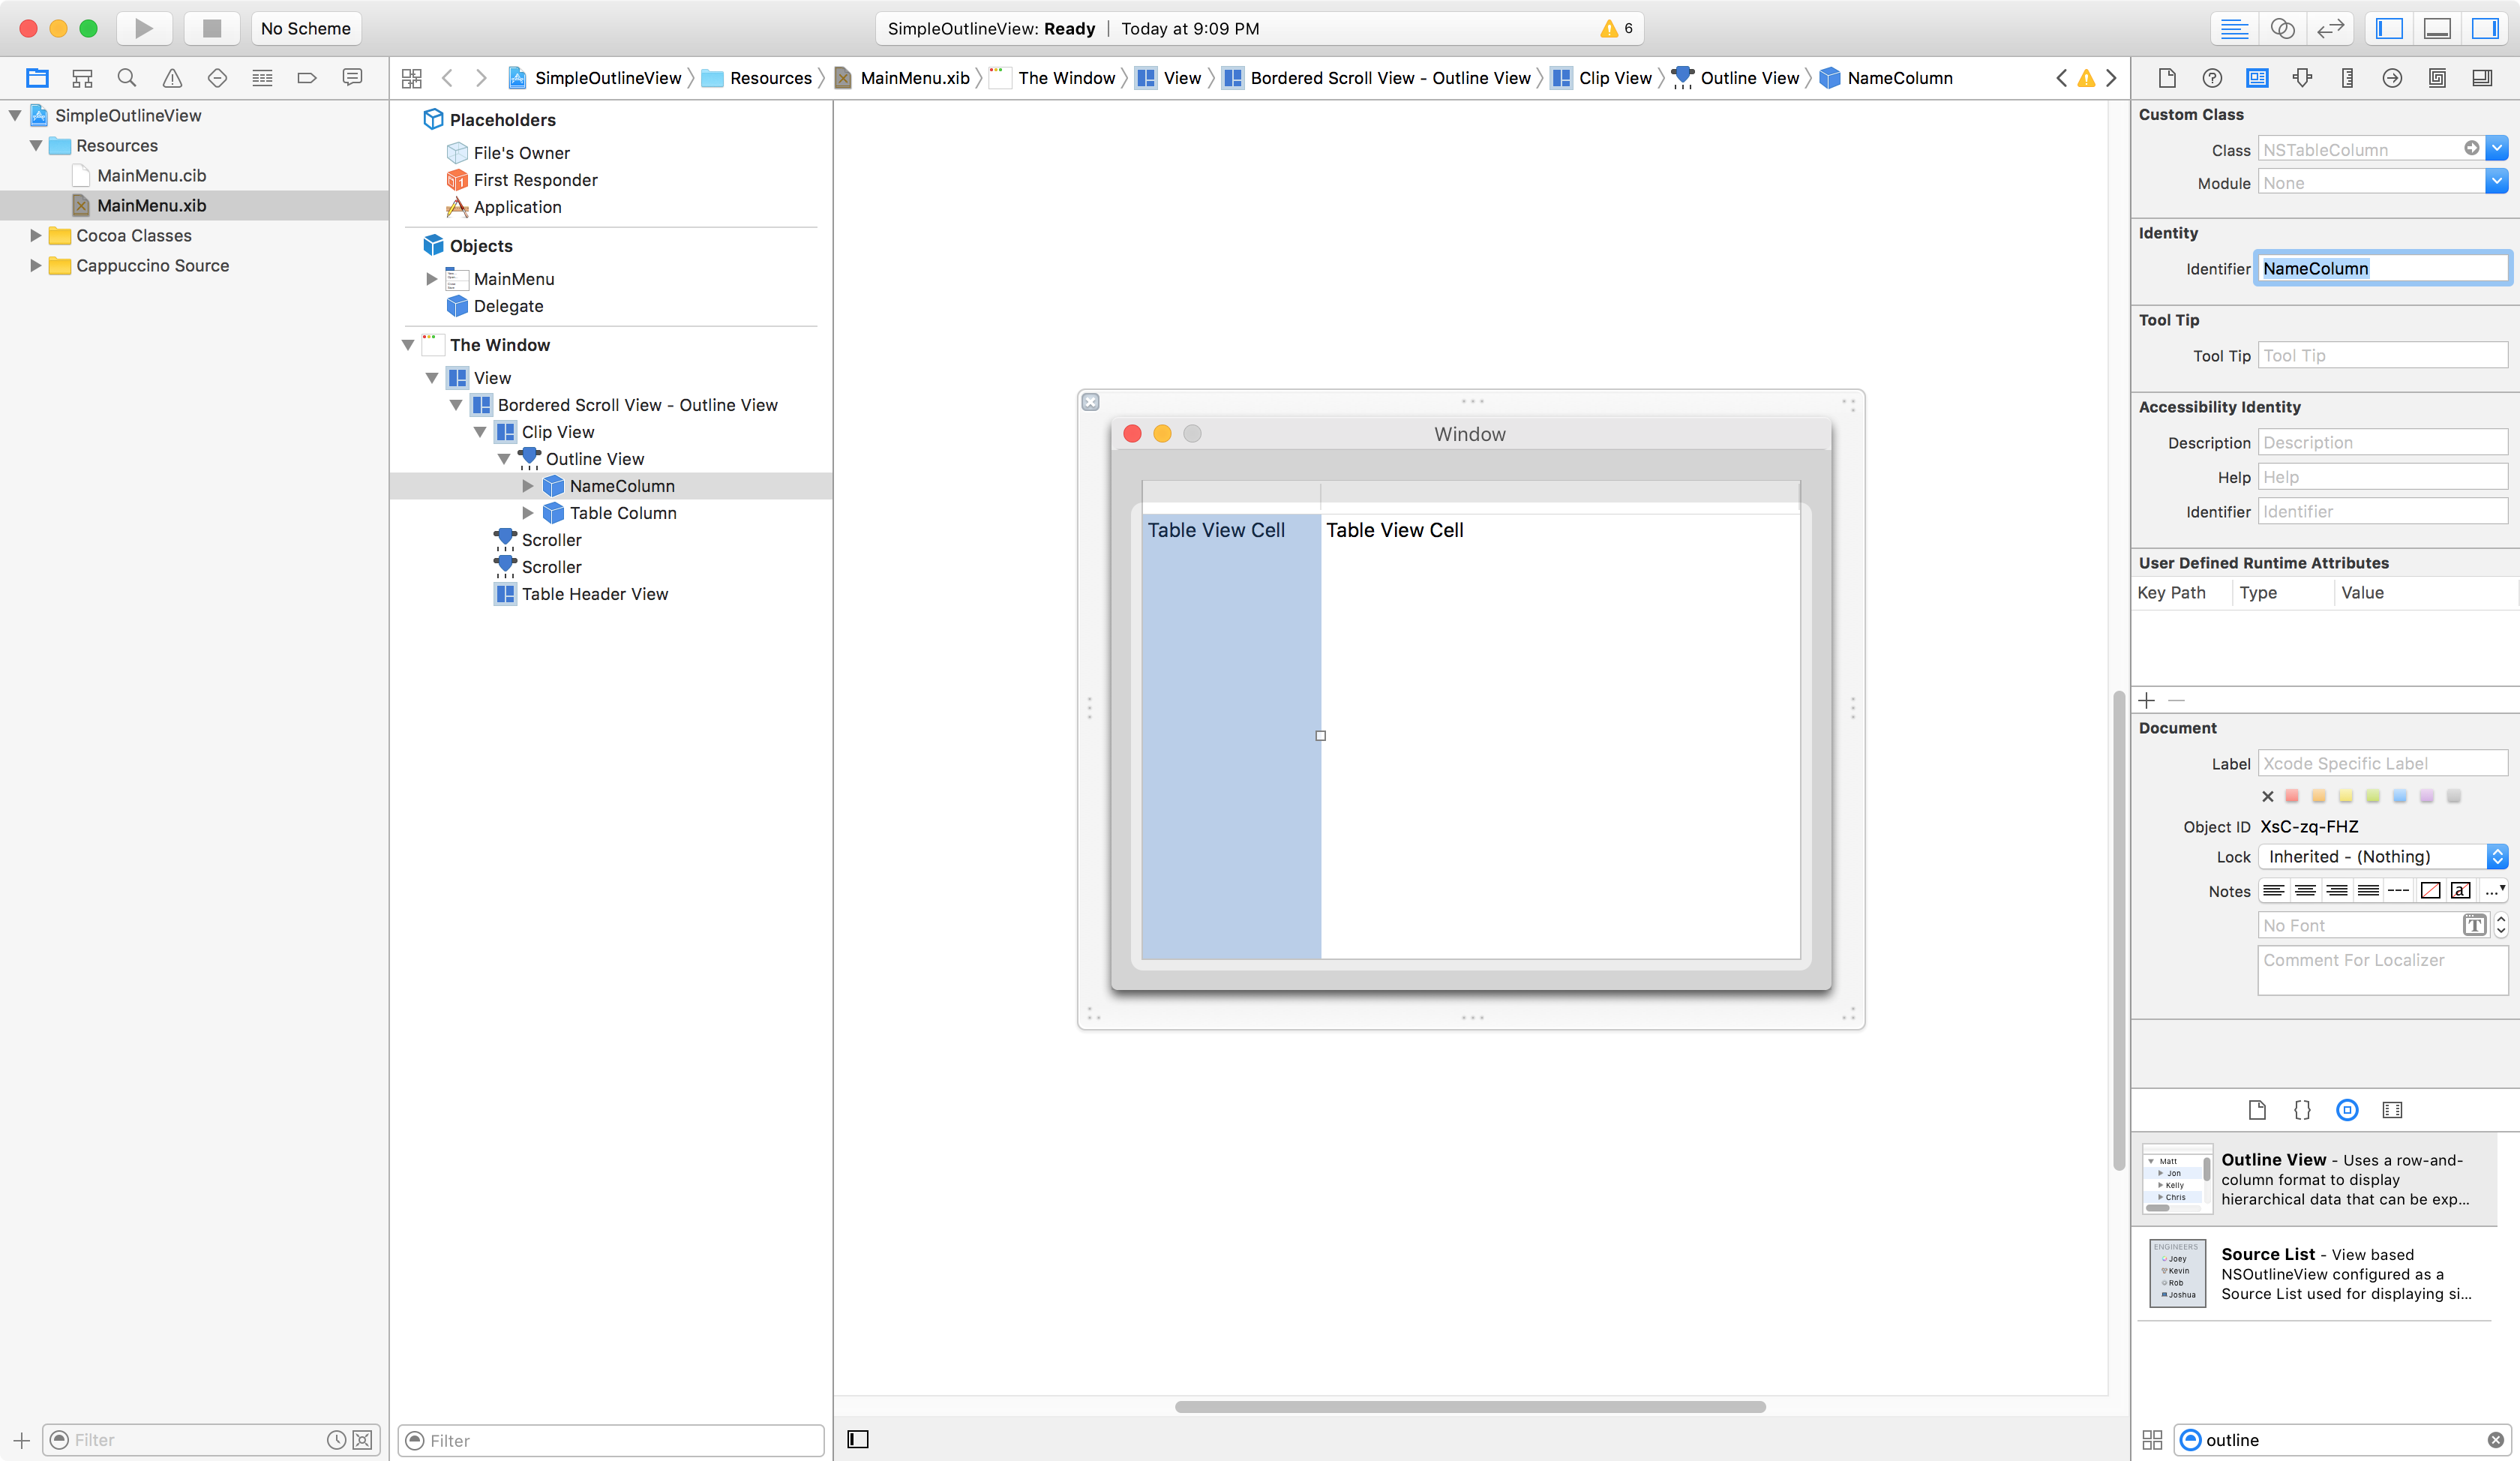
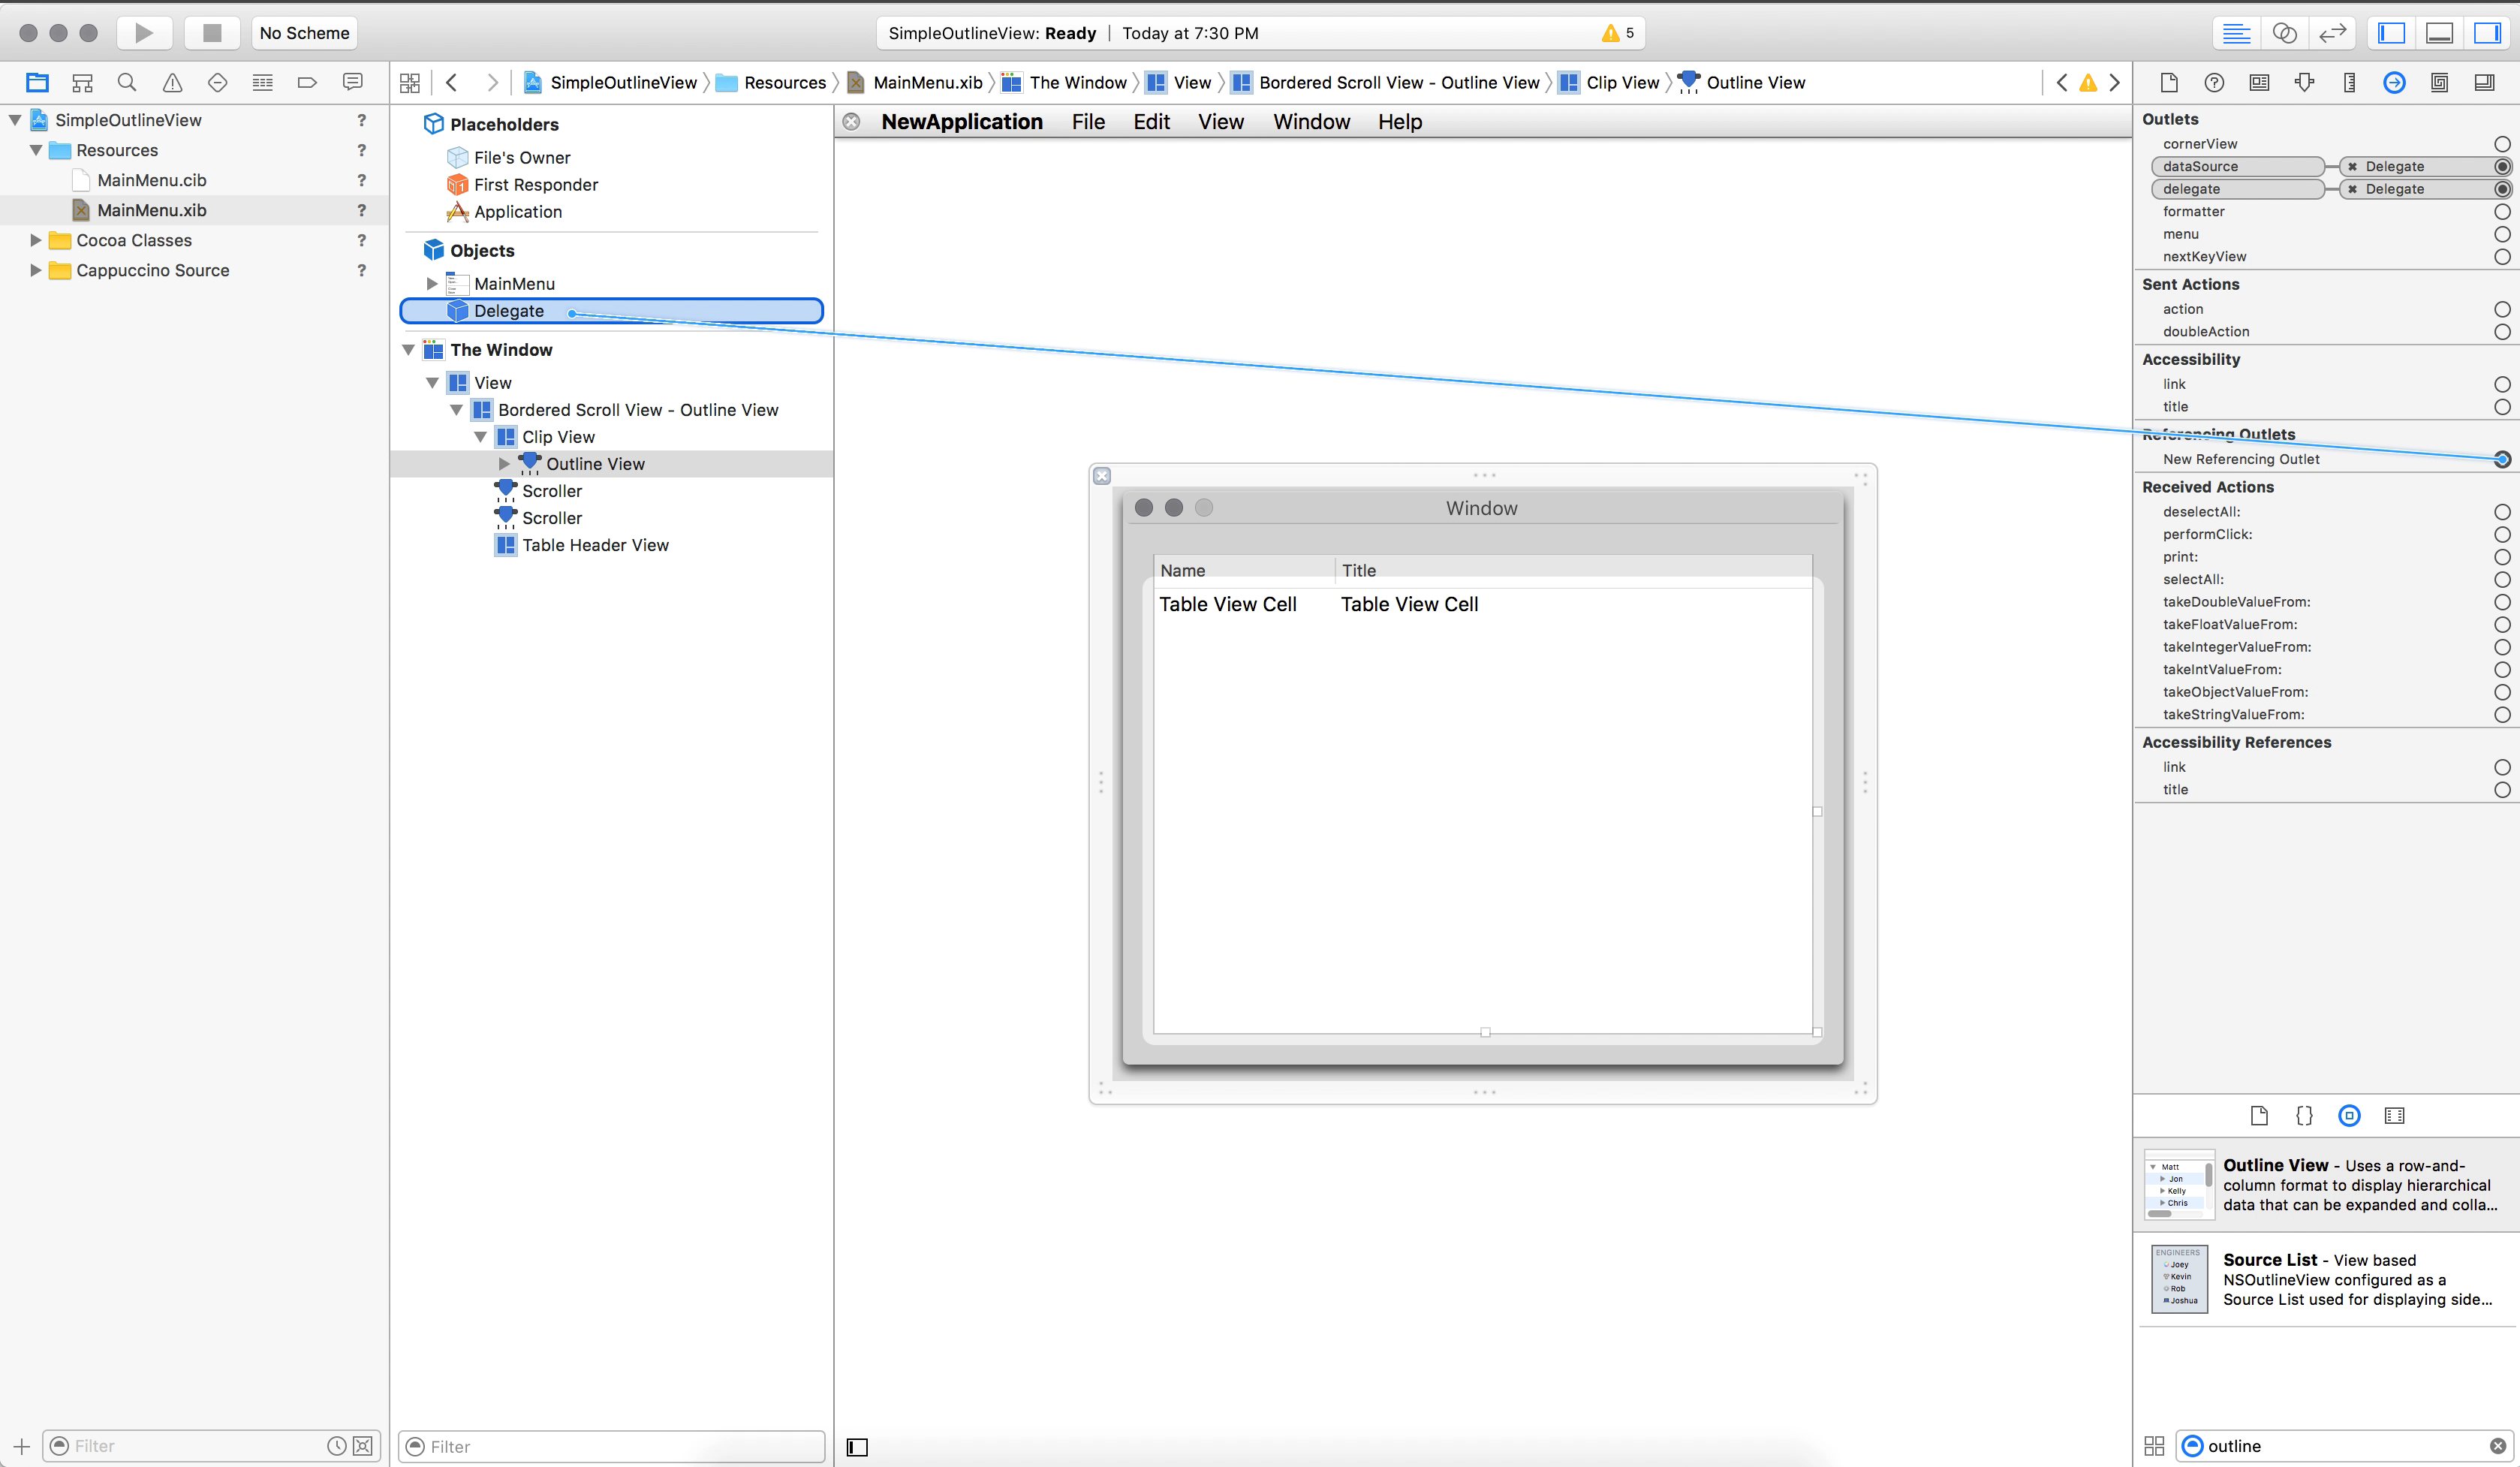
Remember that in the (id)outlineView:(id)outlineView viewForTableColumn:(id)tableColumn item:(id)item method we used both the table column identifier and the view identifier. Where do those come from? We’re going to add them right now.
Choose the Outline View from the Document Outline. Expand the items until you reach Table Column. Now, click on Identity Inspector on the top right side of the Xcode and set the Identifier to “NameColumn”.
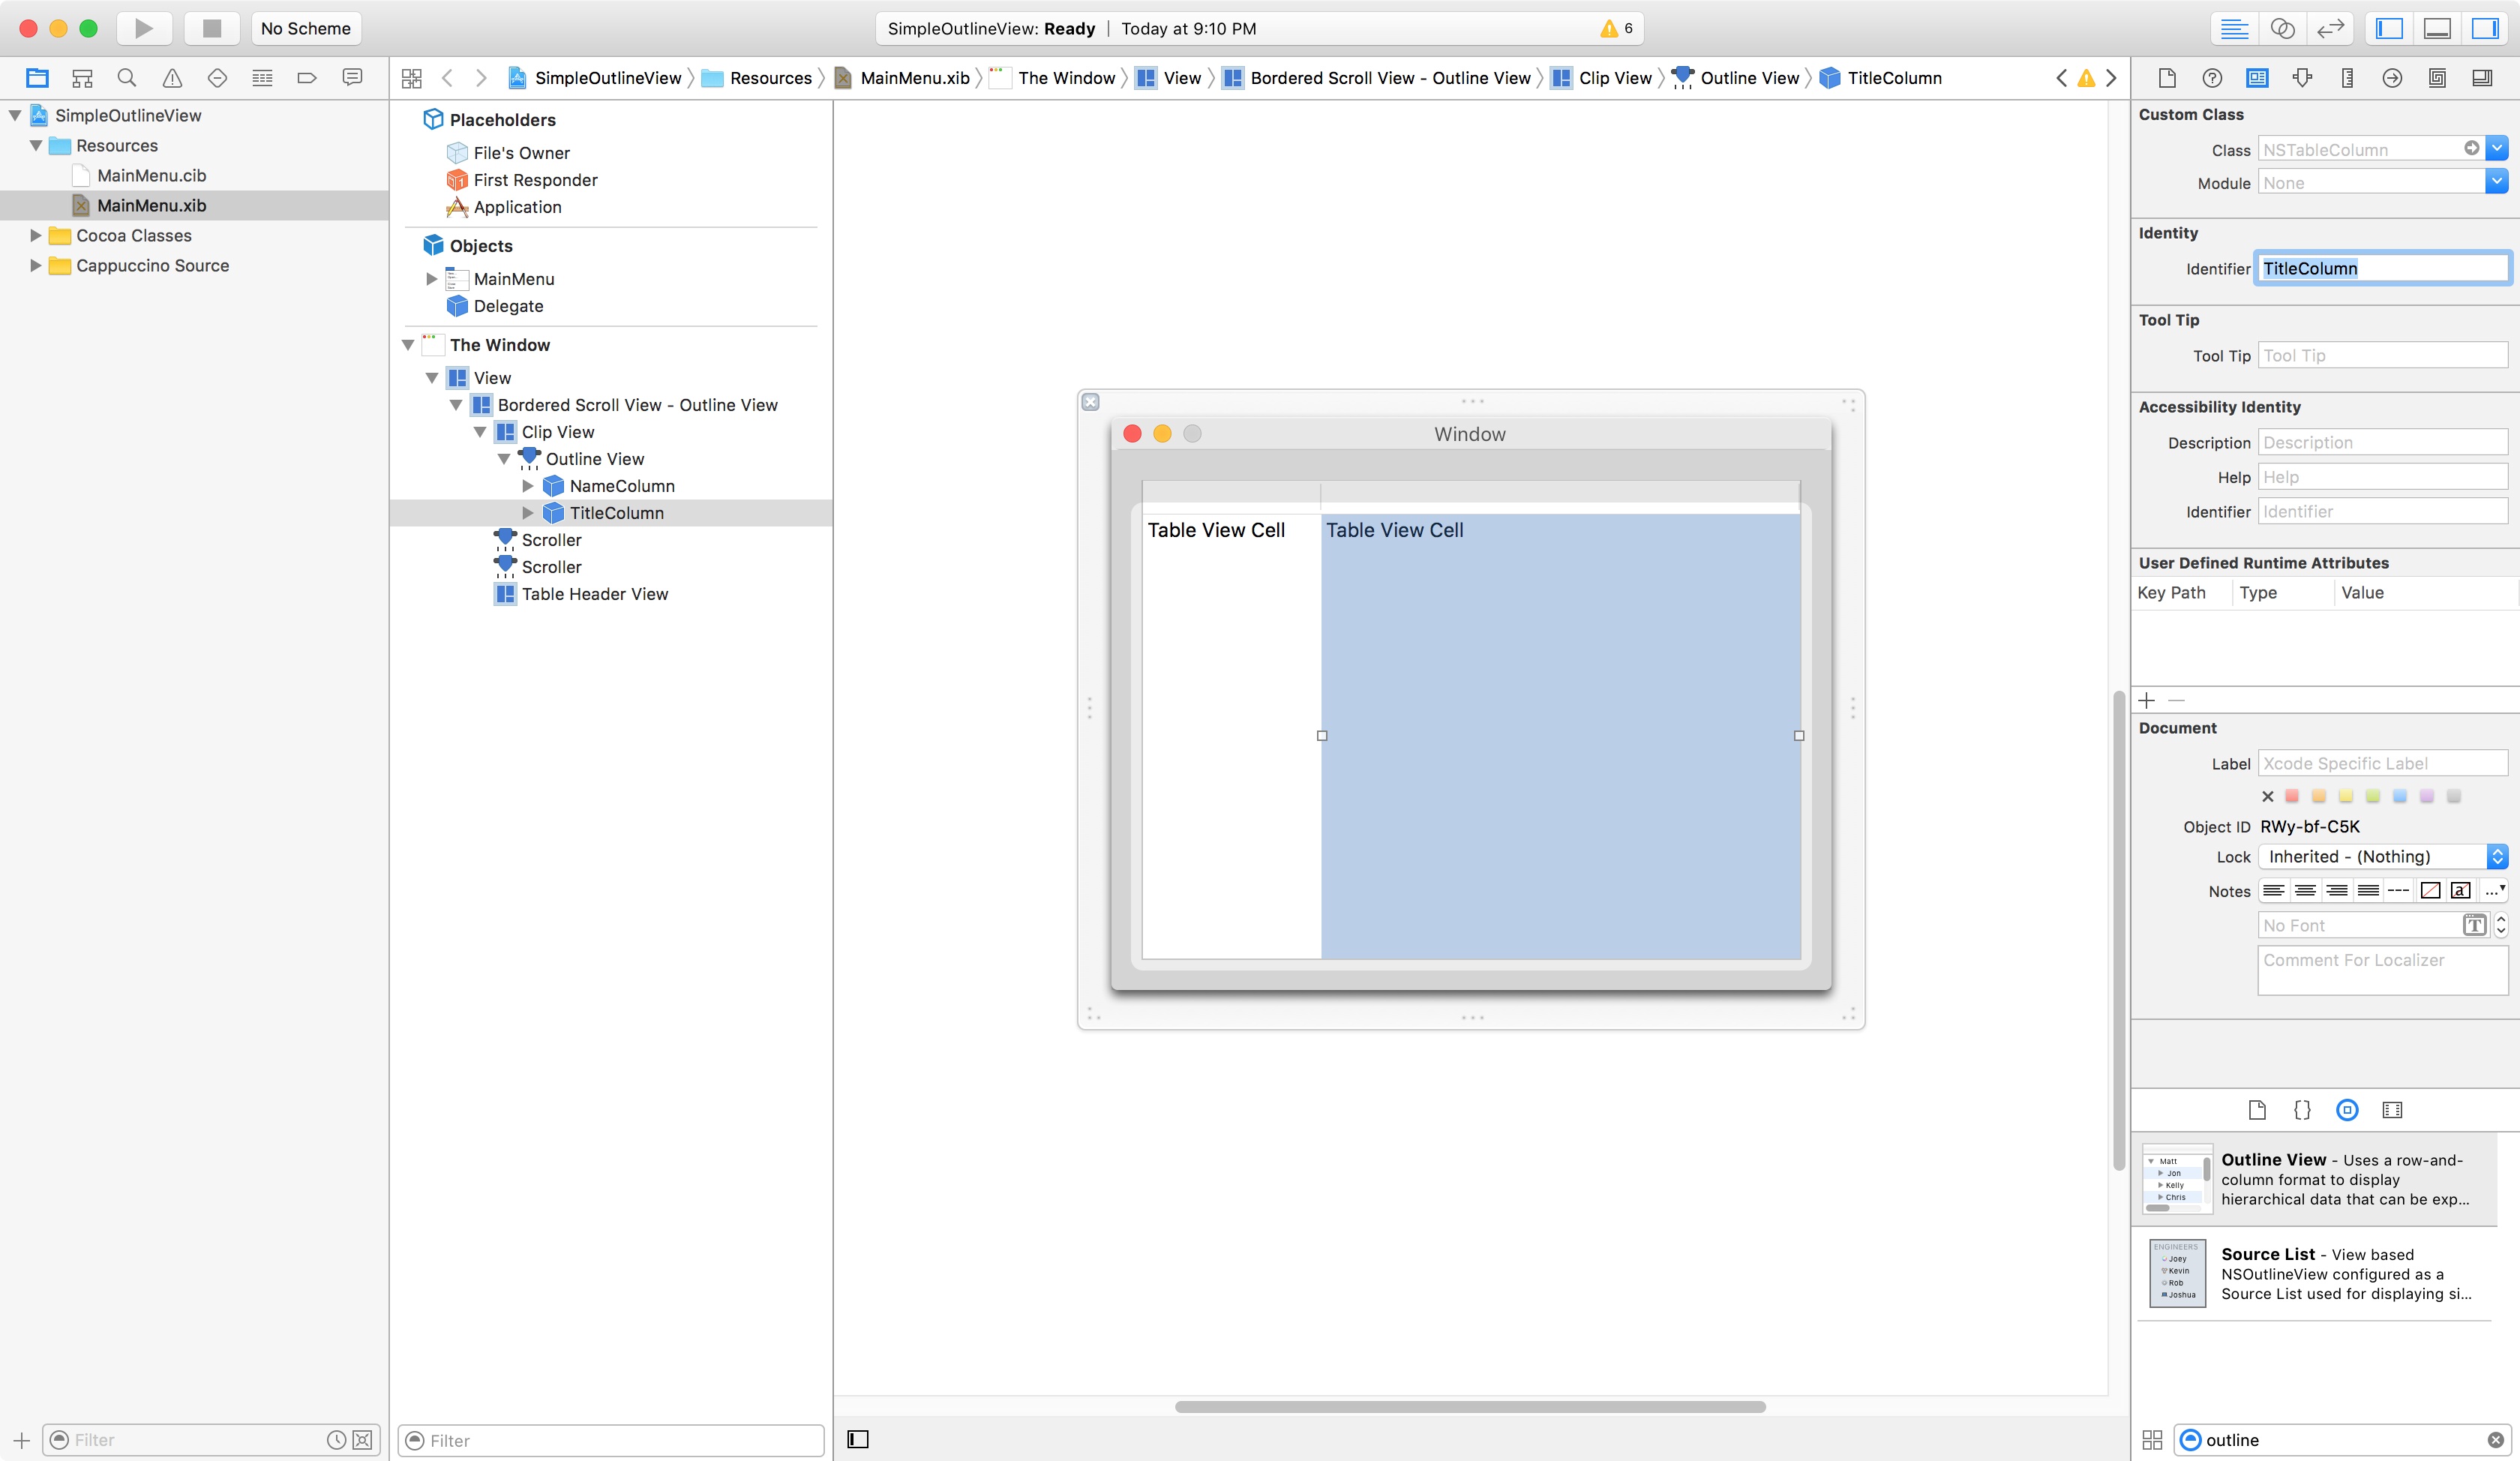
Repeat the same for the second column, and set its Identifier to “TitleColumn”.
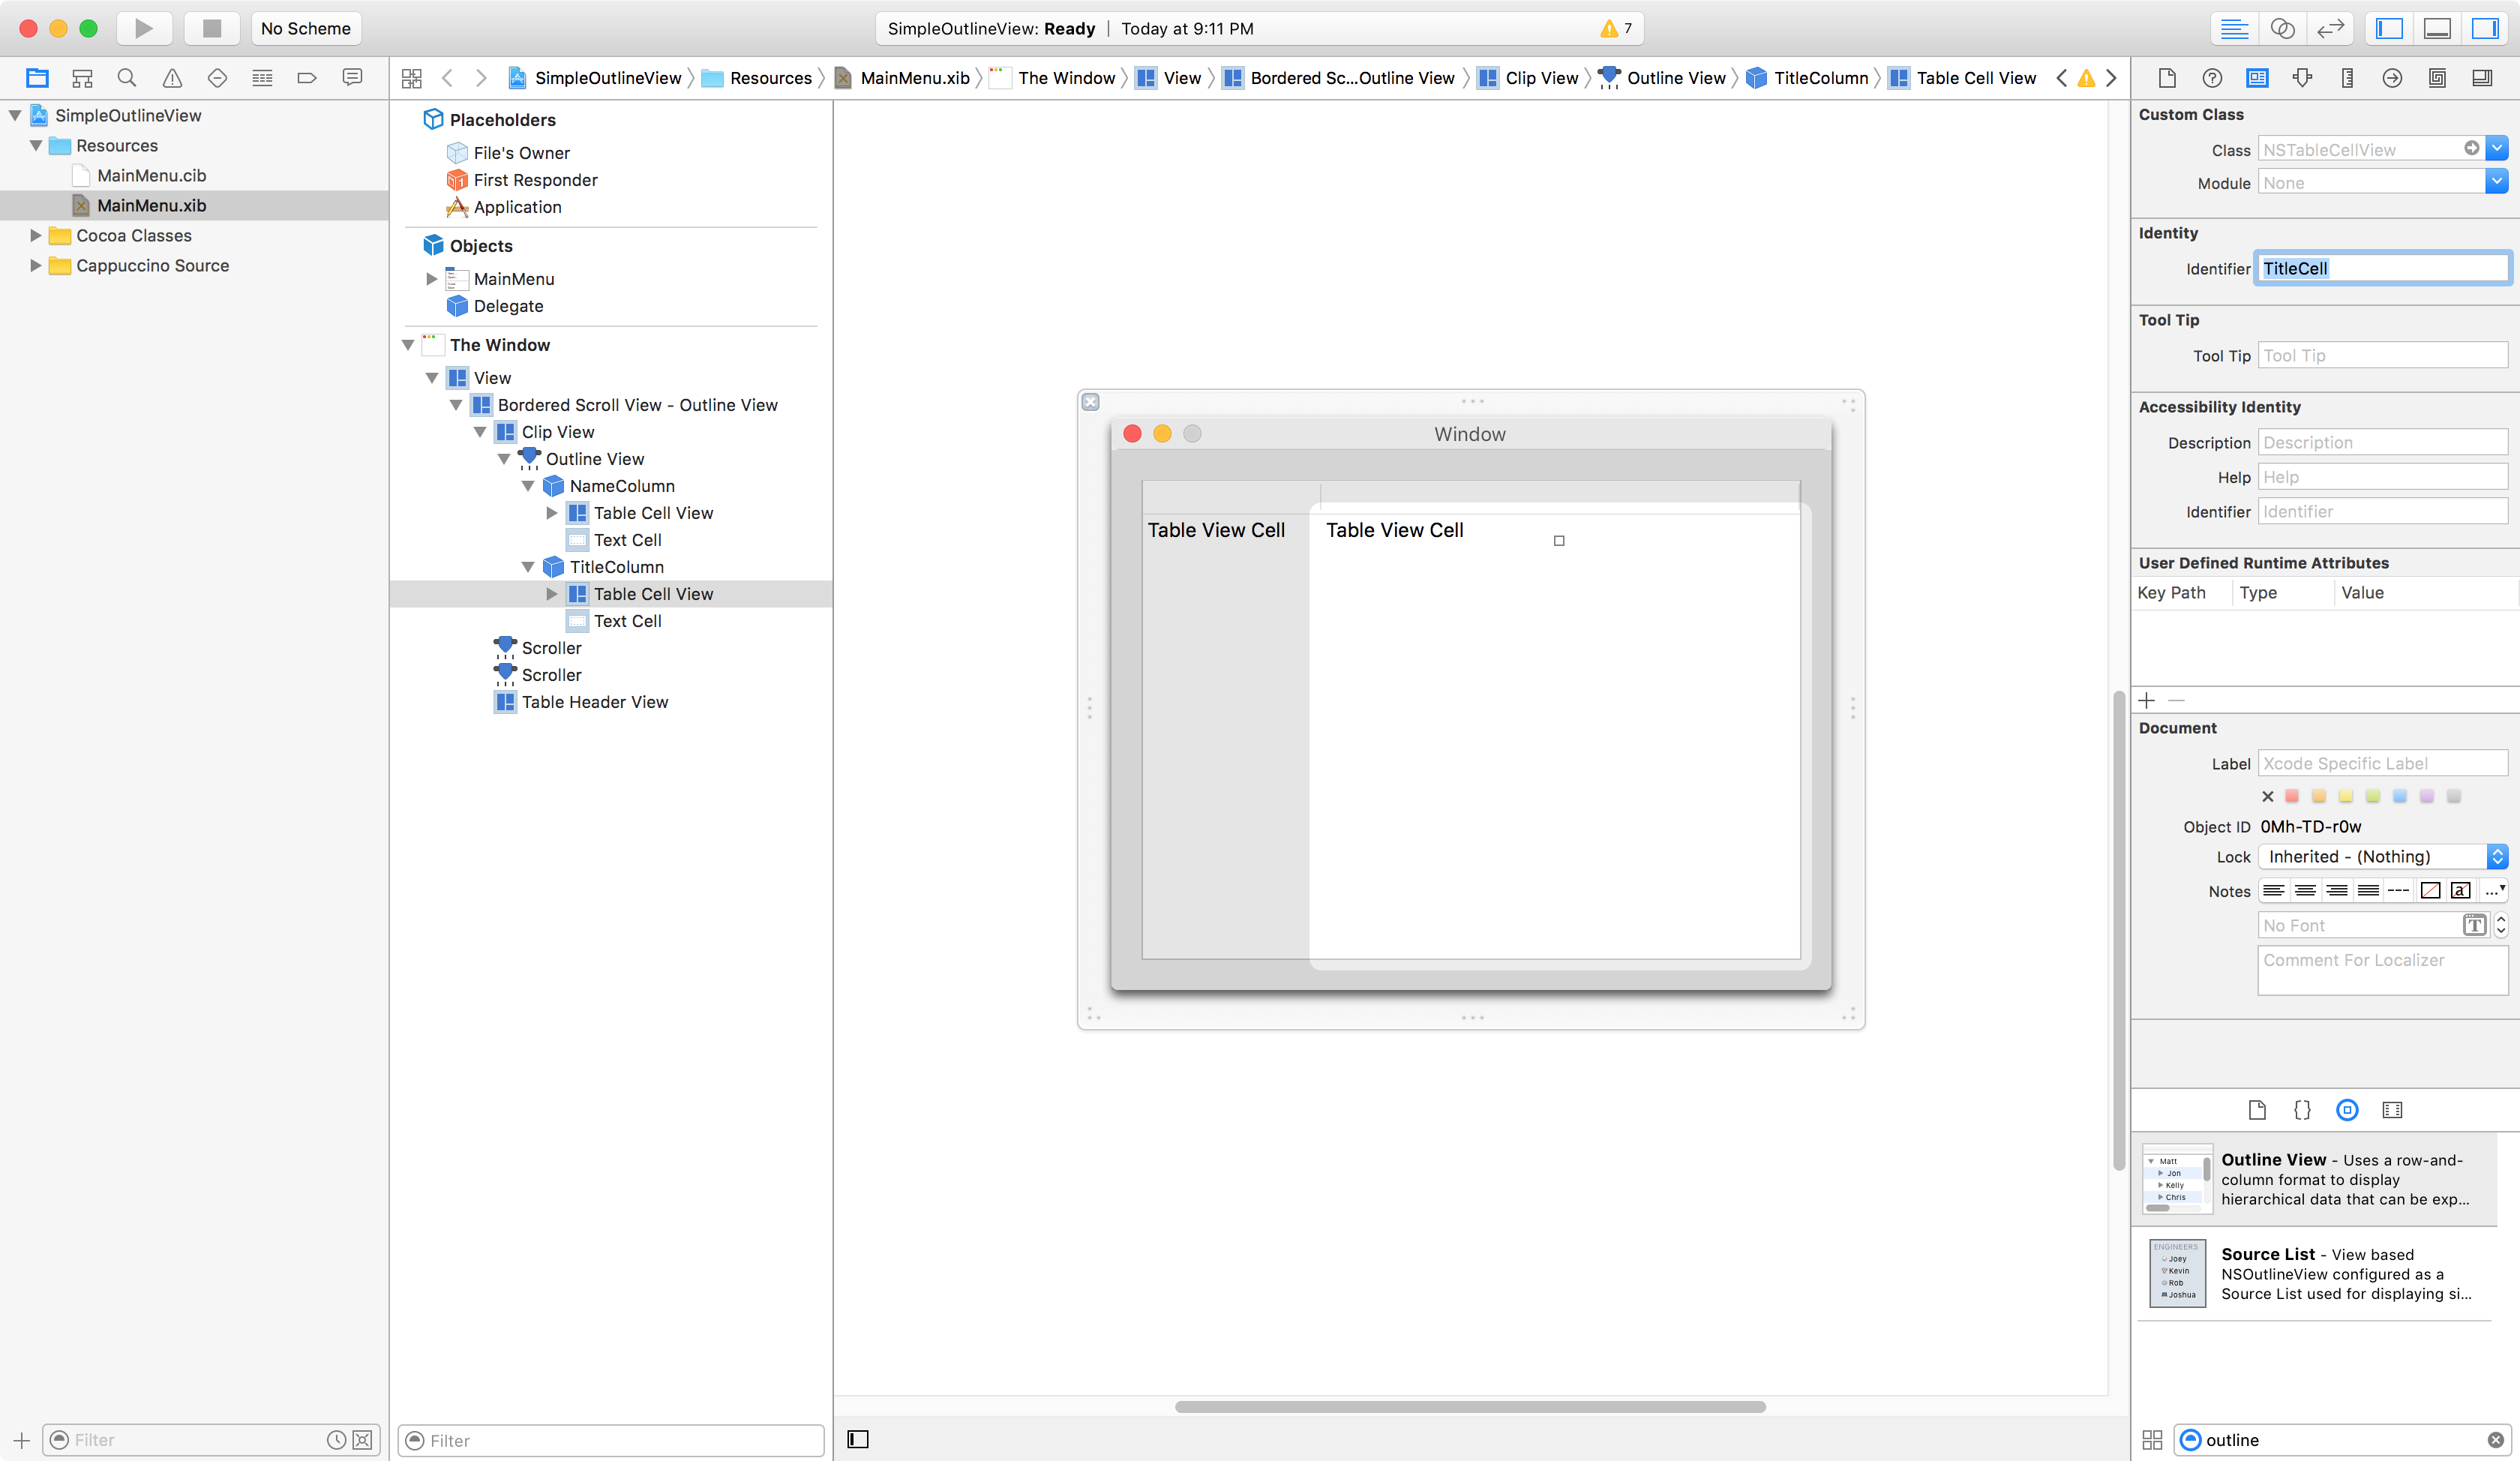
Expand the NameColumn and add “NameCell” as the Table Cell View’s Identifier.
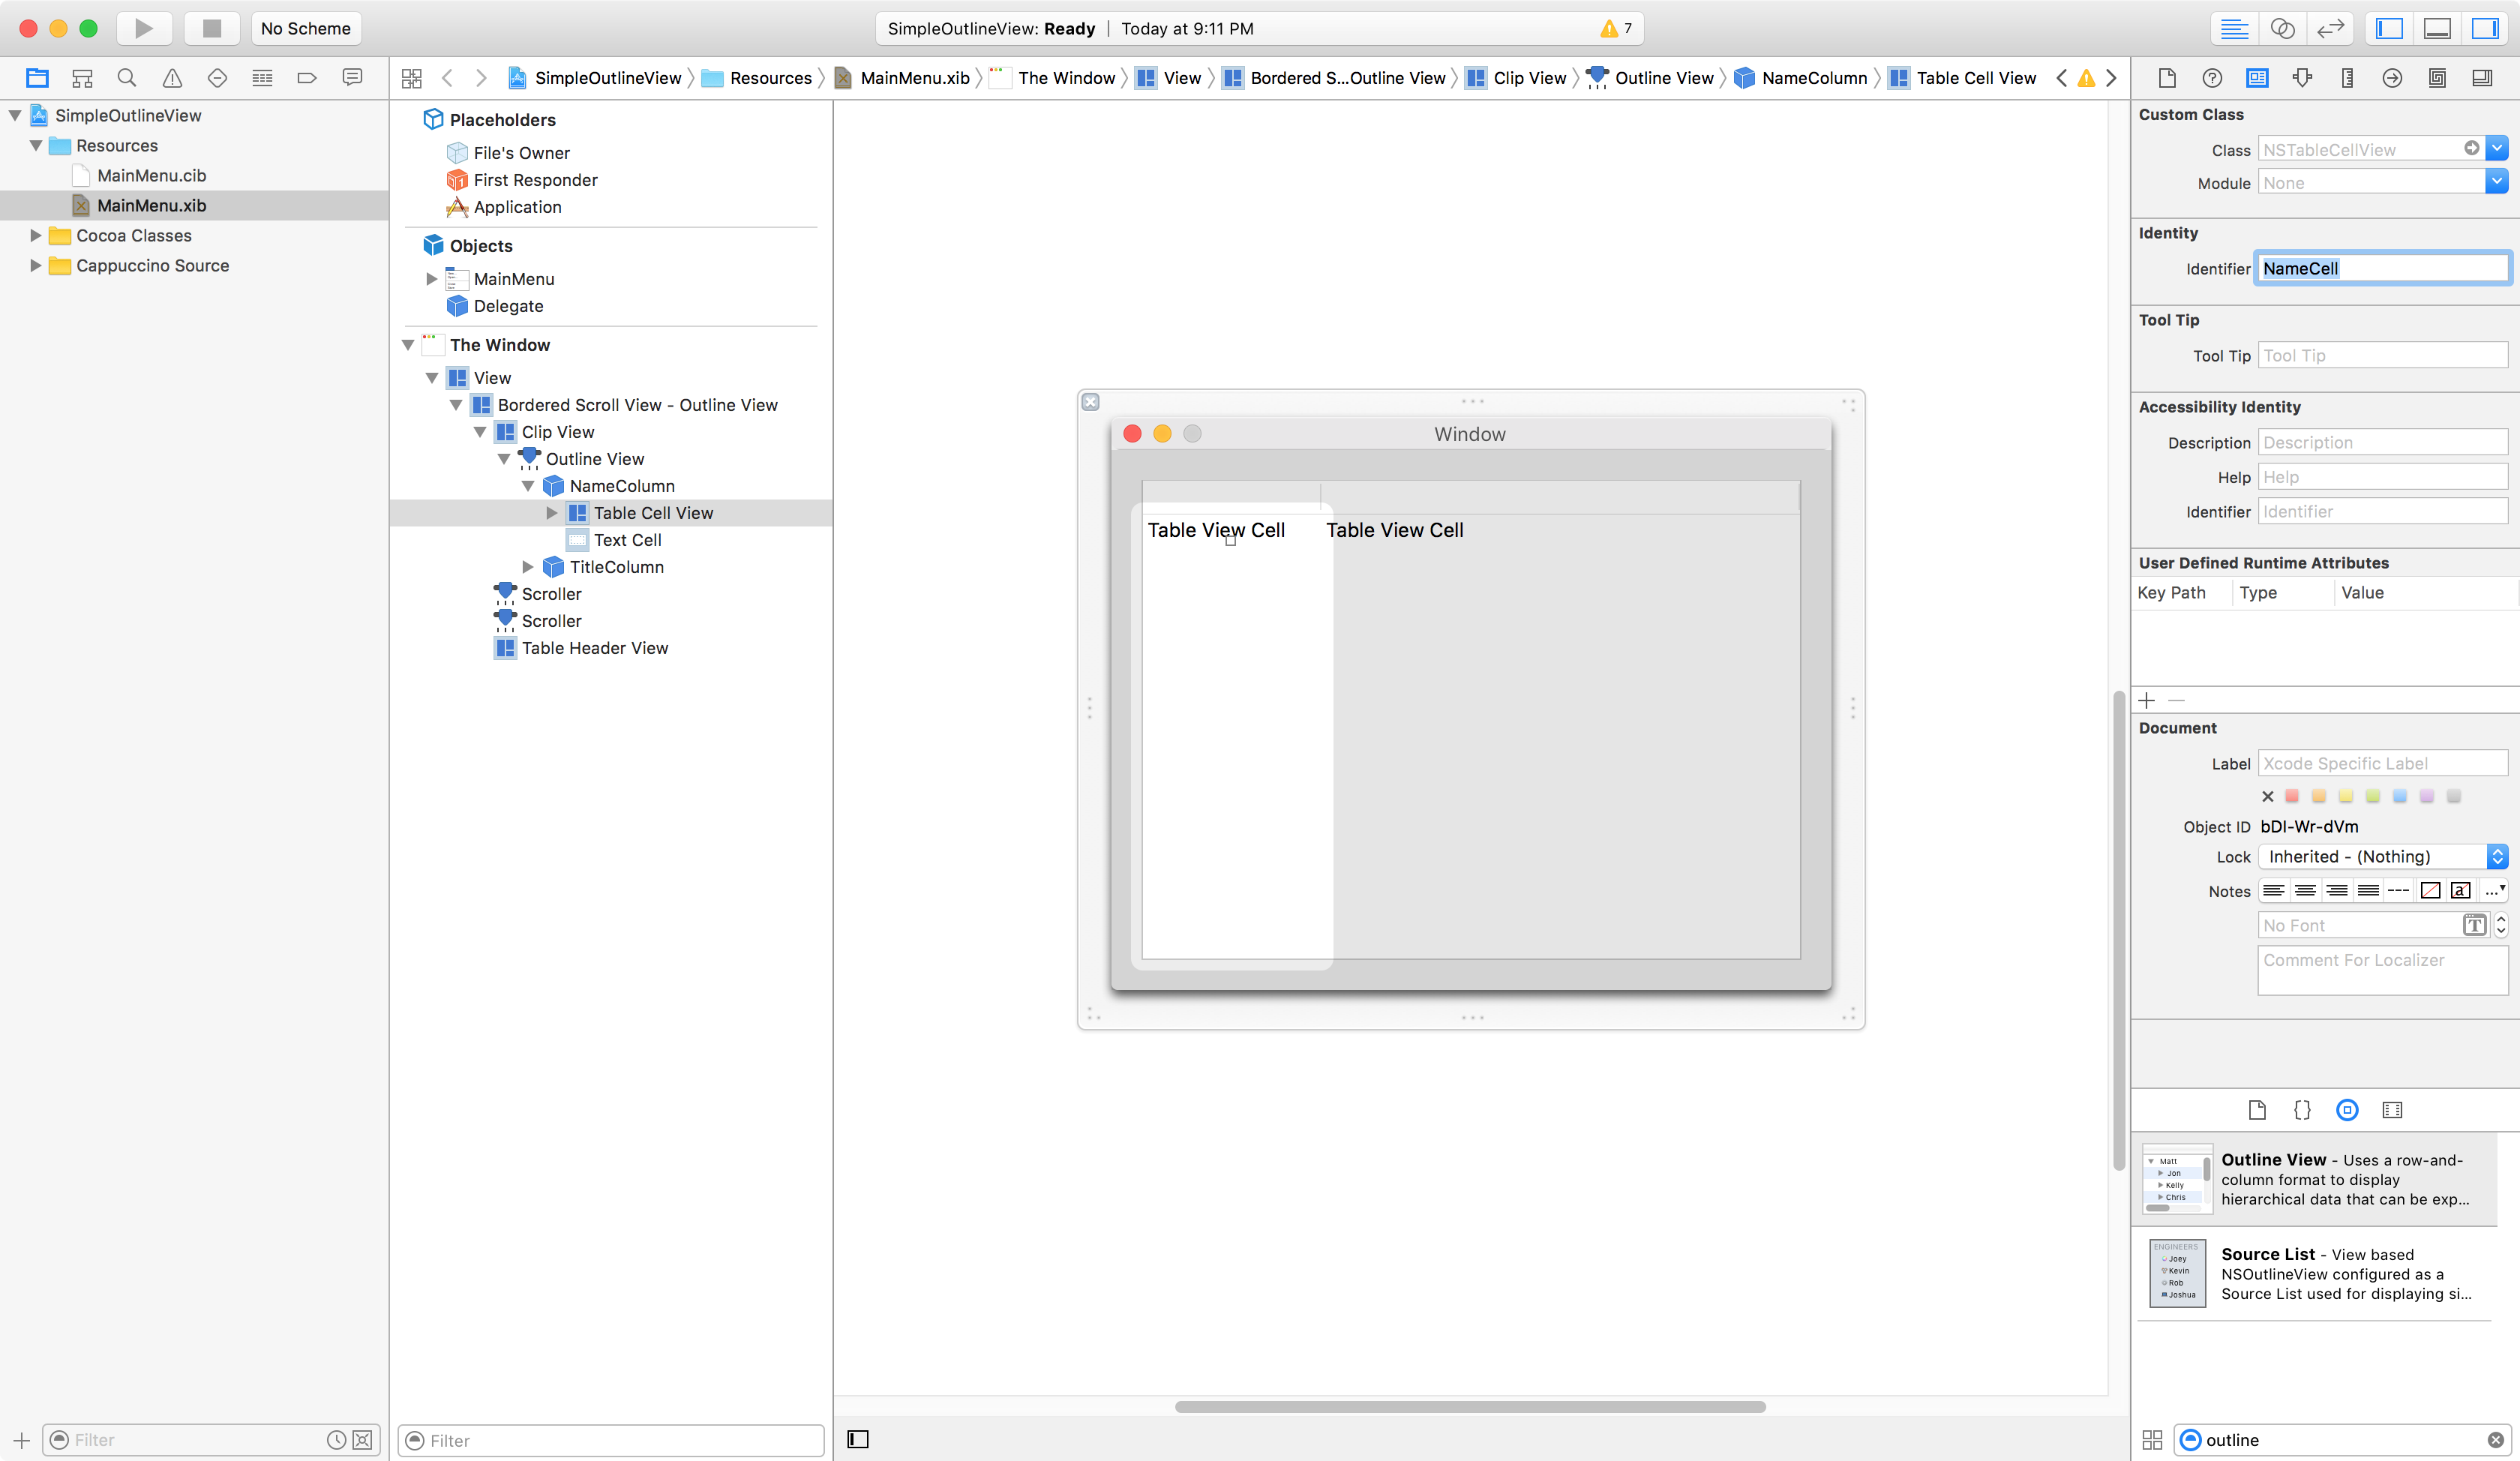
Do the same for TitleColumn with “TitleCell”.
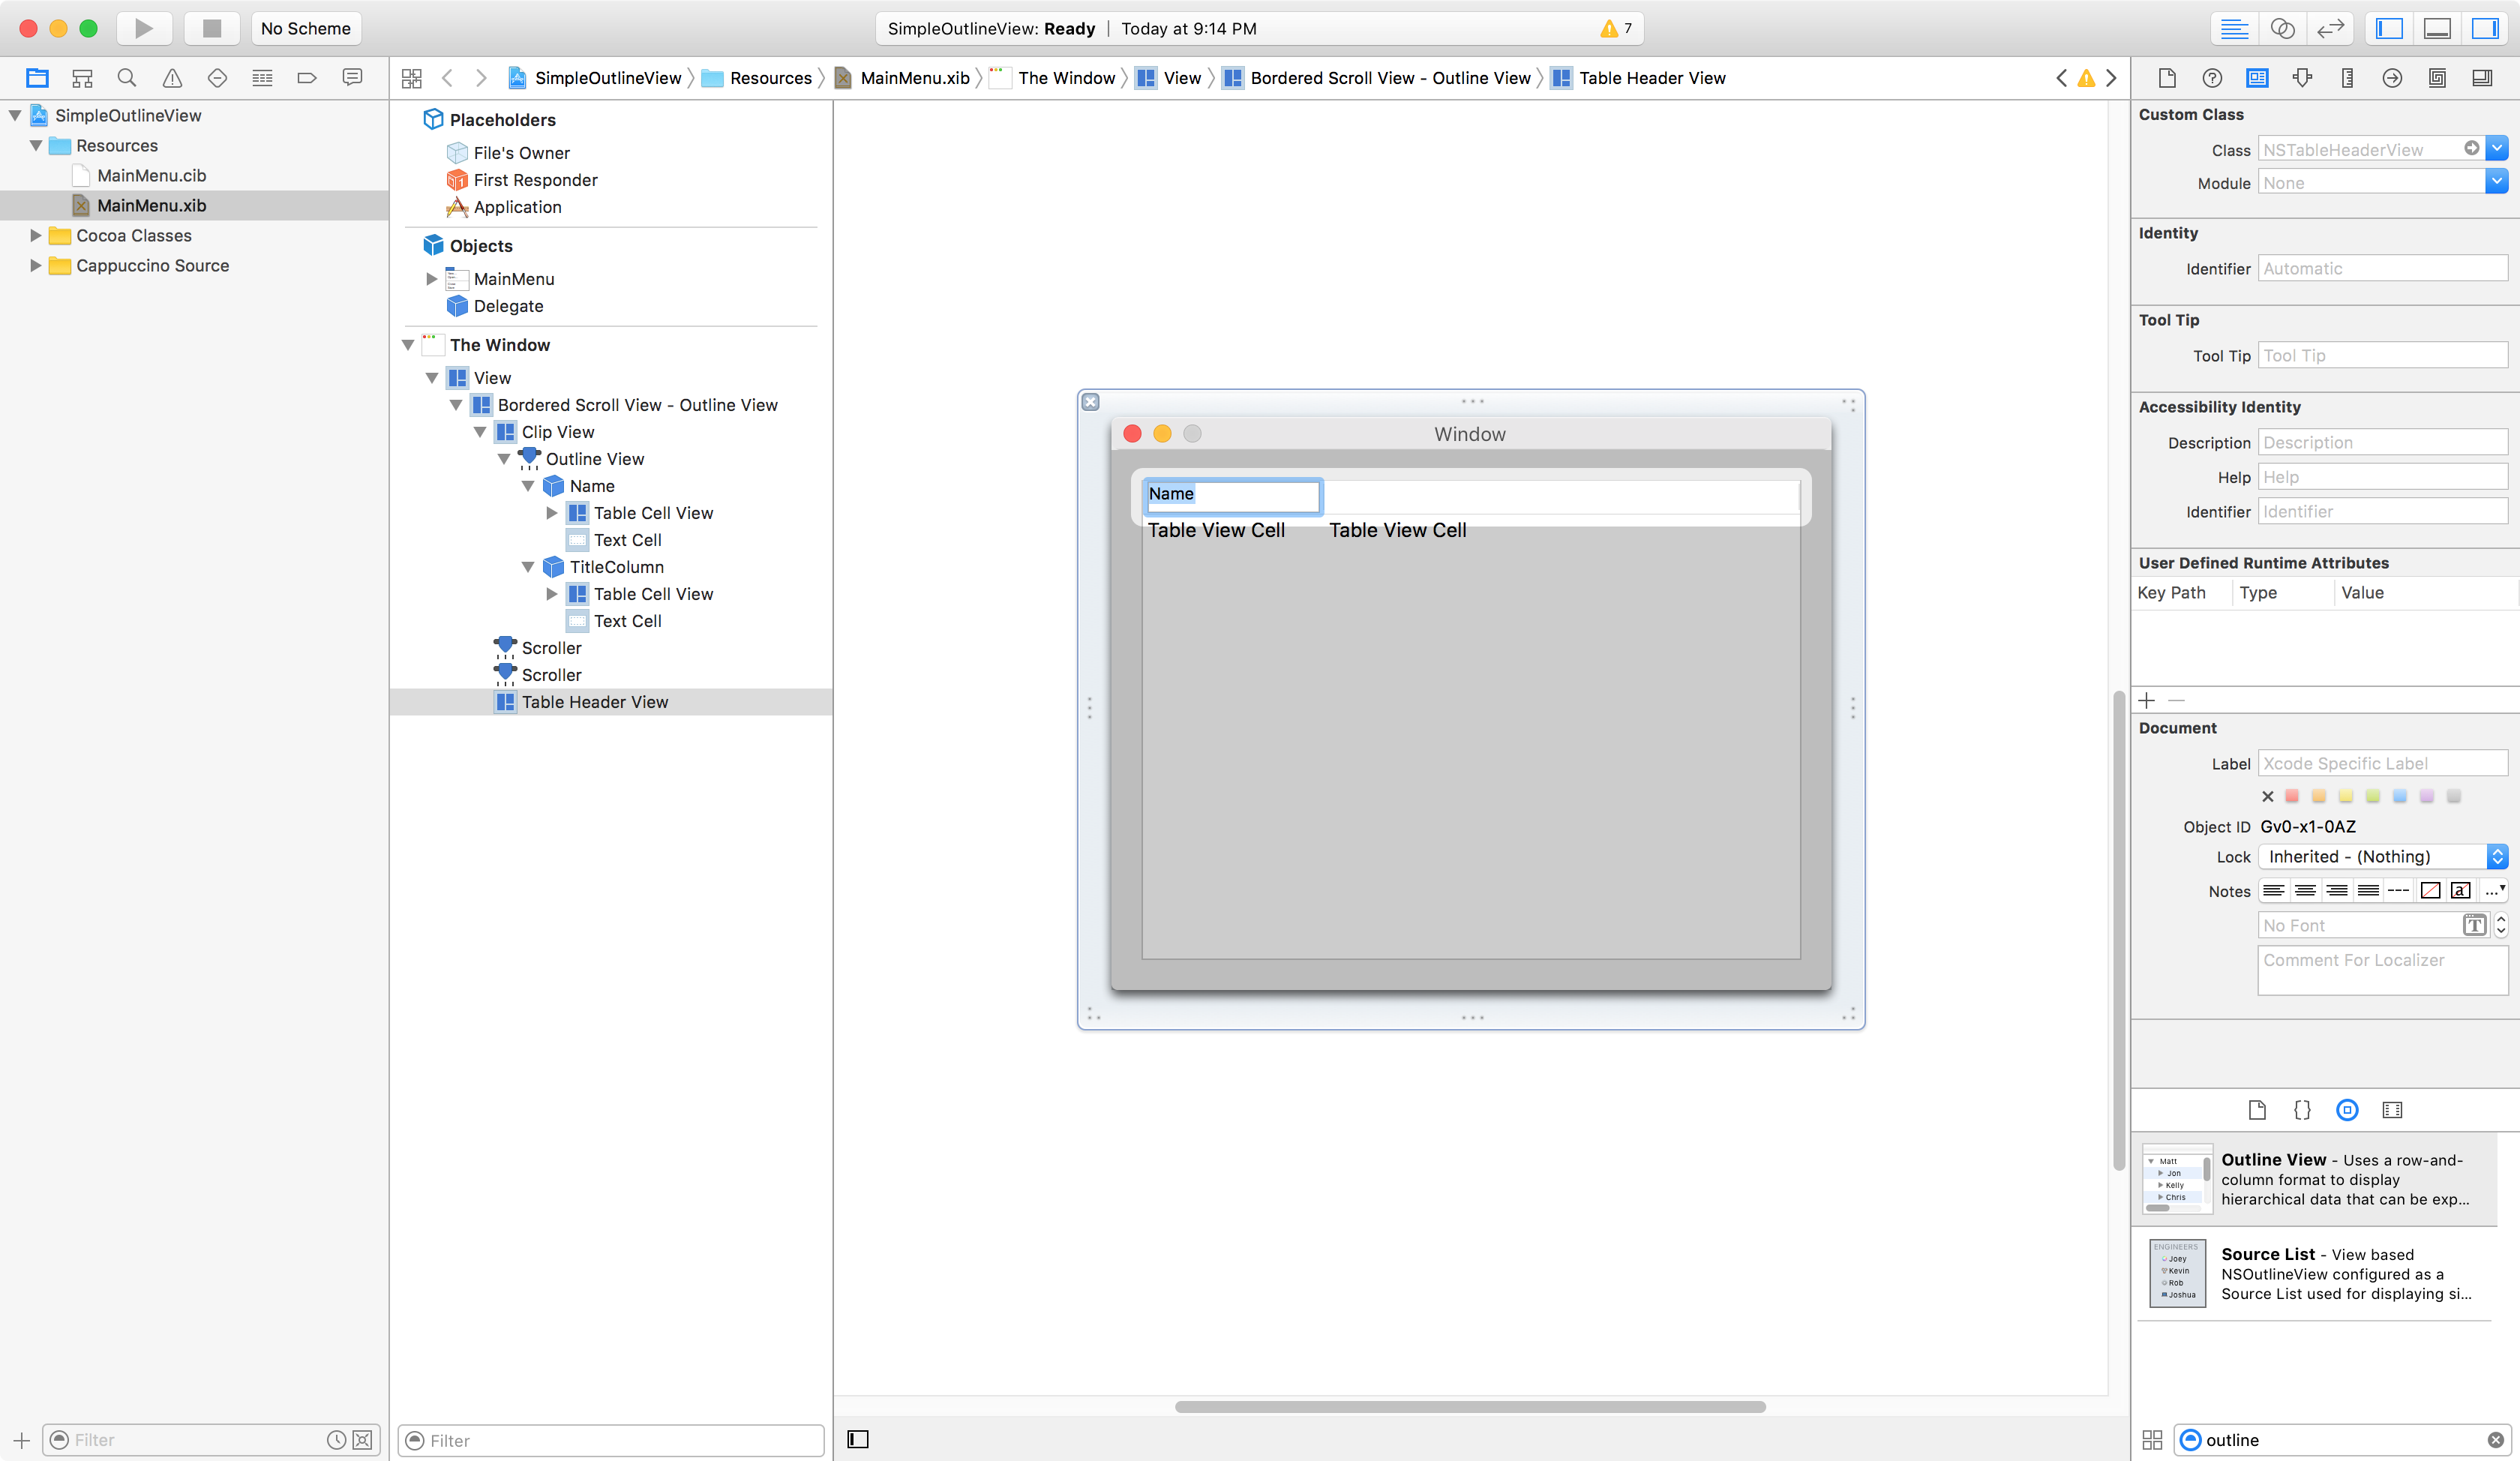
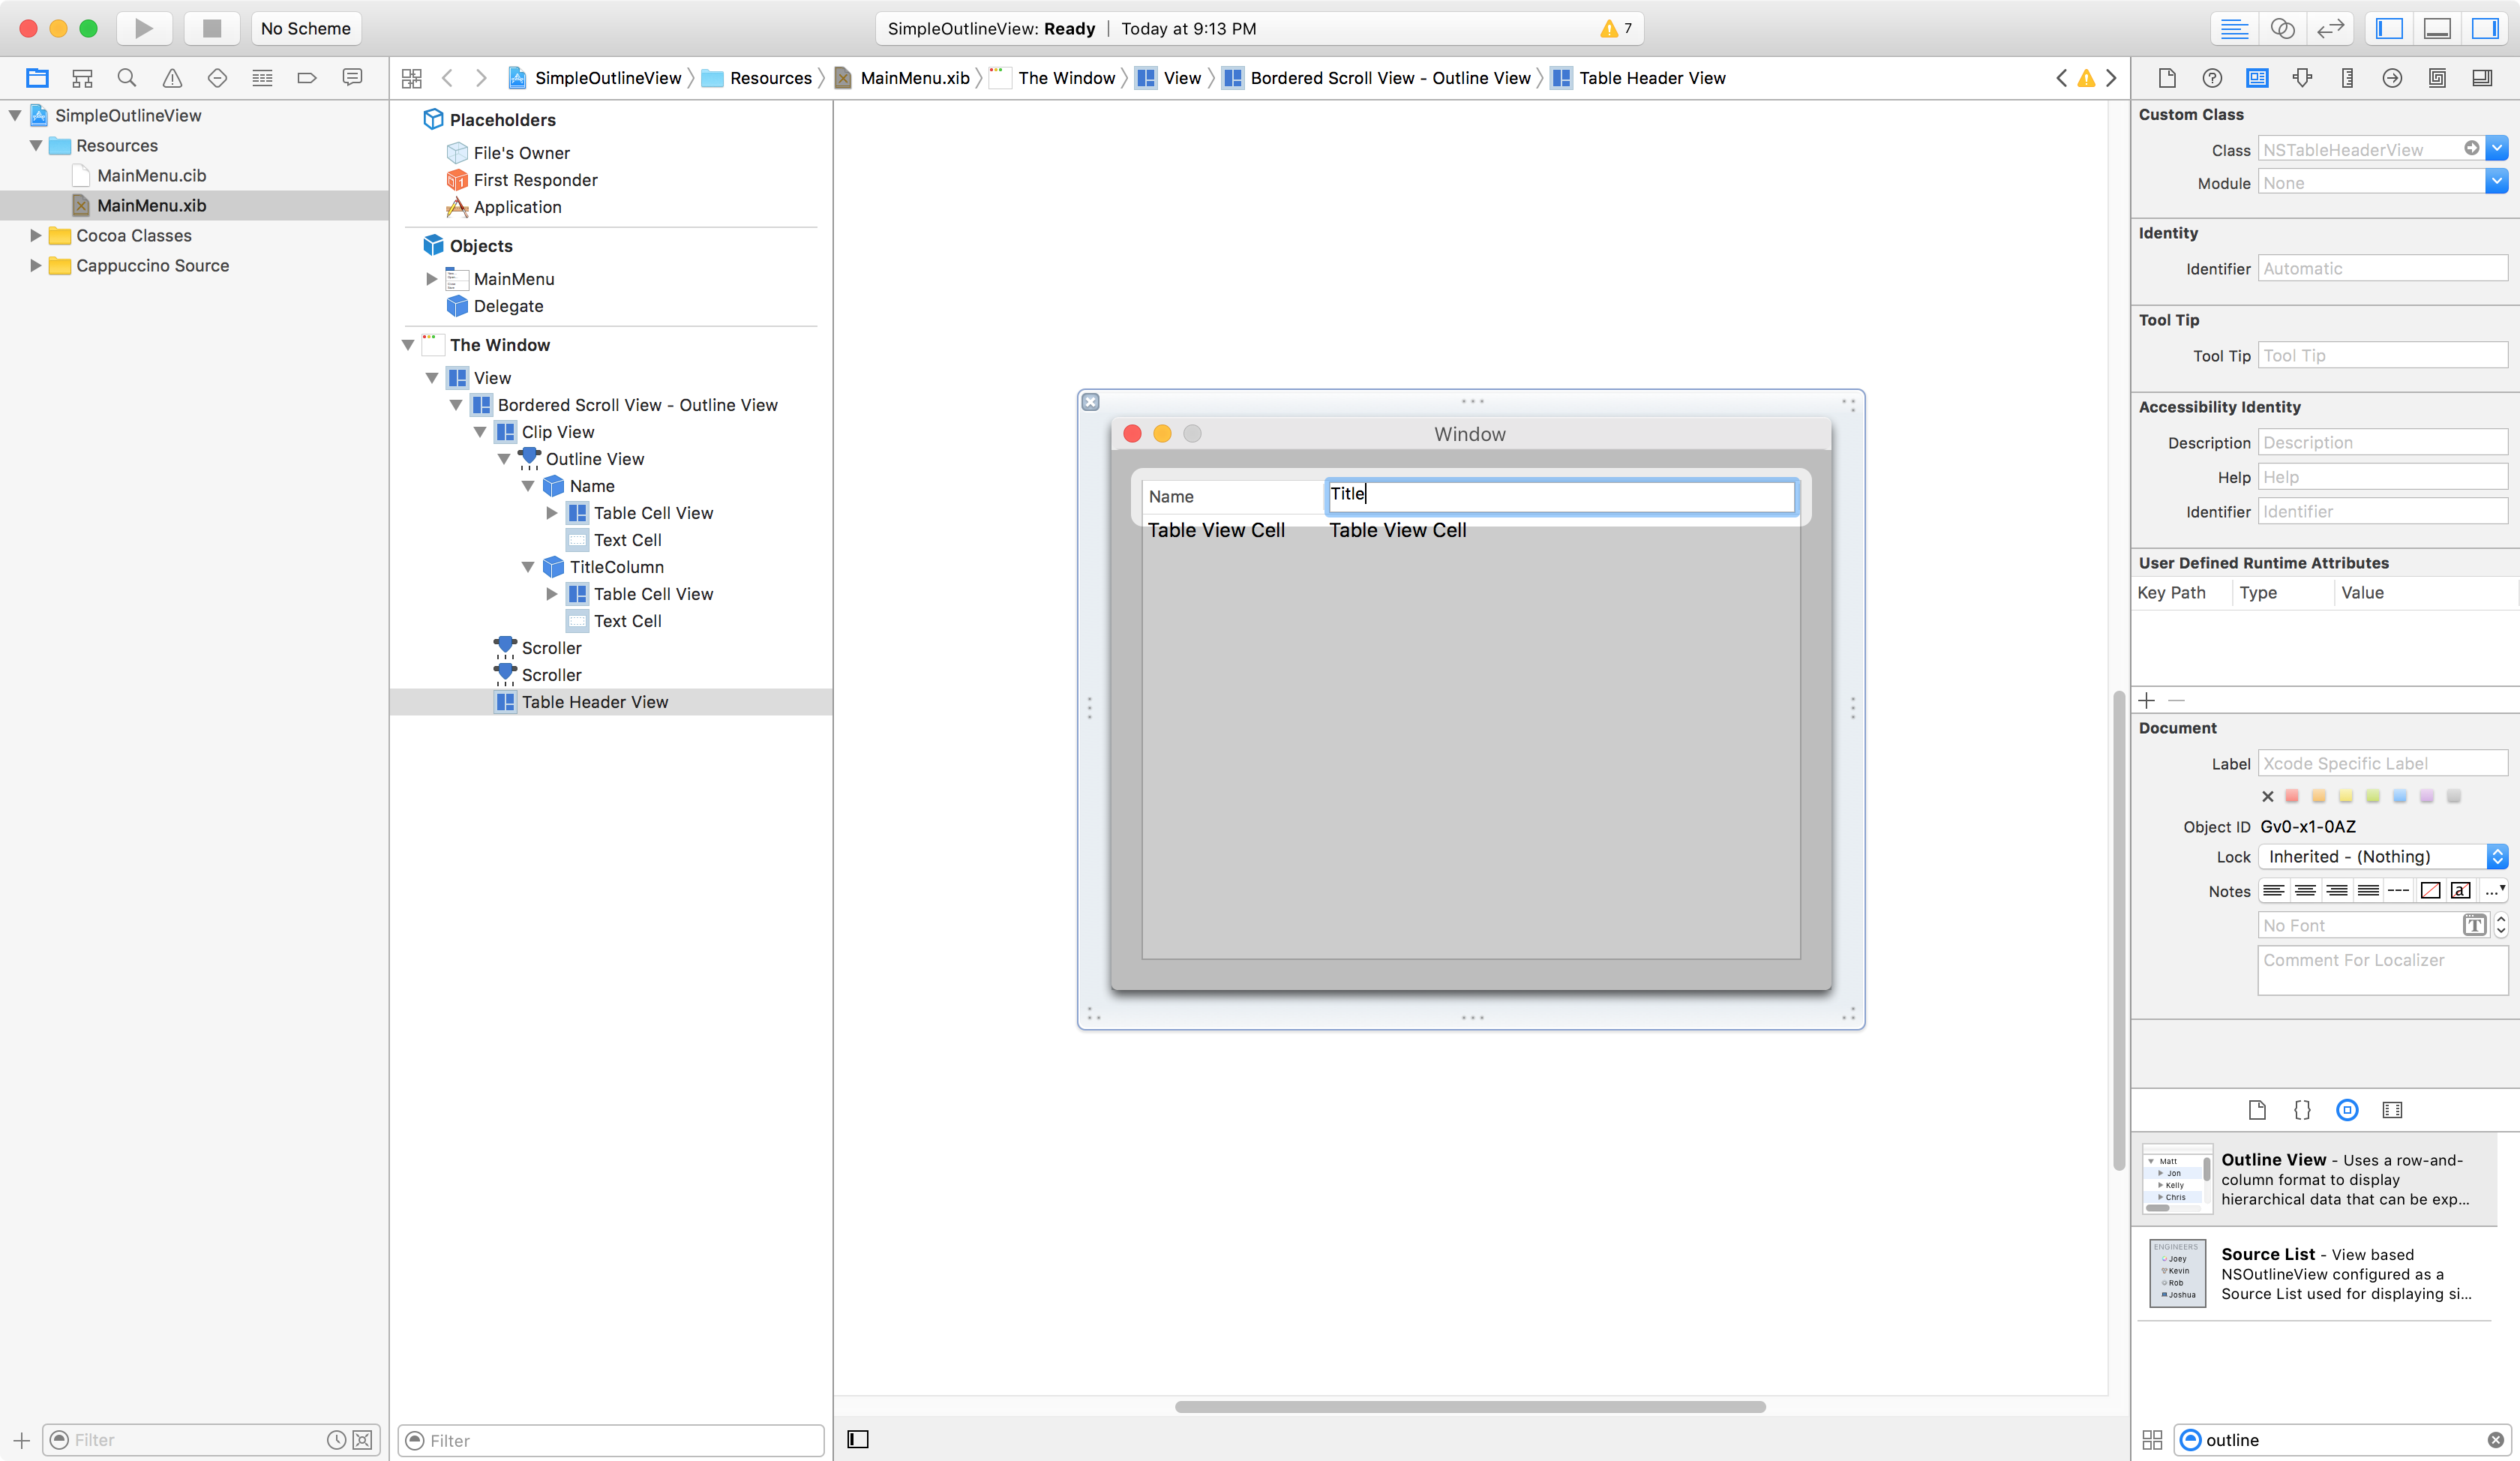
Double click on the Header of the Ouline View, and set its “Name” and “Title”.
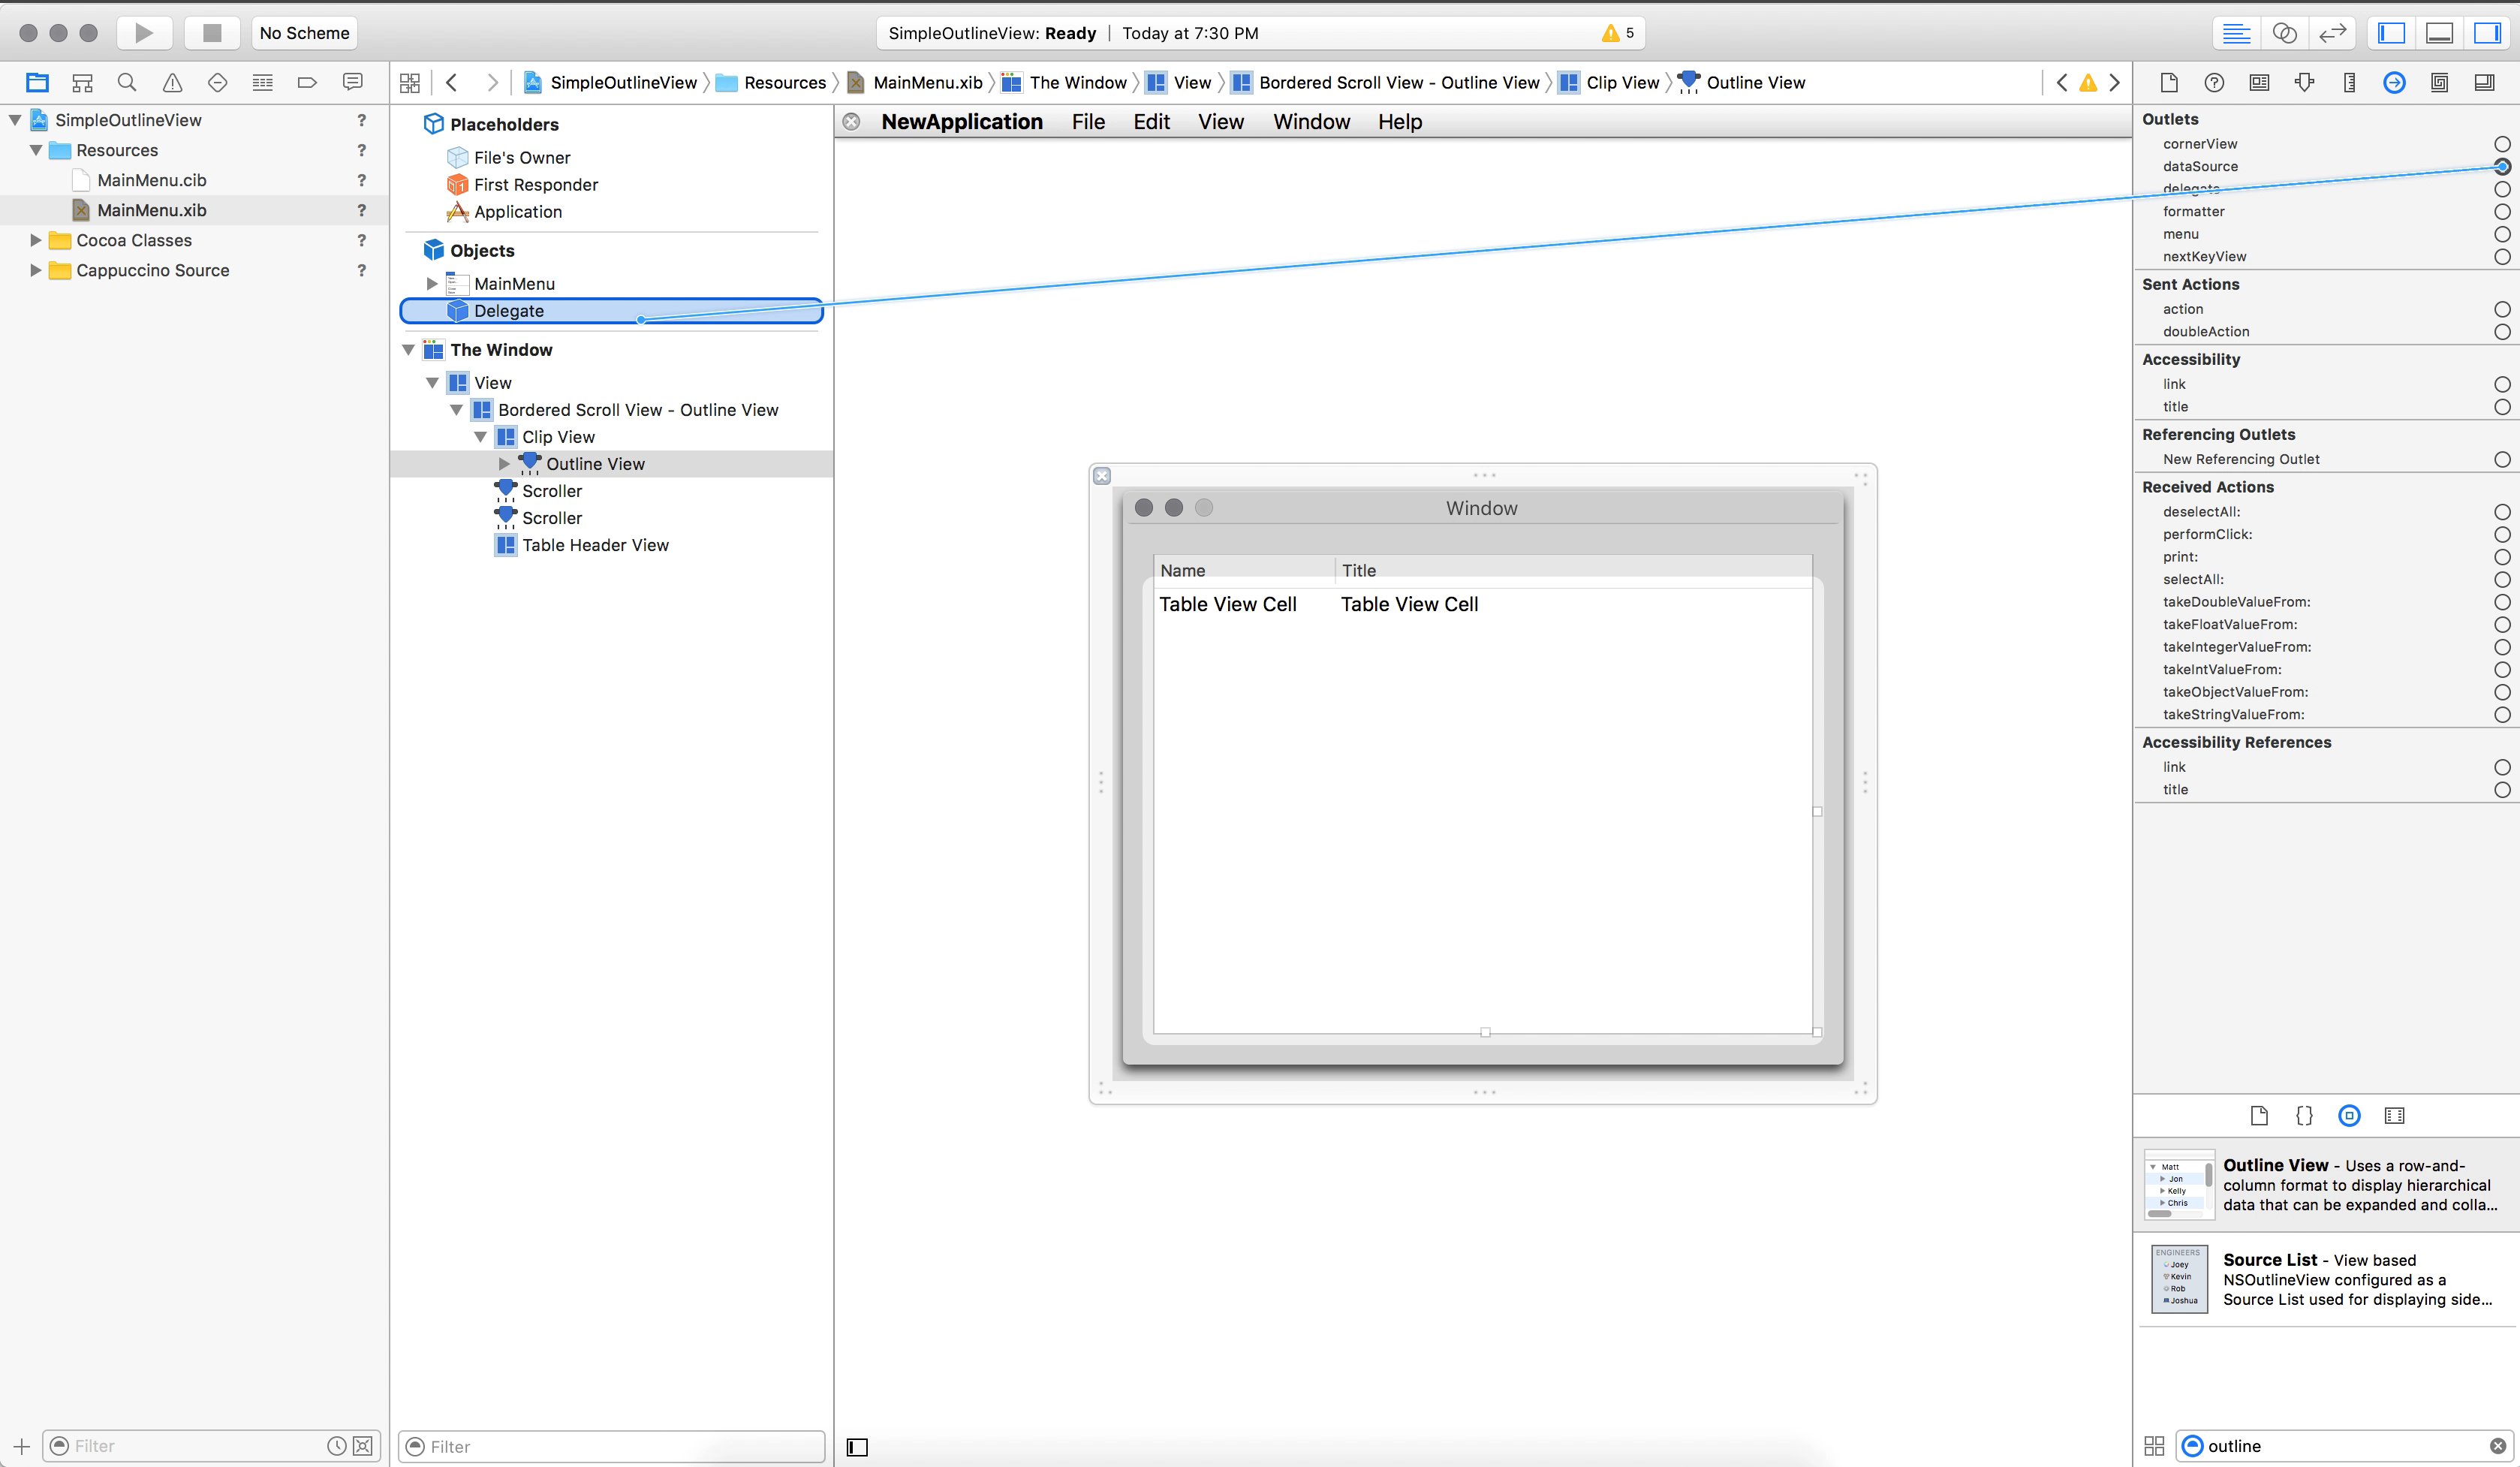
Before testing our new application, there is one more thing left: connect the Outline View to our AppDelegate.

As usual the best way to run a Cappuccino app for testing is to start a local webserver. So in the root of your project folder, type:
python -m SimpleHTTPServer
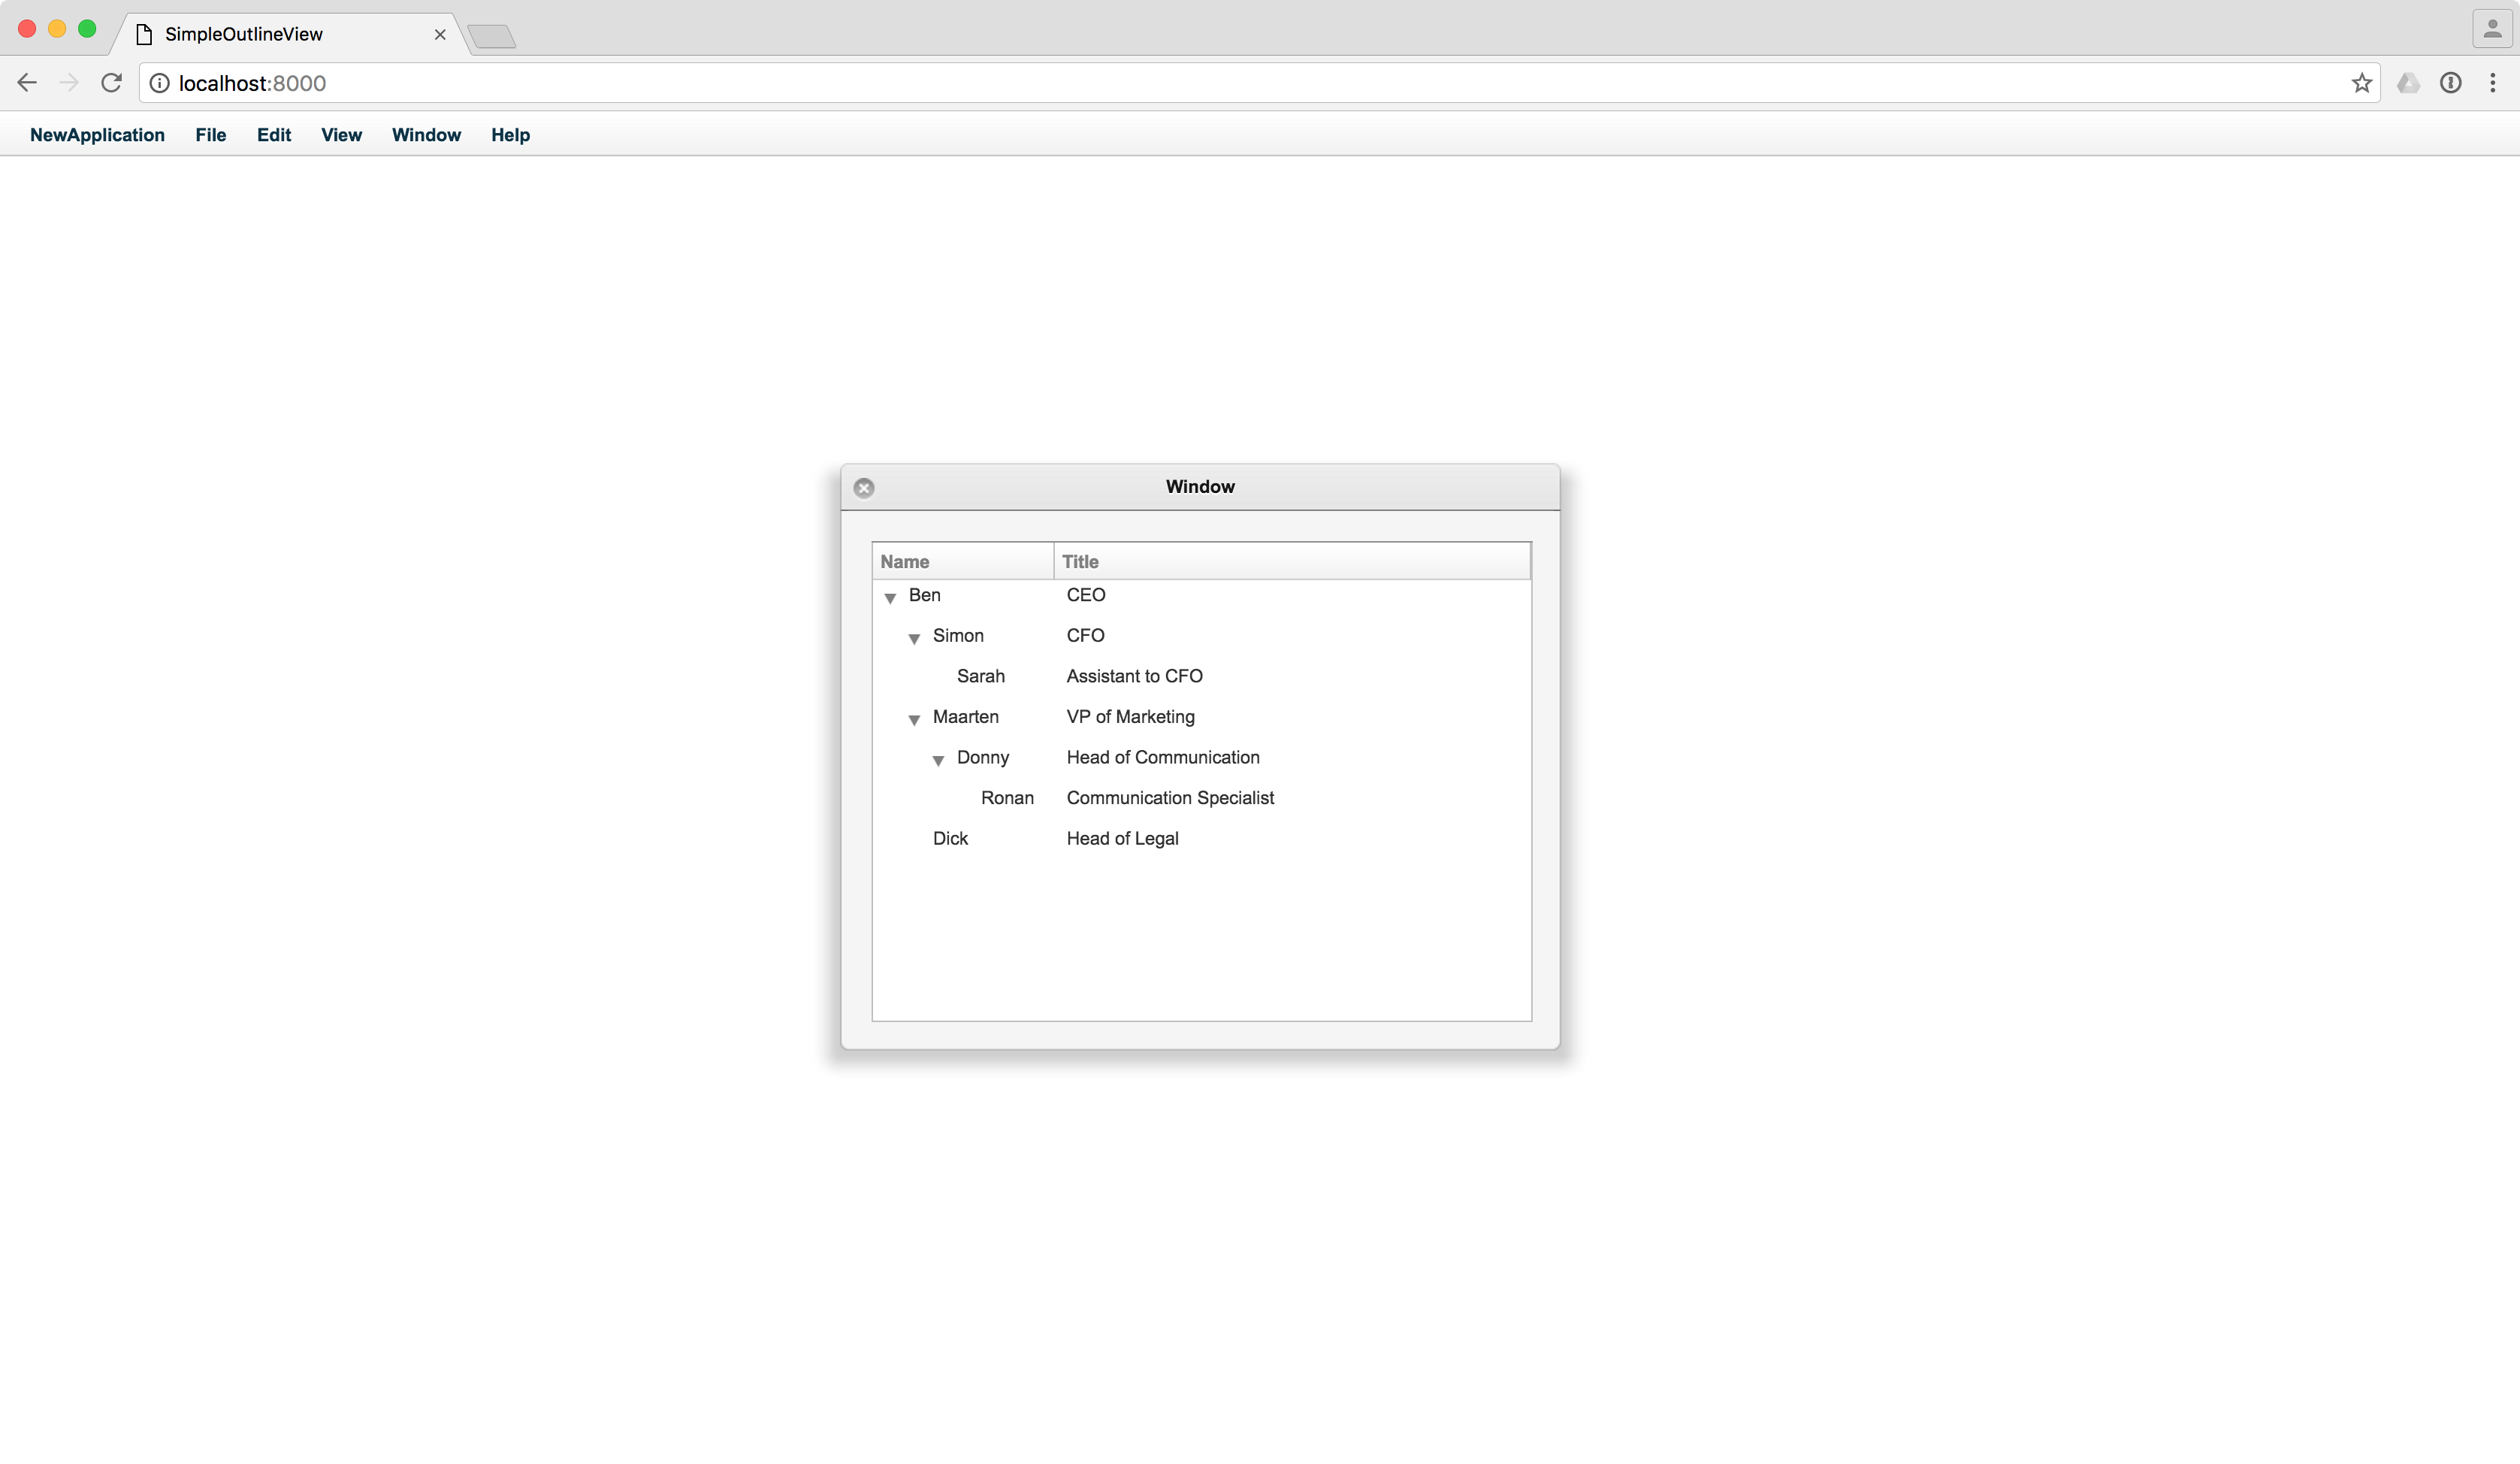
Now, open your browser and type in the address given by SimpleHTTPServer: localhost:8000.
Now, you have a fully functioning application!
You can download the archive of this project here.

![]() Logo by Sofa. Hosted by SlevenBits. Copyright © 2013-2019 - Cappuccino Project.
Logo by Sofa. Hosted by SlevenBits. Copyright © 2013-2019 - Cappuccino Project.