In this tutorial we will create a simple cell-based table view. The table view control, CPTableView, is one of the simplest way to organize our data into columns and rows, whether that’s just for display or for editing. At the conclusion of this tutorial you will know how to populate data into CPTableView and how to add and remove elements.
We will be using Xcode’s Interface Builder in this tutorial, so if you haven’t already you should read our Xcode Interface Builder tutorial.
First, go to the folder in which you want create the project. Run the capp command:
capp gen -l -t NibApplication SimpleTableView
This will generate an empty new project using the Nib template.
Since we will be interacting with our table view in the app controller, let’s start by giving it an outlet. While we’re there let’s add an ivar to store our content too. In AppController.j:
@implementation AppController : CPObject
{
    @outlet CPWindow    theWindow;
    @outlet CPTableView tableView;
    CPMutableArray      _names;
}
Tables need a data source from which to read its row data. In this case we’ll store that data in a mutable array:
- (id)init
{
    if (self = [super init])
    {
        _names = @["Alpha", "Beta", "Charlie", "Delta"];
    }
    return self;
}
Let’s make a windowed application for this tutorial, by setting setFullPlatformWindow:NO in the awakeFromCib method:
- (void)awakeFromCib
{
    [theWindow setFullPlatformWindow:NO];
}
CPTableView uses a core concept in Cappuccino which you will see implemented in many different settings: a data source. The data source should at a minimum be able to let the table view know how many rows of data there are and what each row is.
This is what the CPTableView API docs have to say about it:
… displays record-oriented data in a table and allows the user to edit values and resize and rearrange columns. A
CPTableViewrequires you to either set a data source which implementsnumberOfRowsInTableView:andtableView:objectValueForTableColumn:row:, or alternatively to provide data through Key Value Bindings.
In our case the number of rows in the table view is equivalent to the number of elements in our array. We are going to make the app controller our data source, so let’s add this method to AppController.j:
- (int)numberOfRowsInTableView:(CPTableView)aTableView
{
    return [_names count];
}
And then the method to actually return the elements of each row:
- (id)tableView:(CPTableView)aTableView objectValueForTableColumn:(CPTableColumn)aColumn row:(CPInteger)aRowIndex
{
    return [_names objectAtIndex:aRowIndex];
}
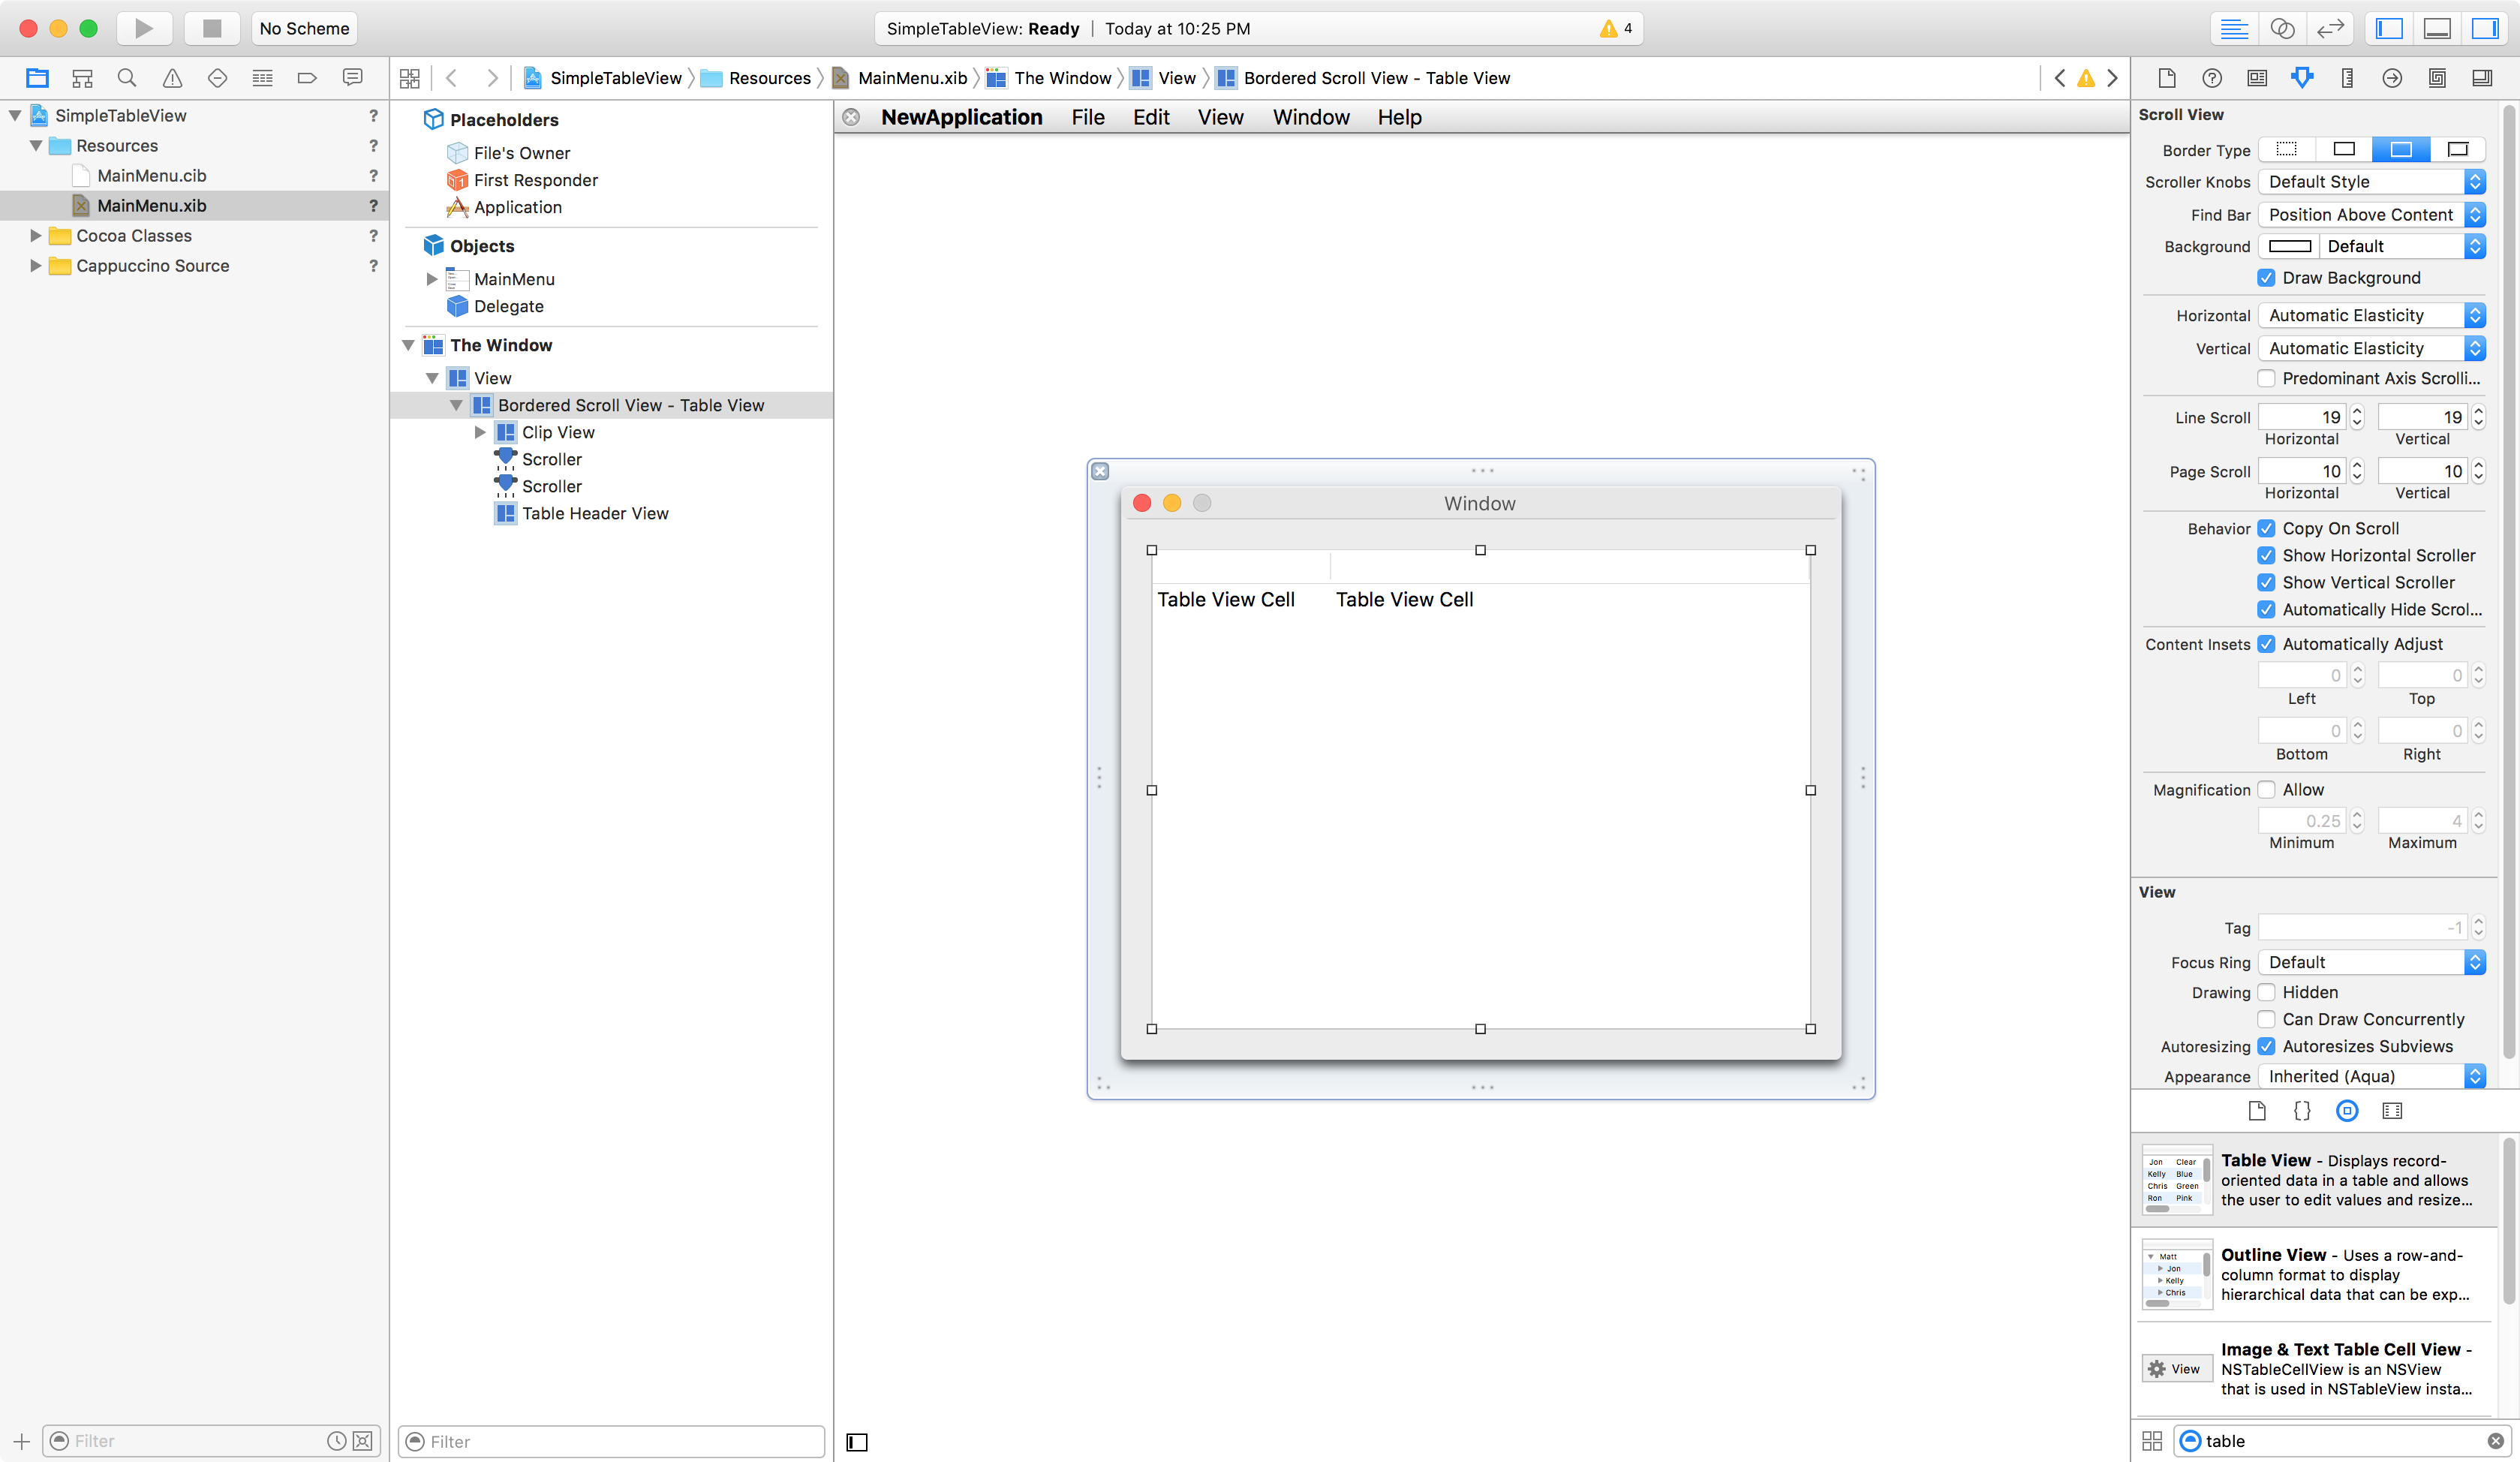
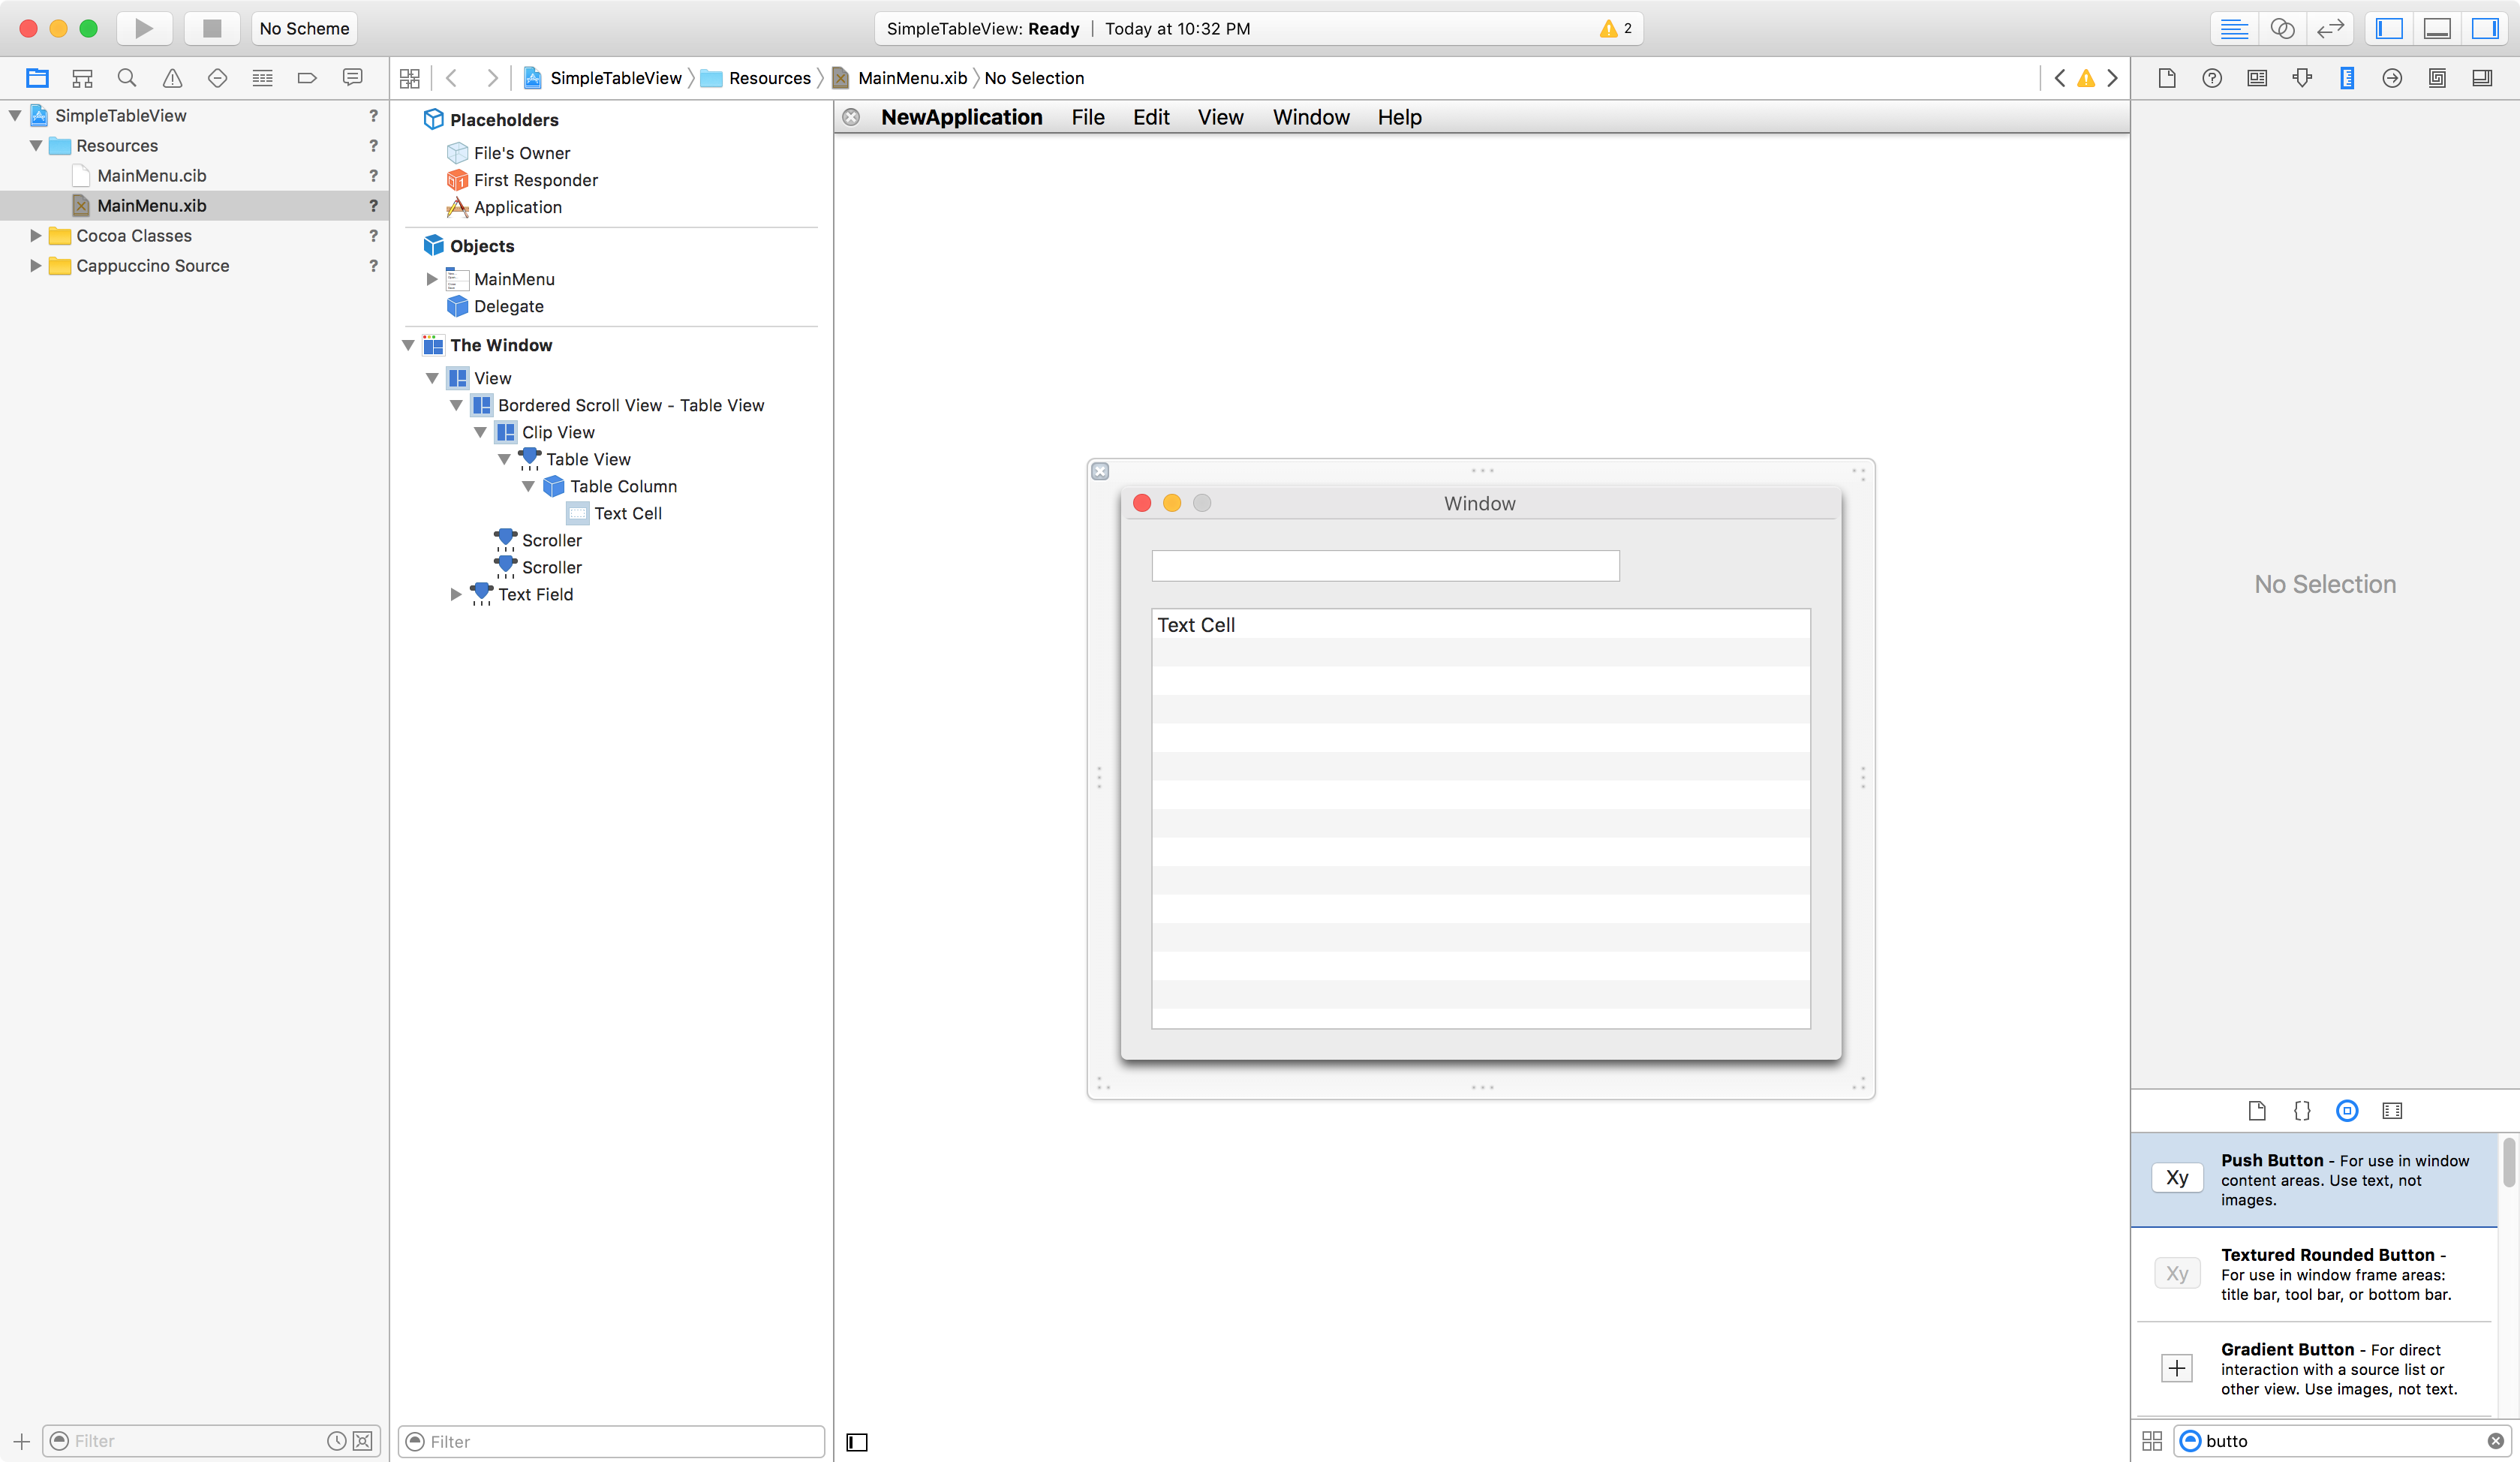
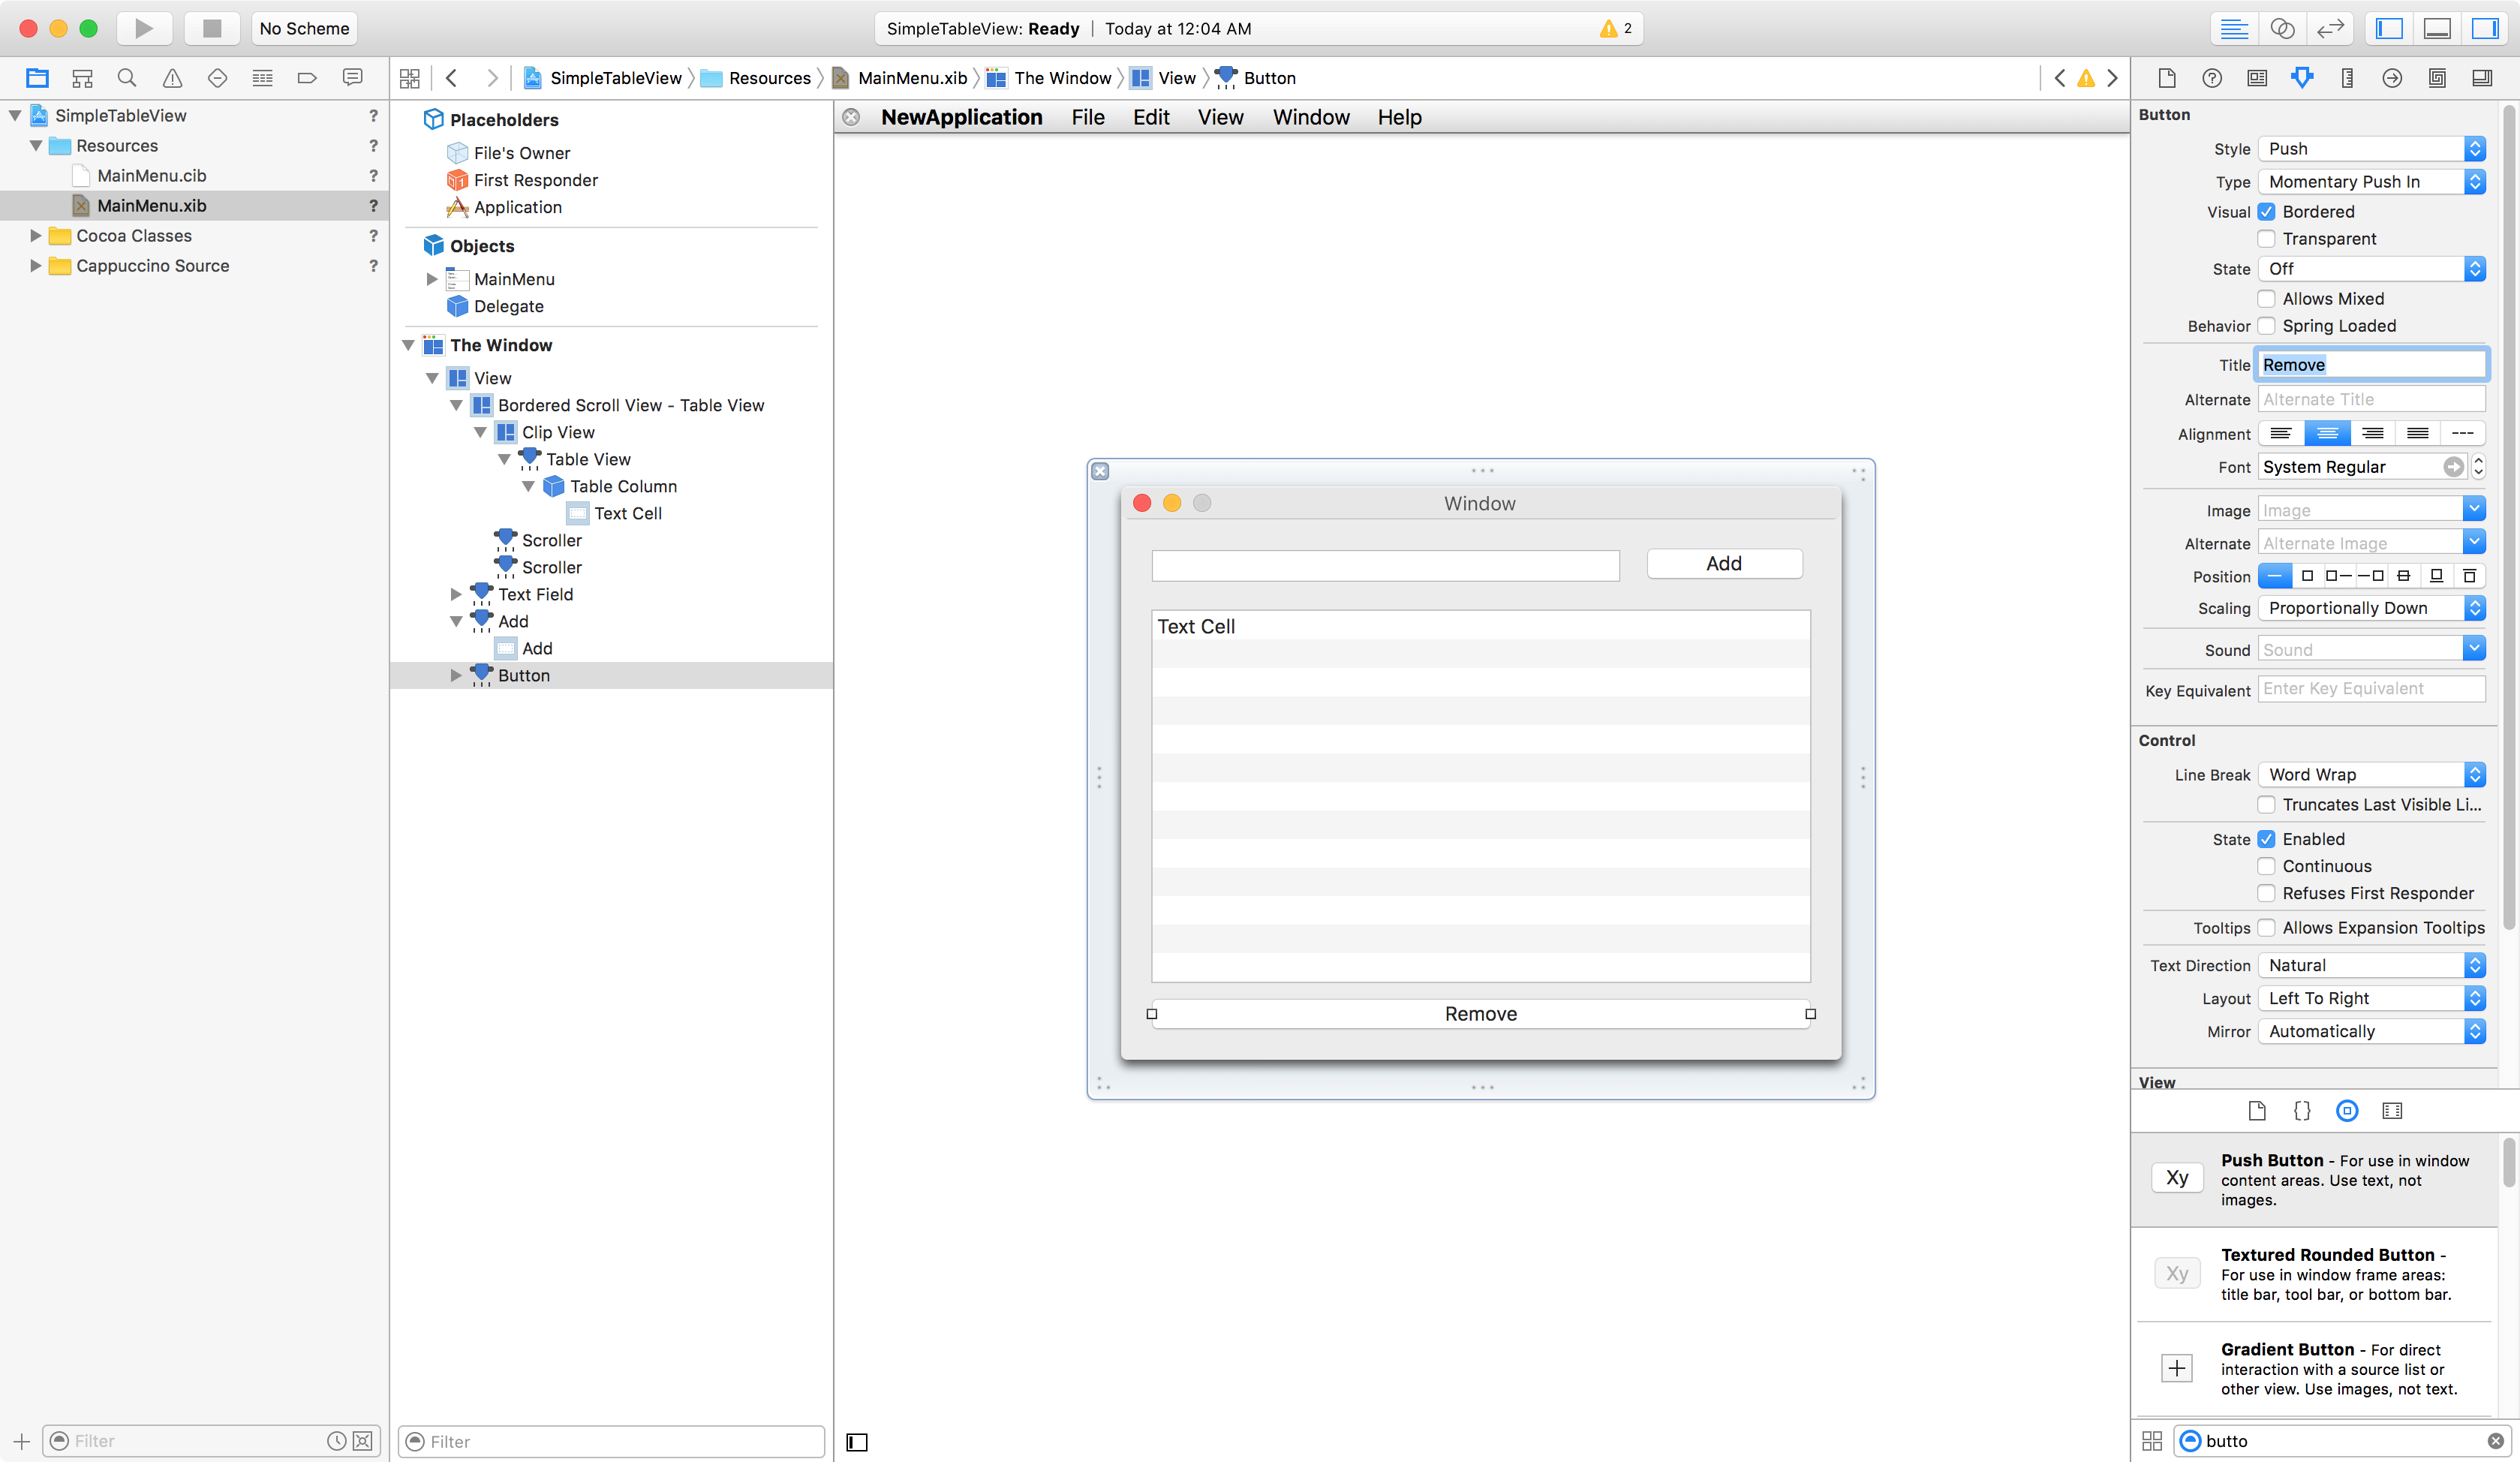
In Xcode, open up the main window by double clicking Window - Window in the Object navigator.
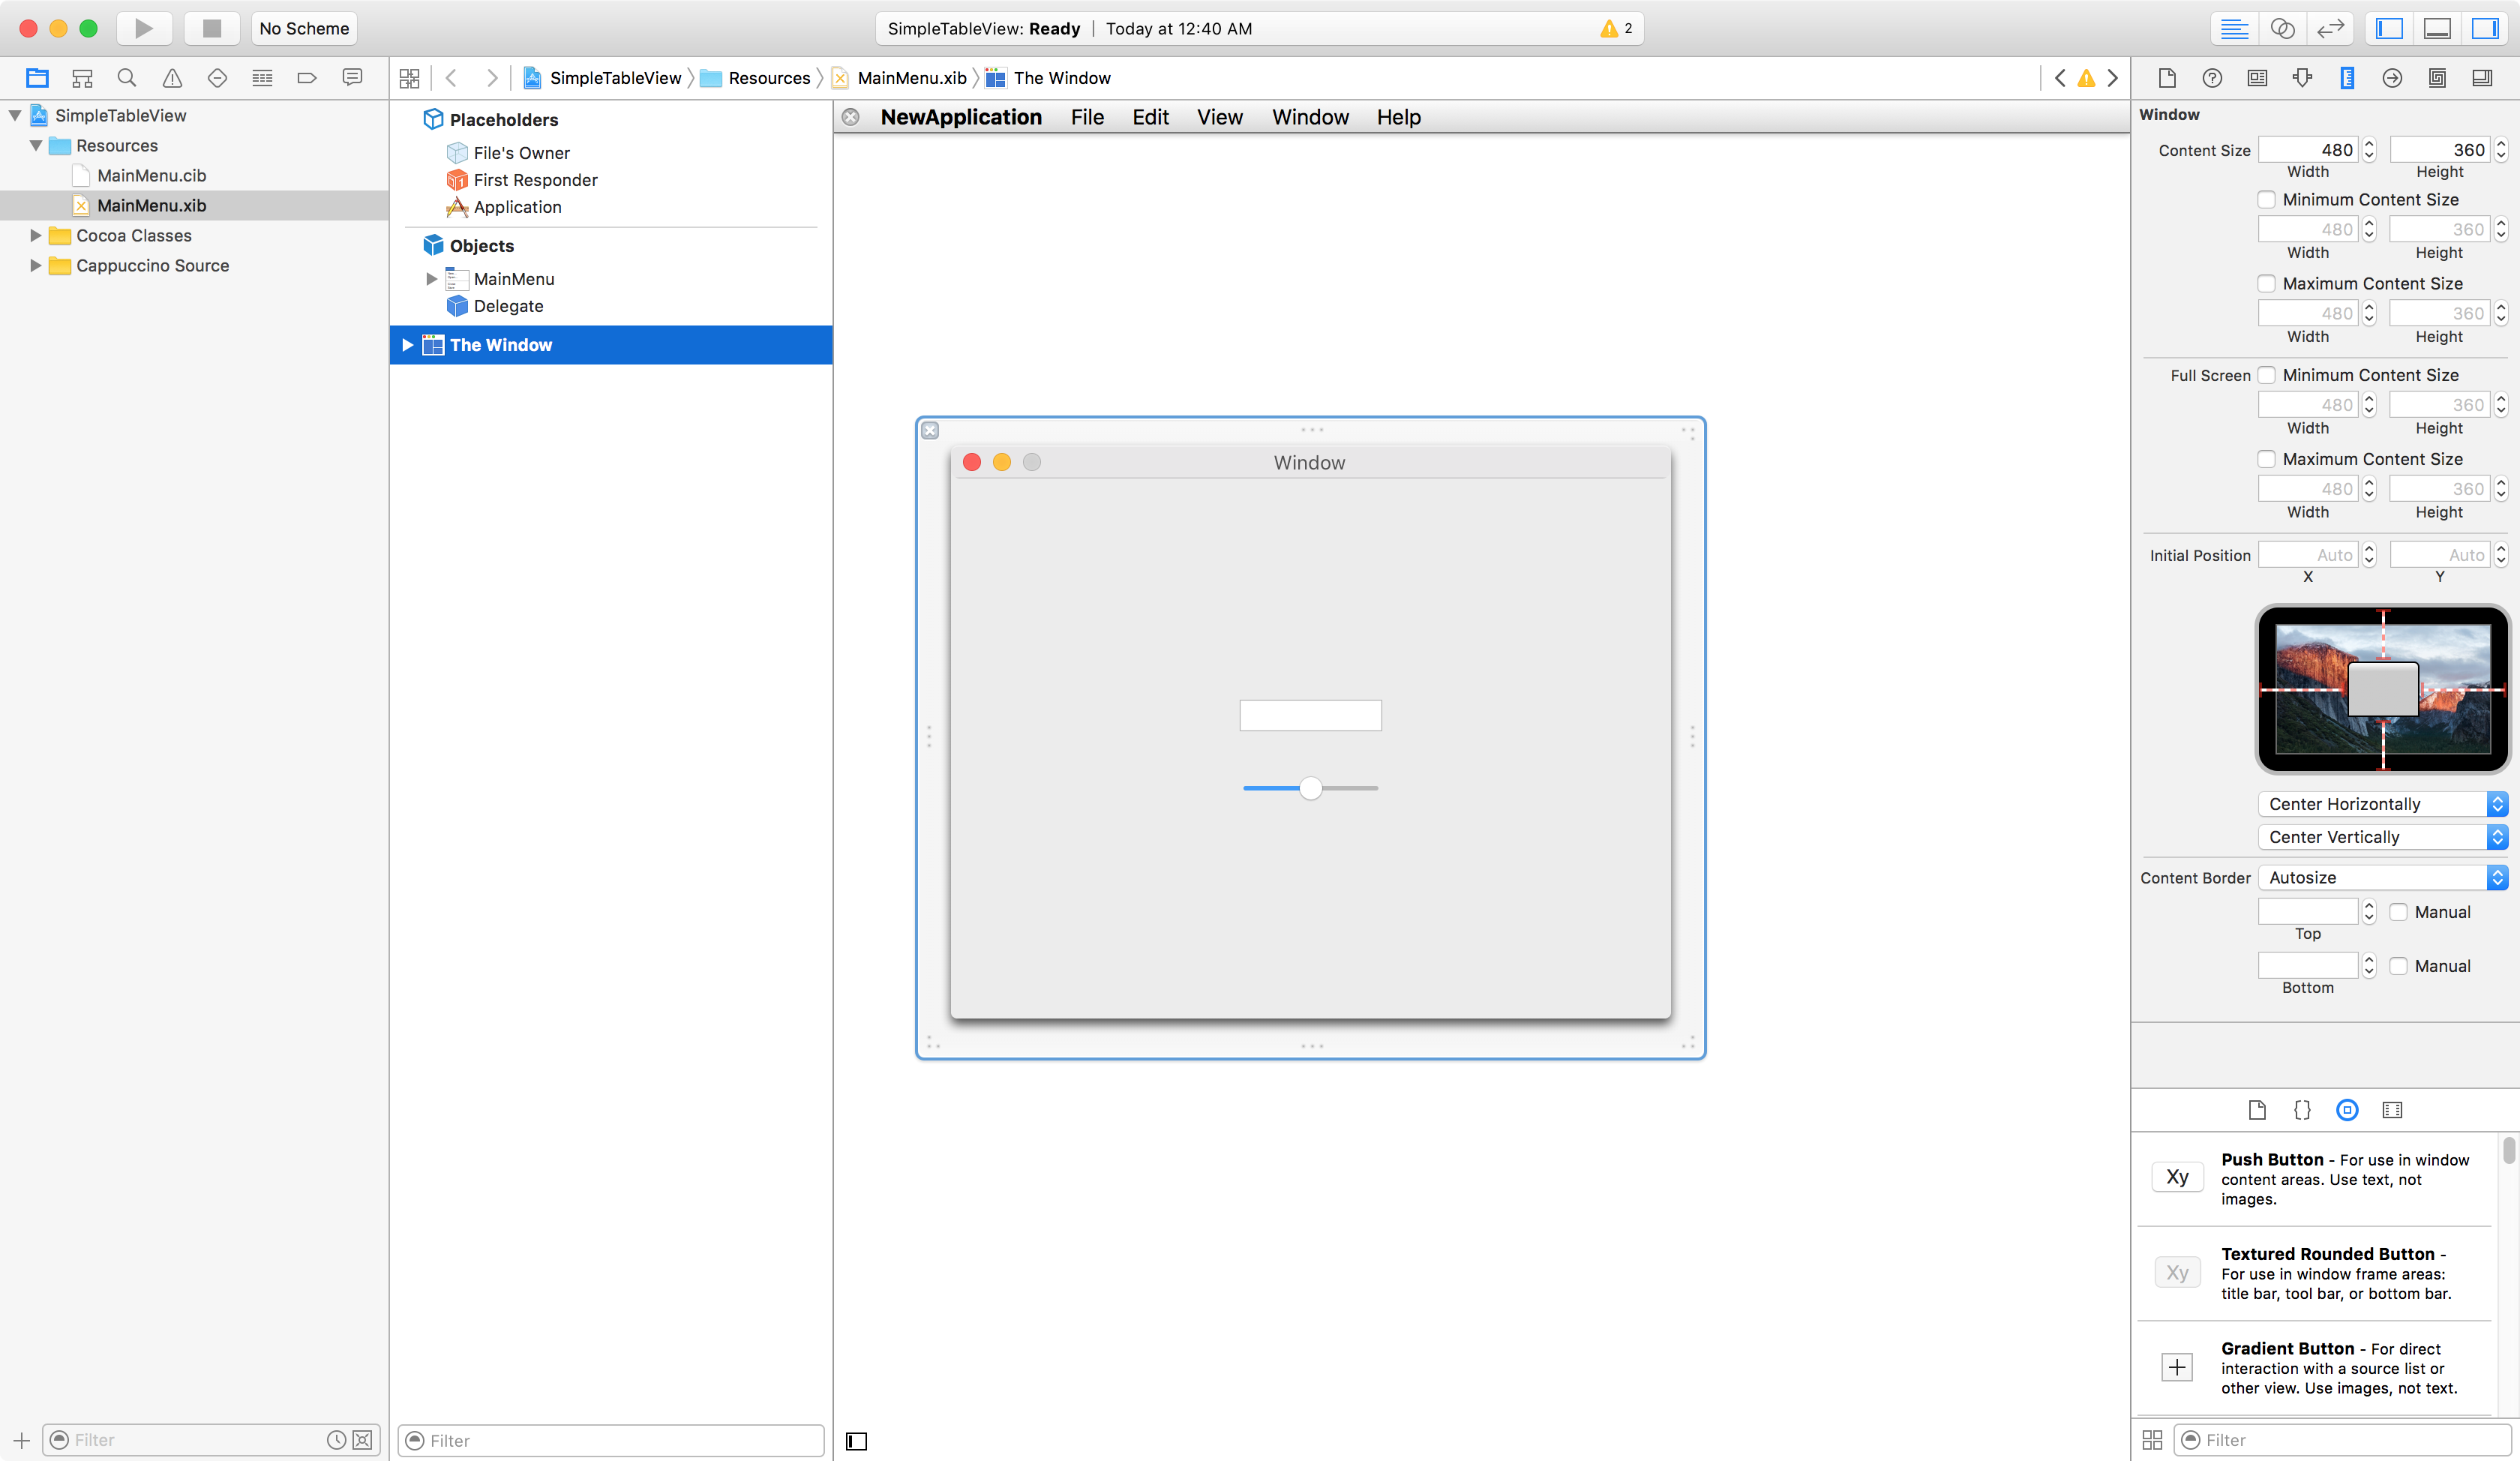
By default, there is a text field and a slider in the window. Select and remove them (using the Delete key).
Choose “Table View” from the Object Library.
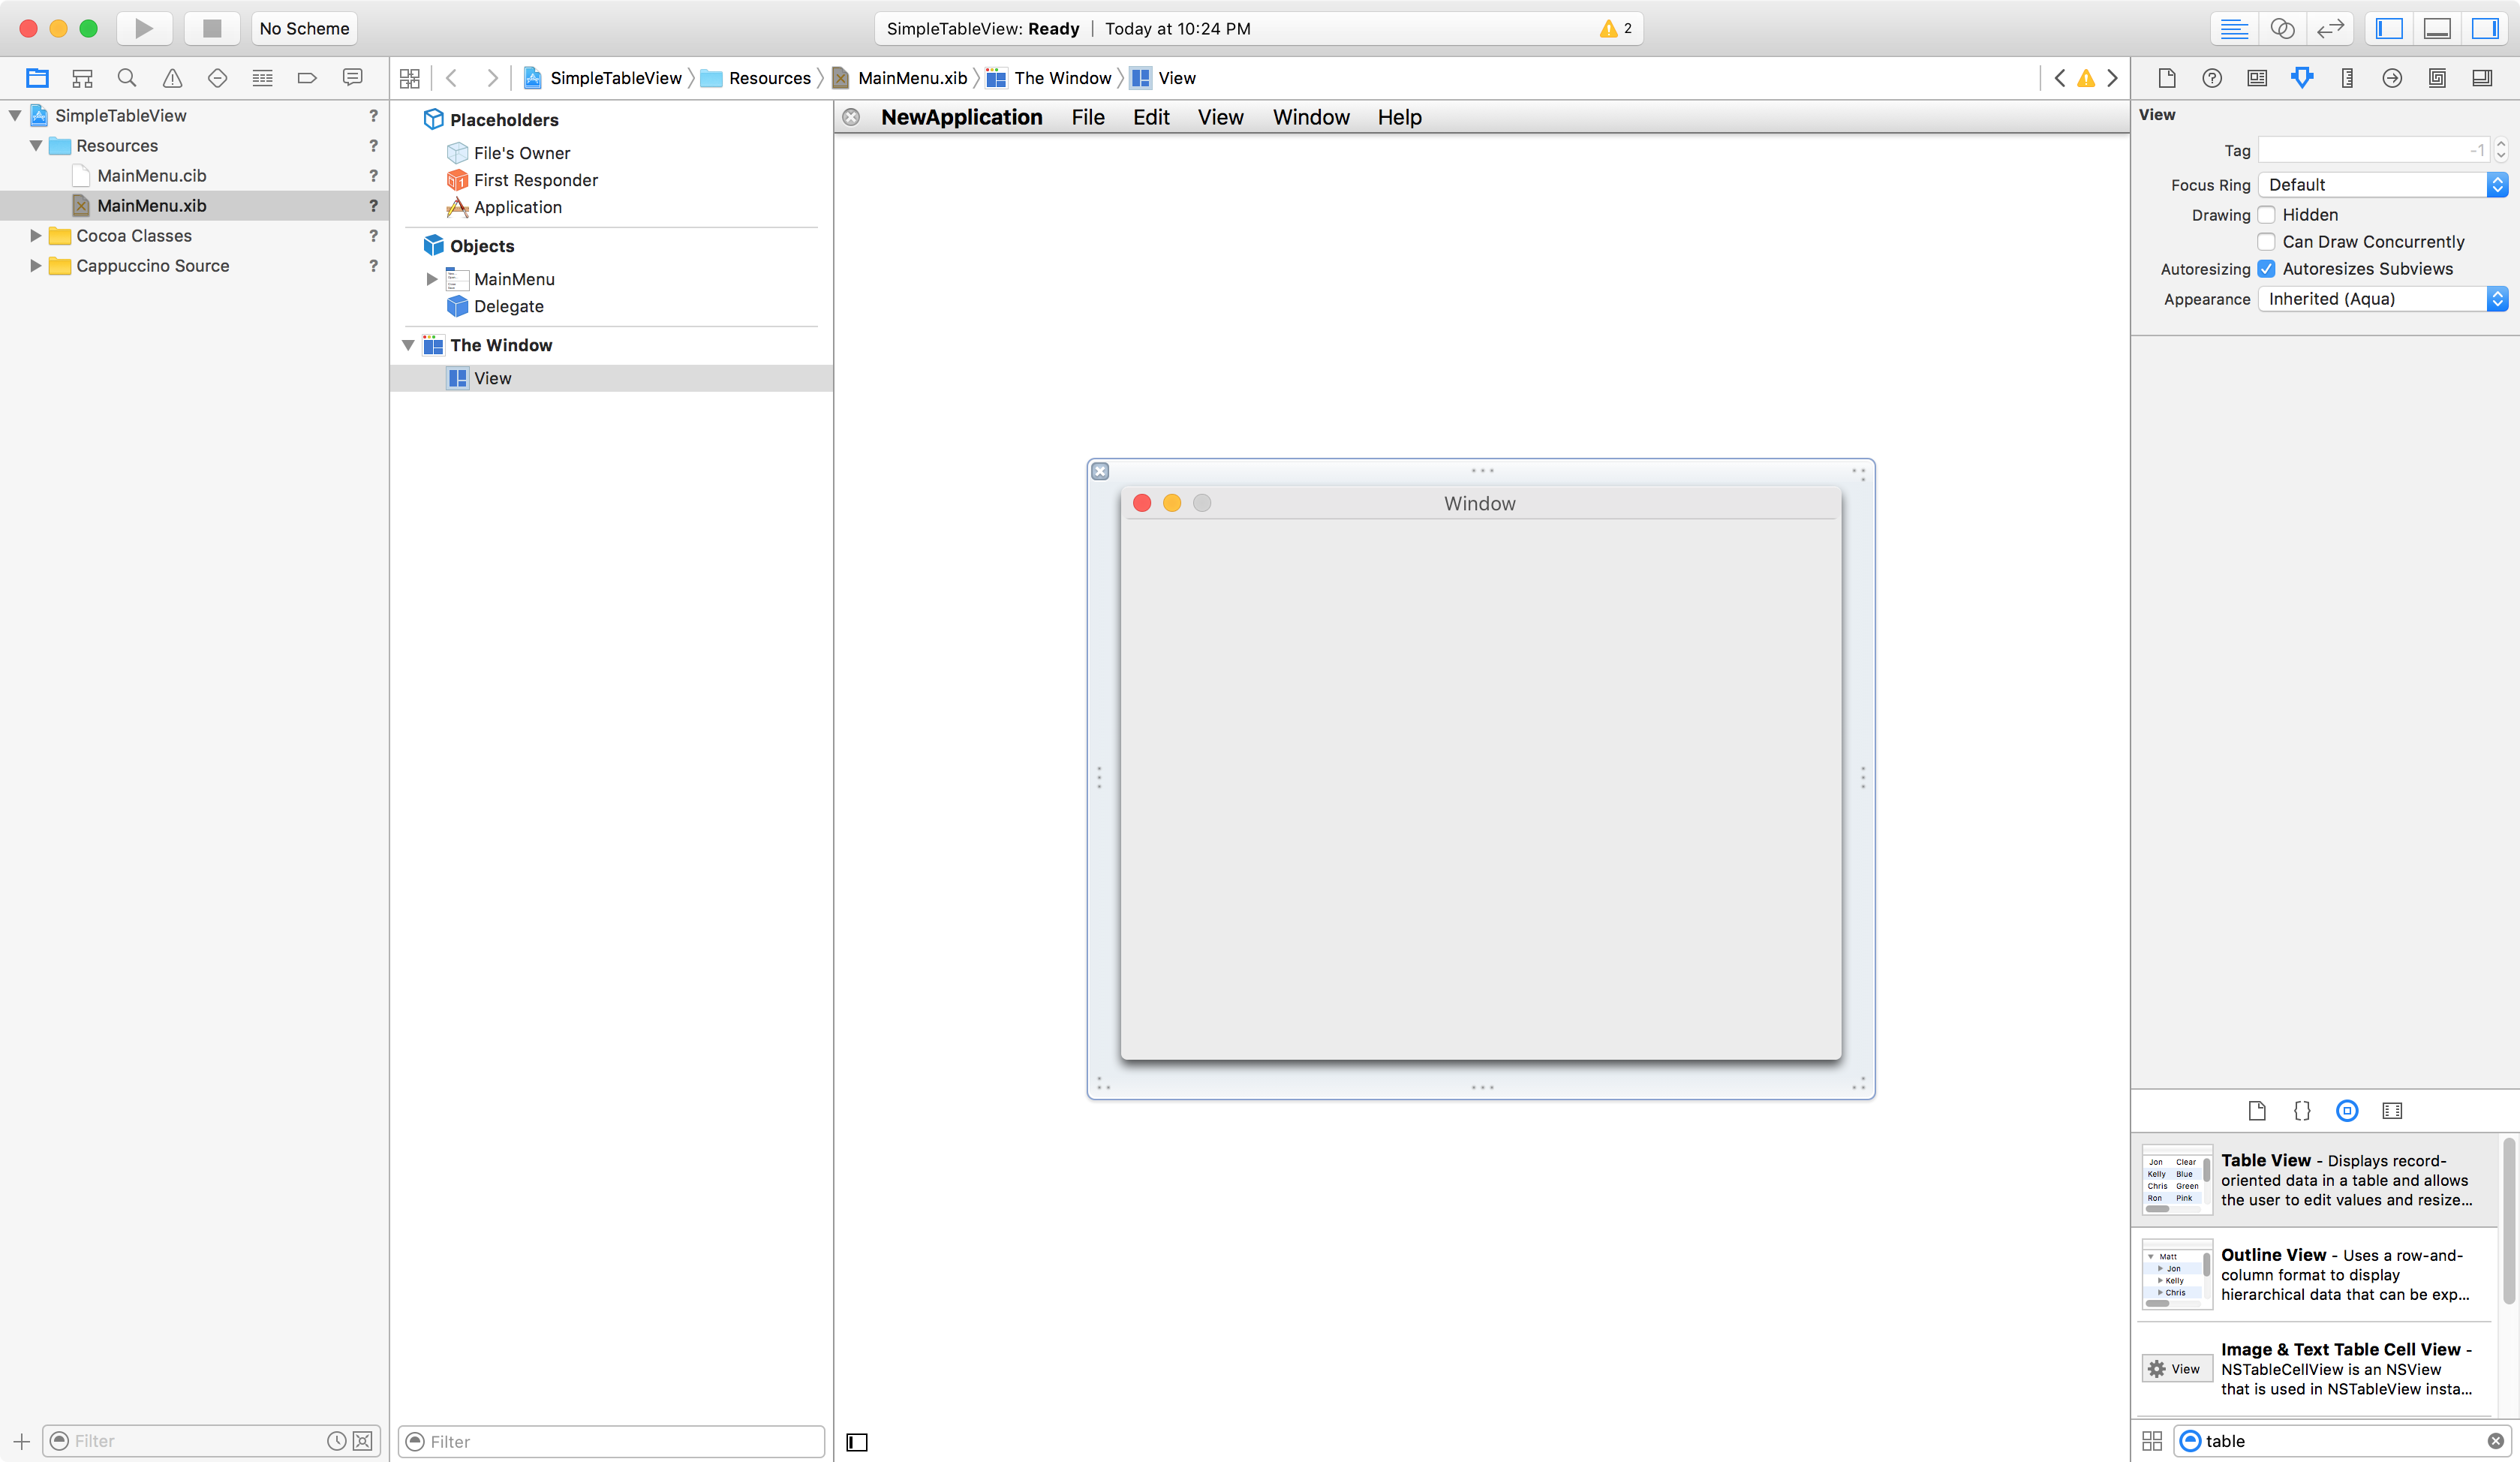
Drag and drop “Table View” onto the Window.
By dragging the right corner of Table View, resize it to fill the Window.
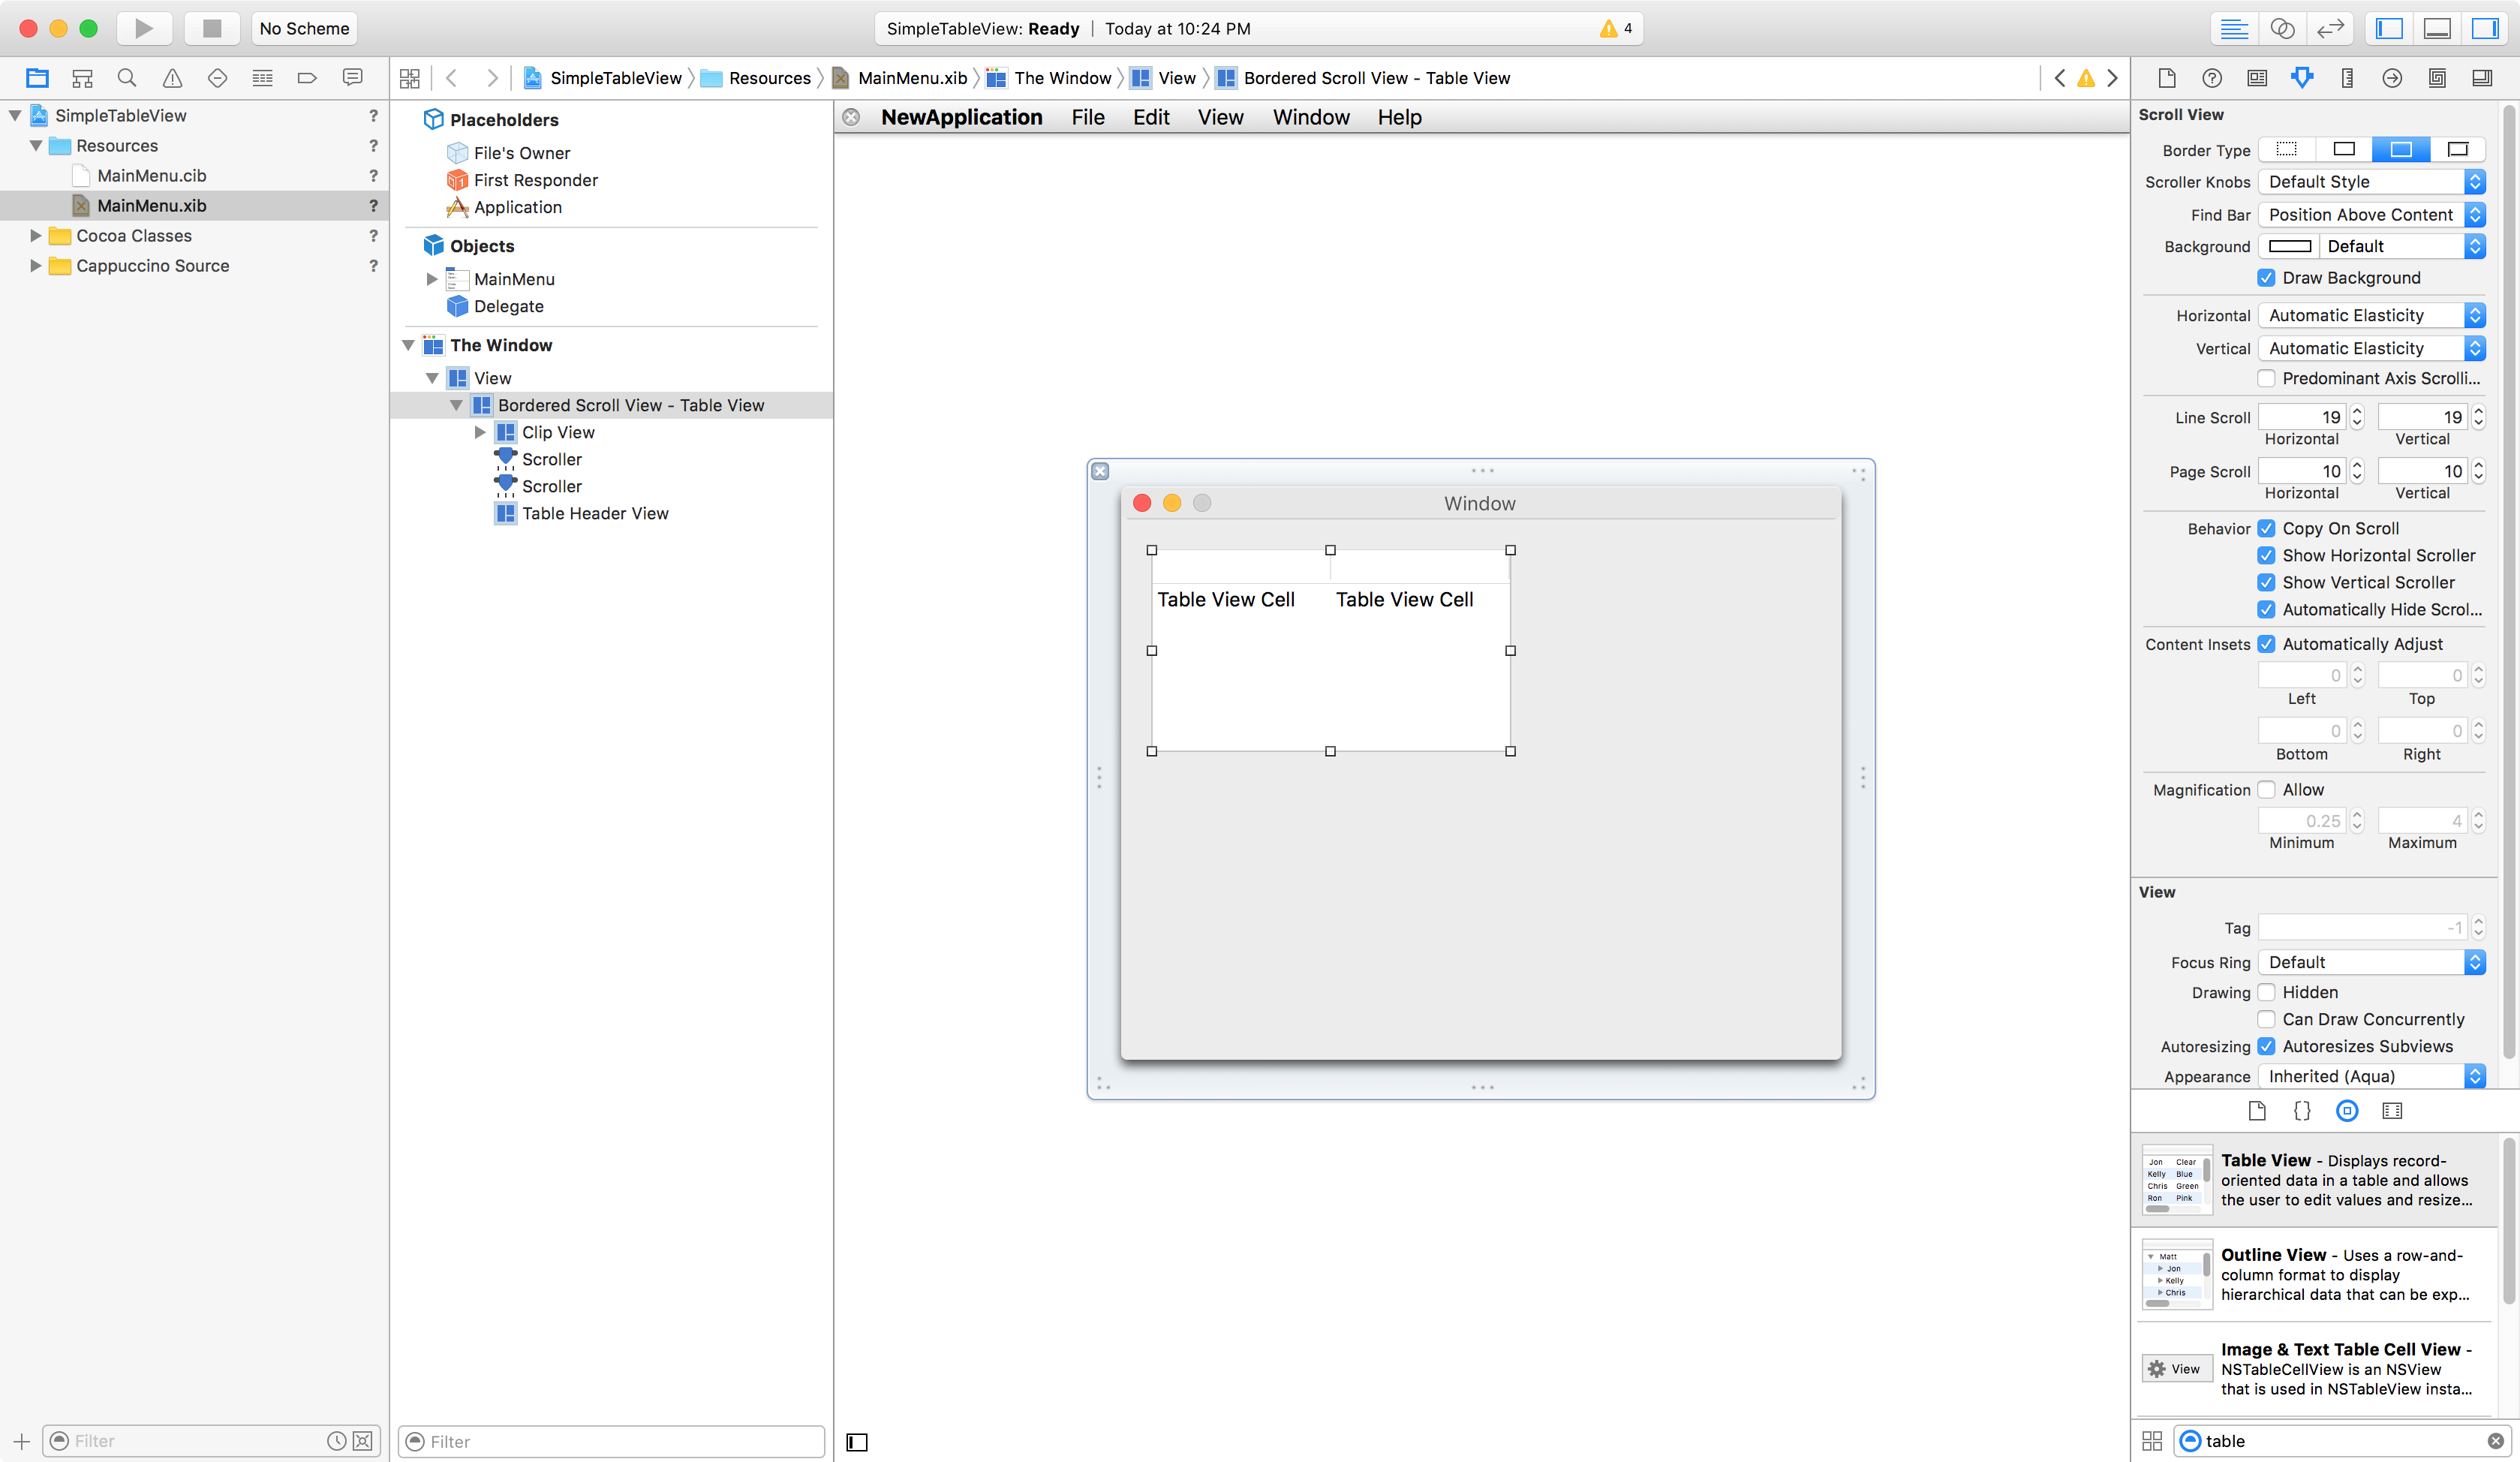
Choose “Table View” in the Document Outline, then open the Attributes inspector by clicking its button on the top right side of Xcode. In this tutorial we will a cell based table view (rather than a view based one), so we need to change the “Content Mode” from “View based” to “Cell based”.
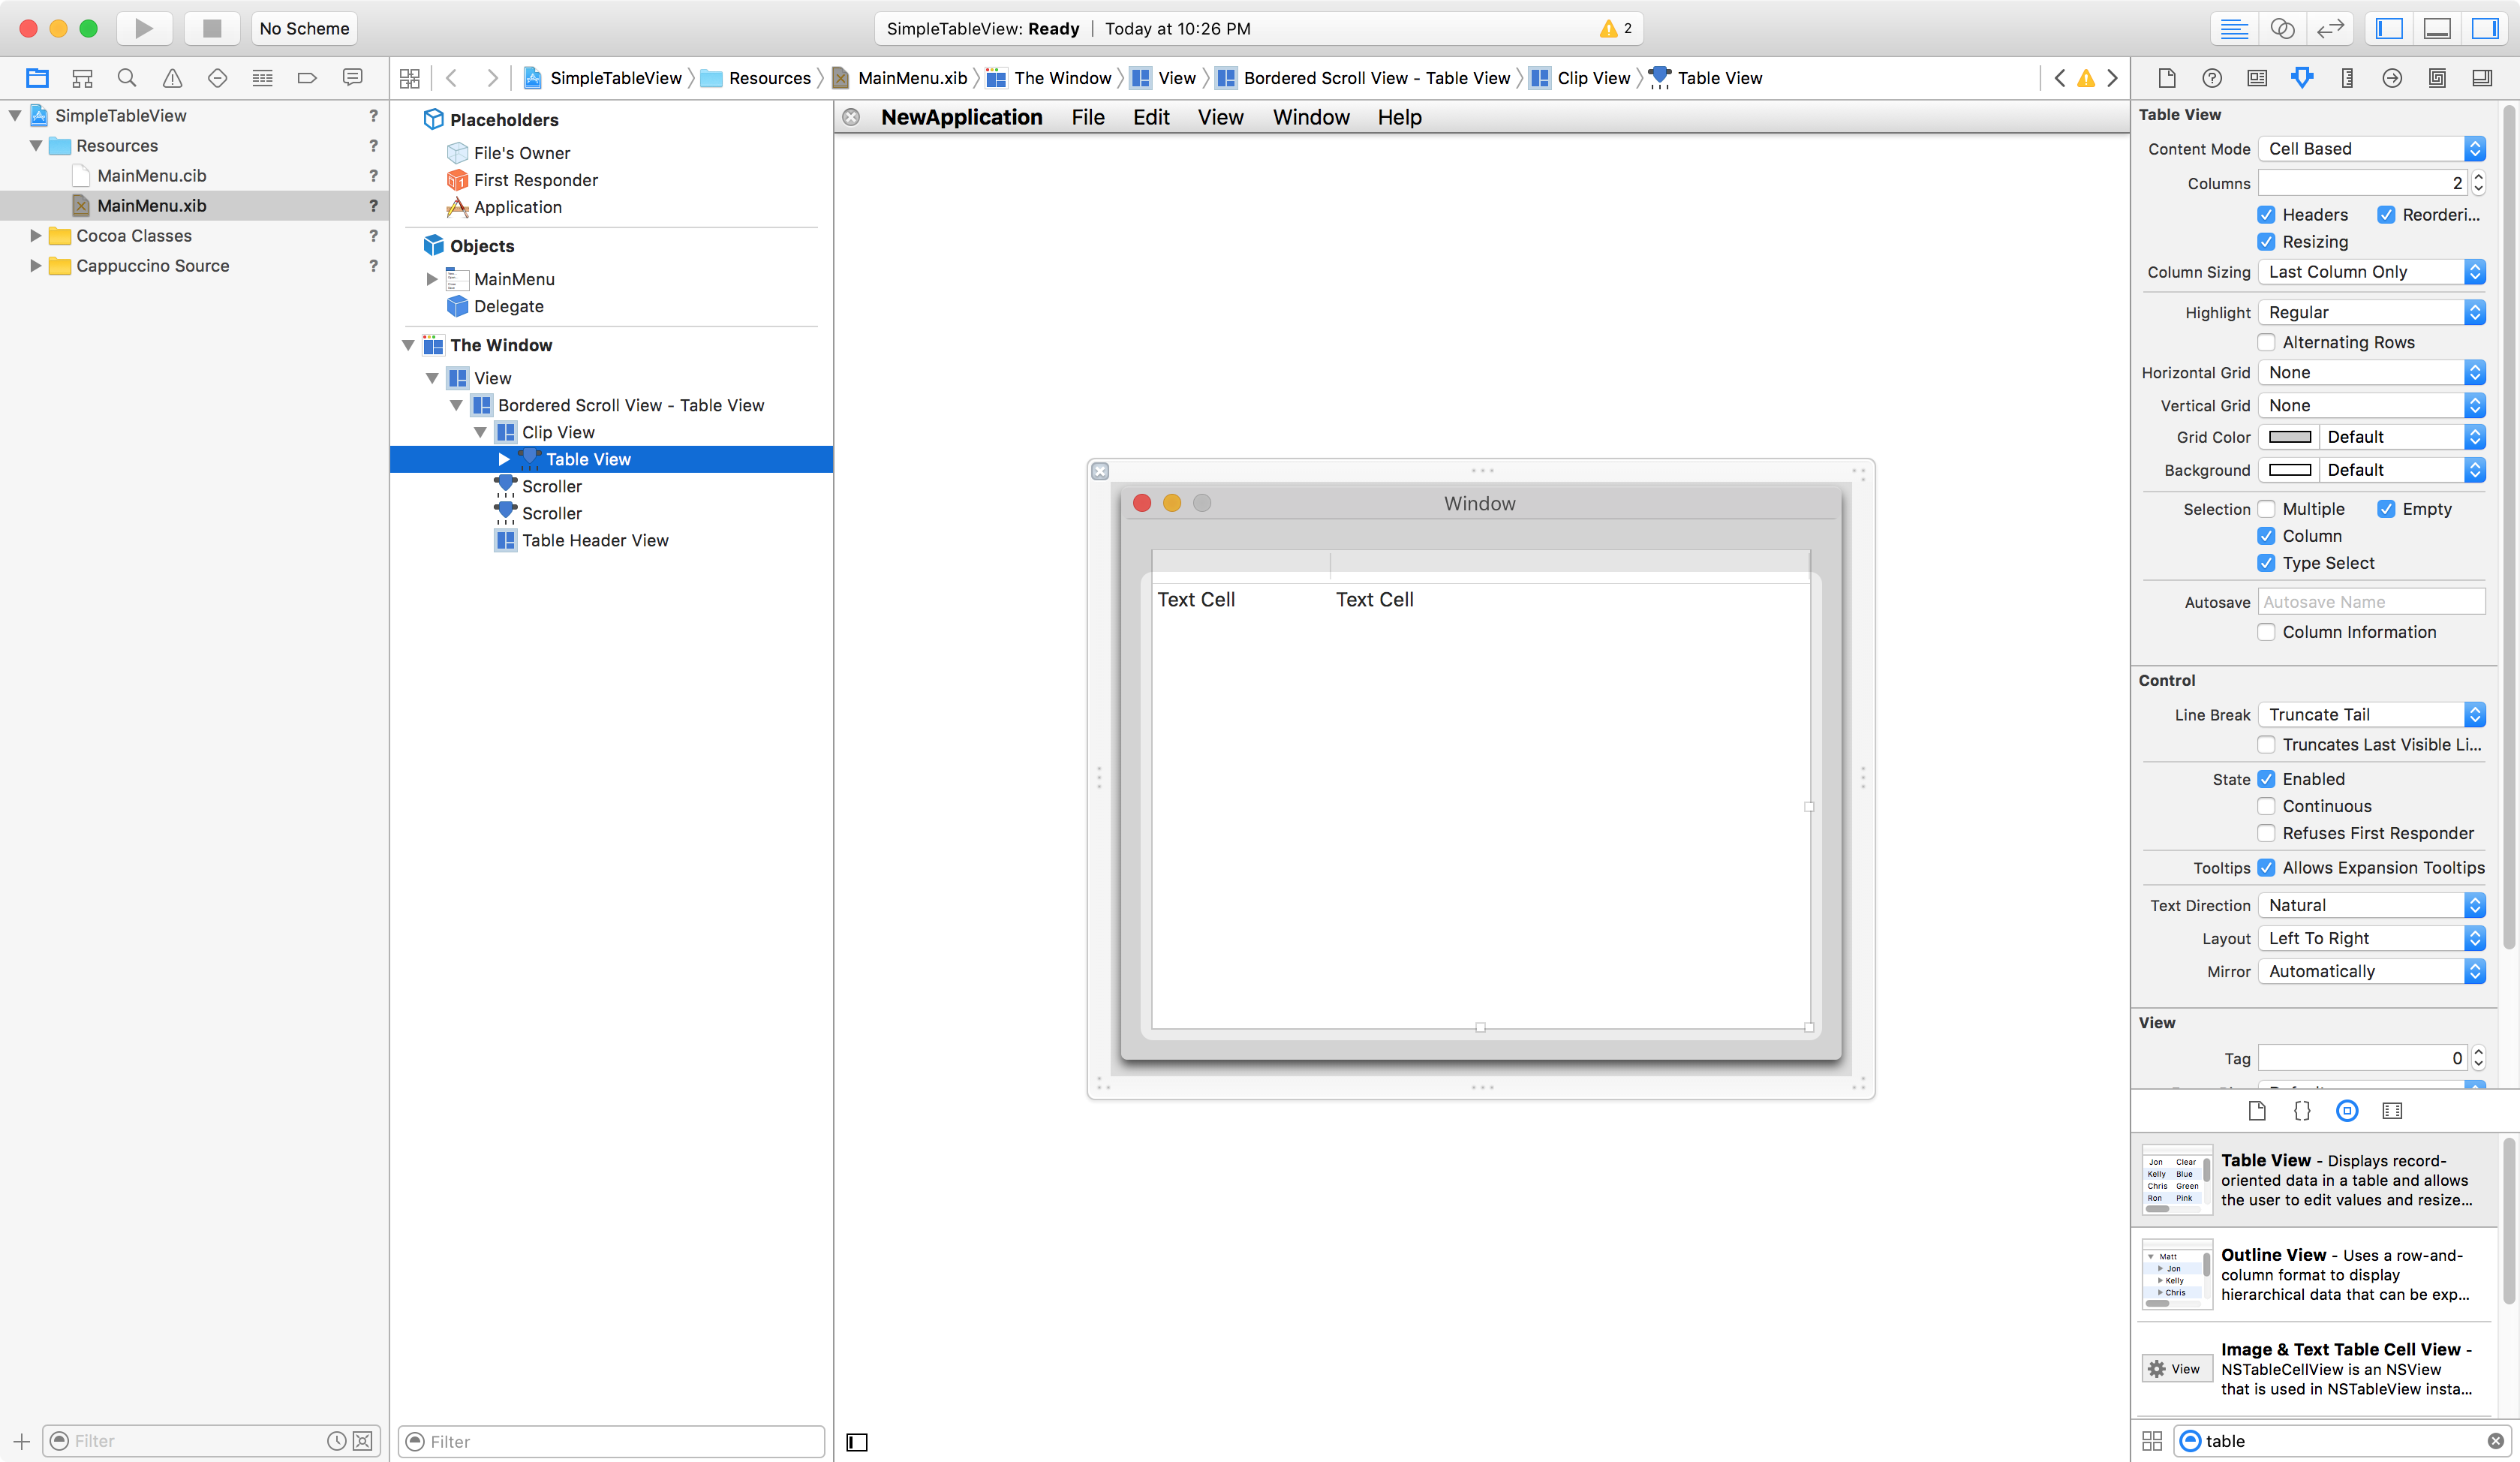
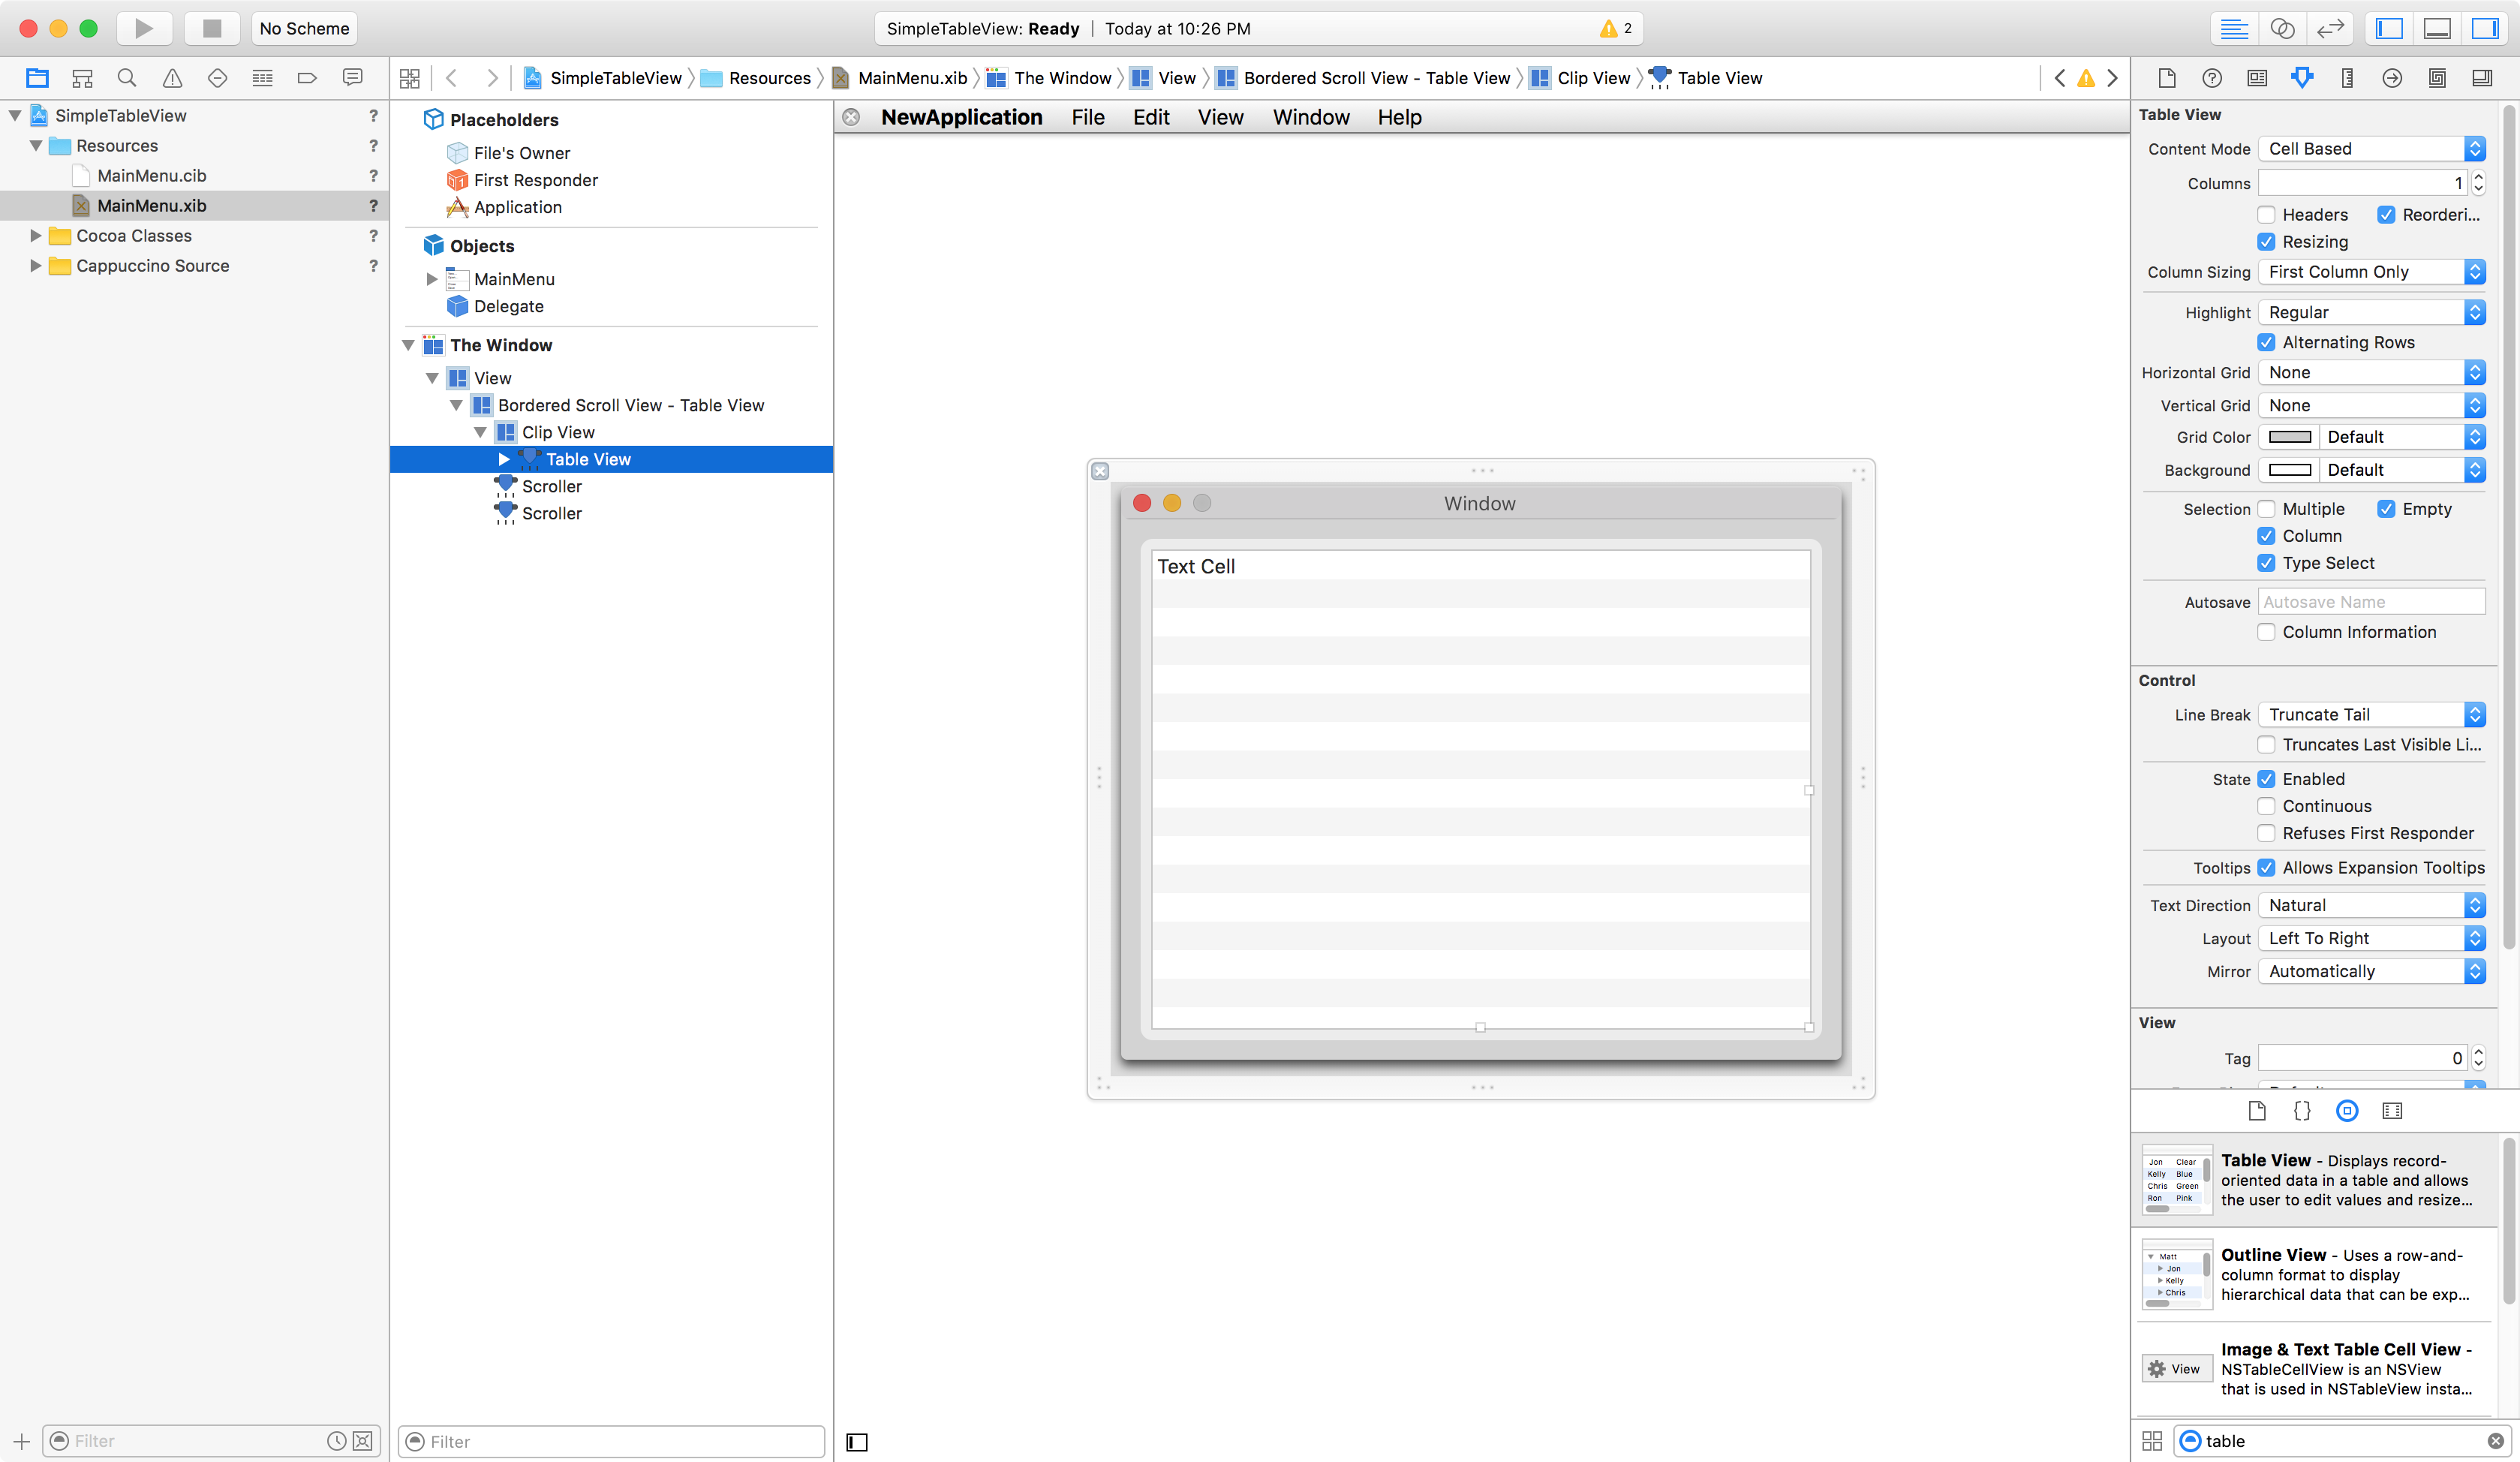
As we need only one column, reduce the column number from 2 to 1. We don’t need a header, so uncheck that. Set the “Column Sizing” to “First Column Only”. Let’s enable “Alternating Rows” too.
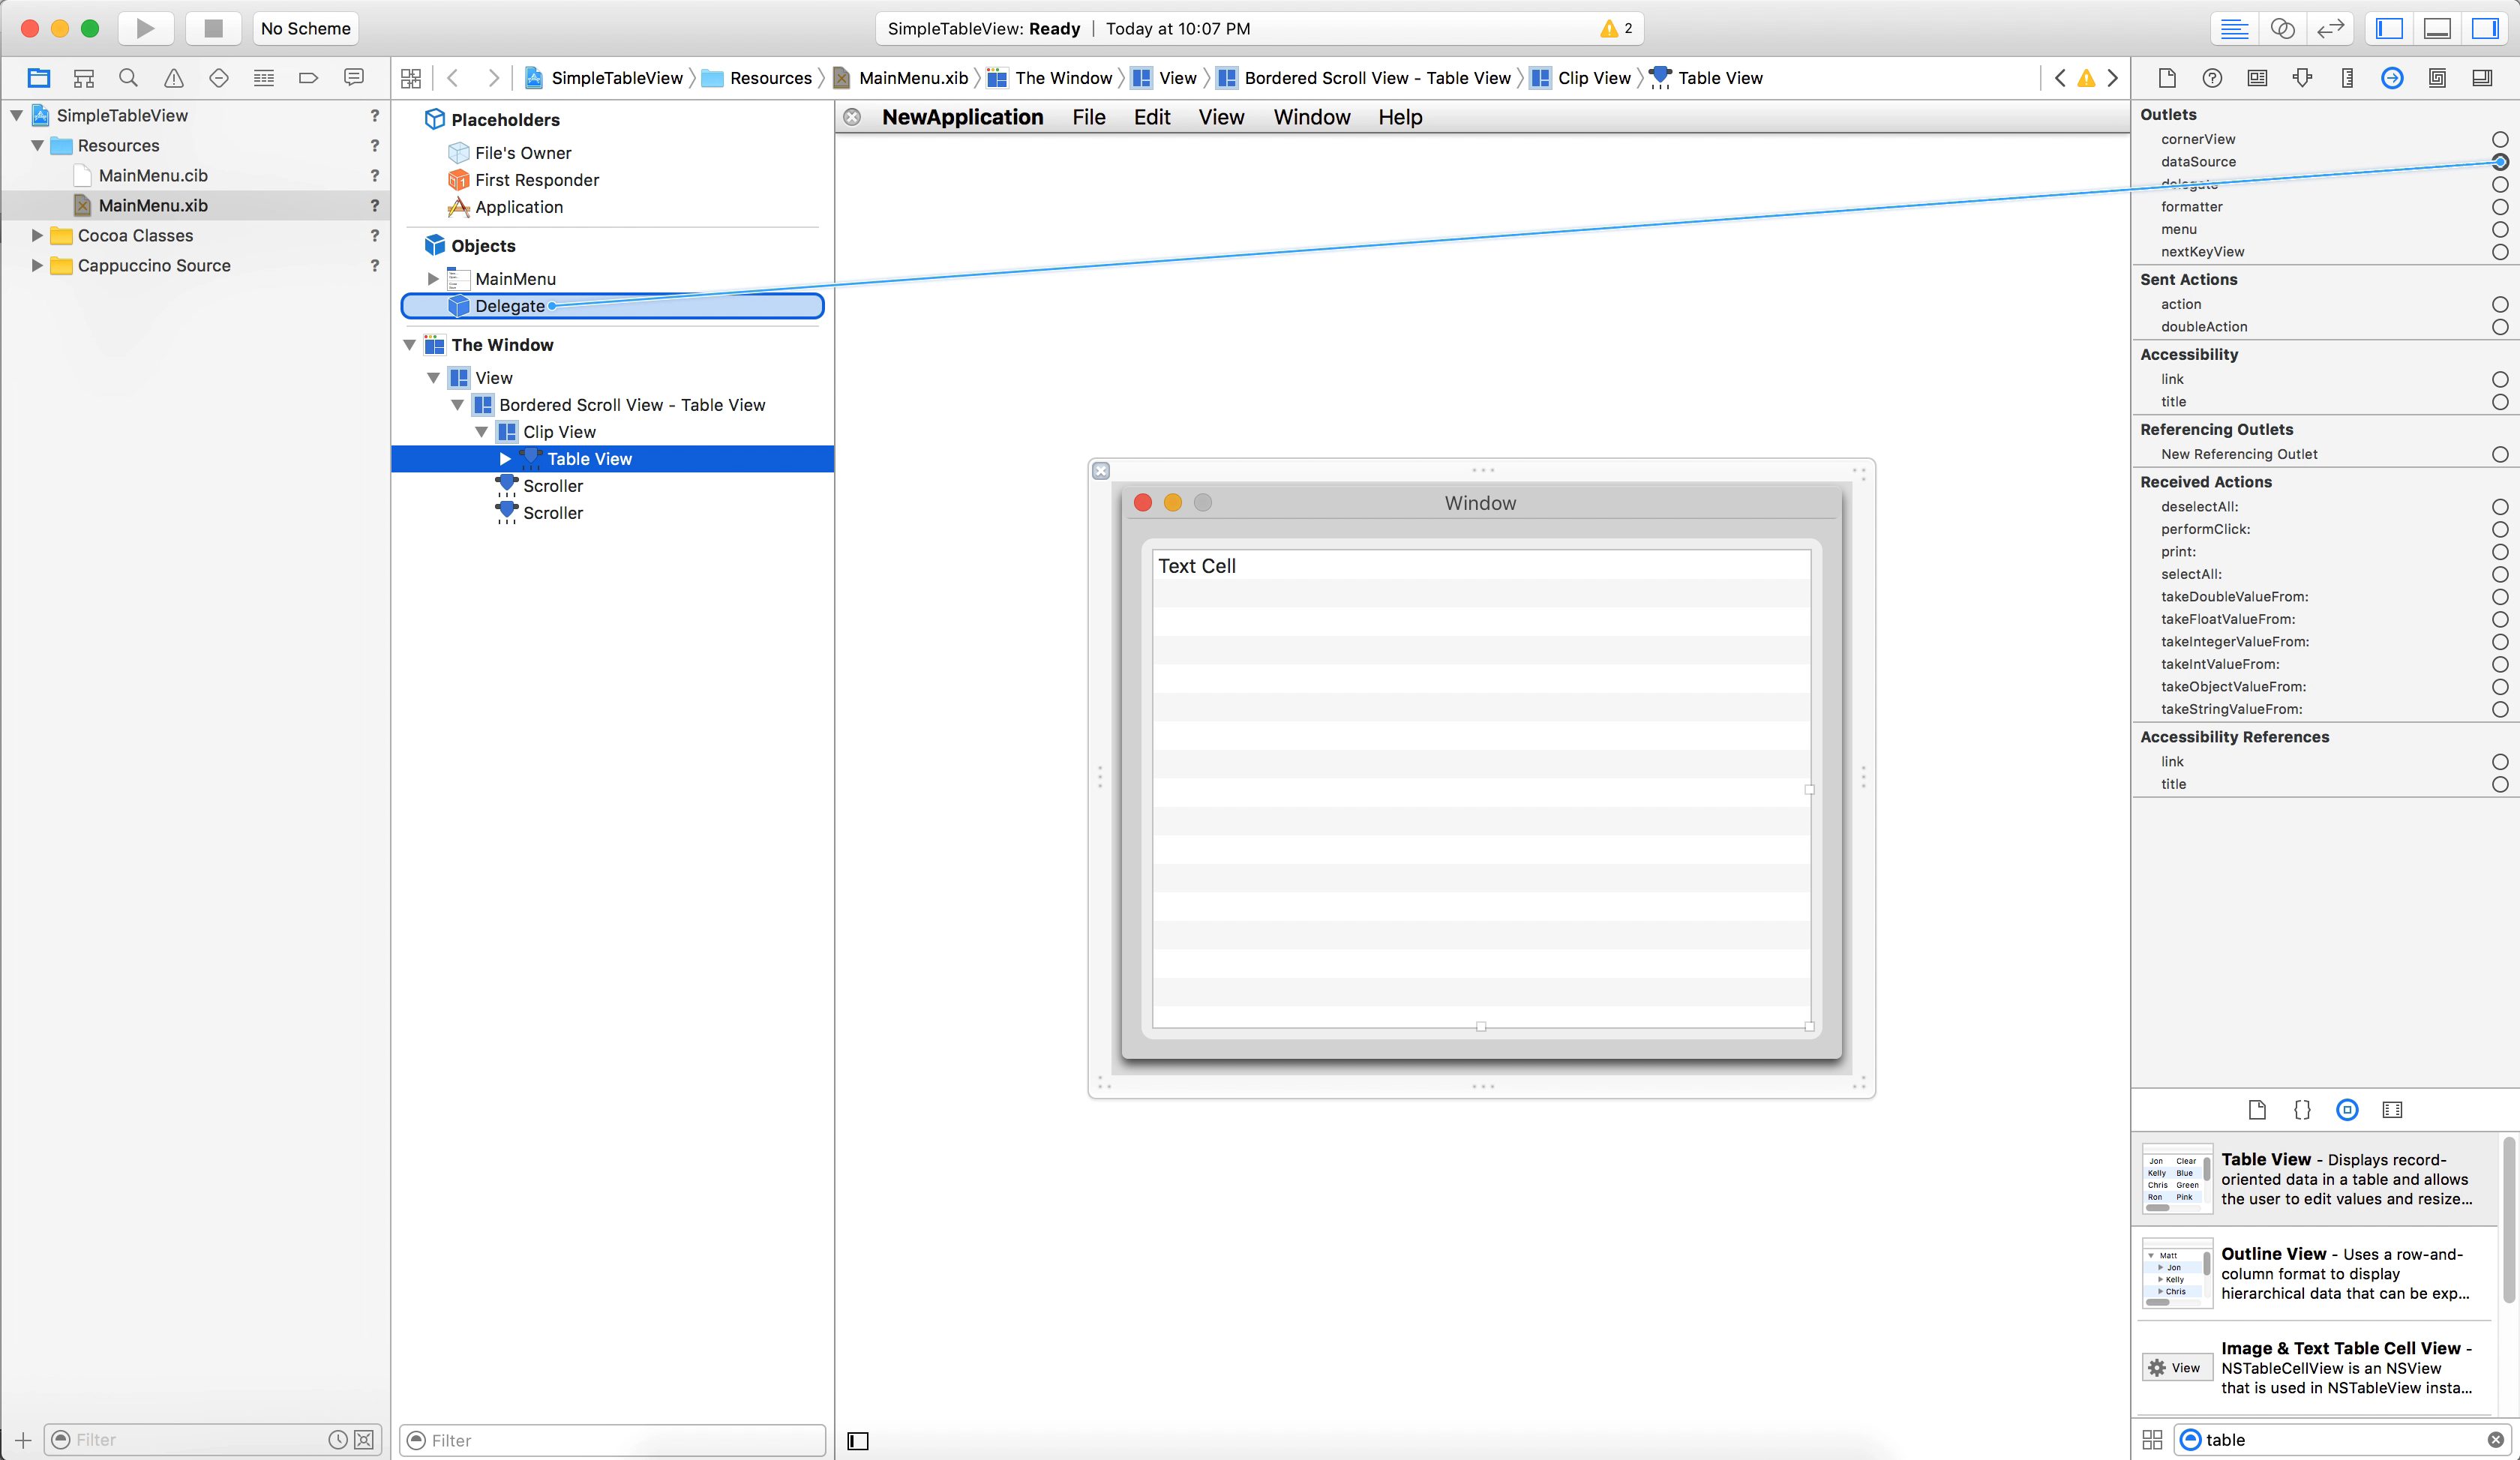
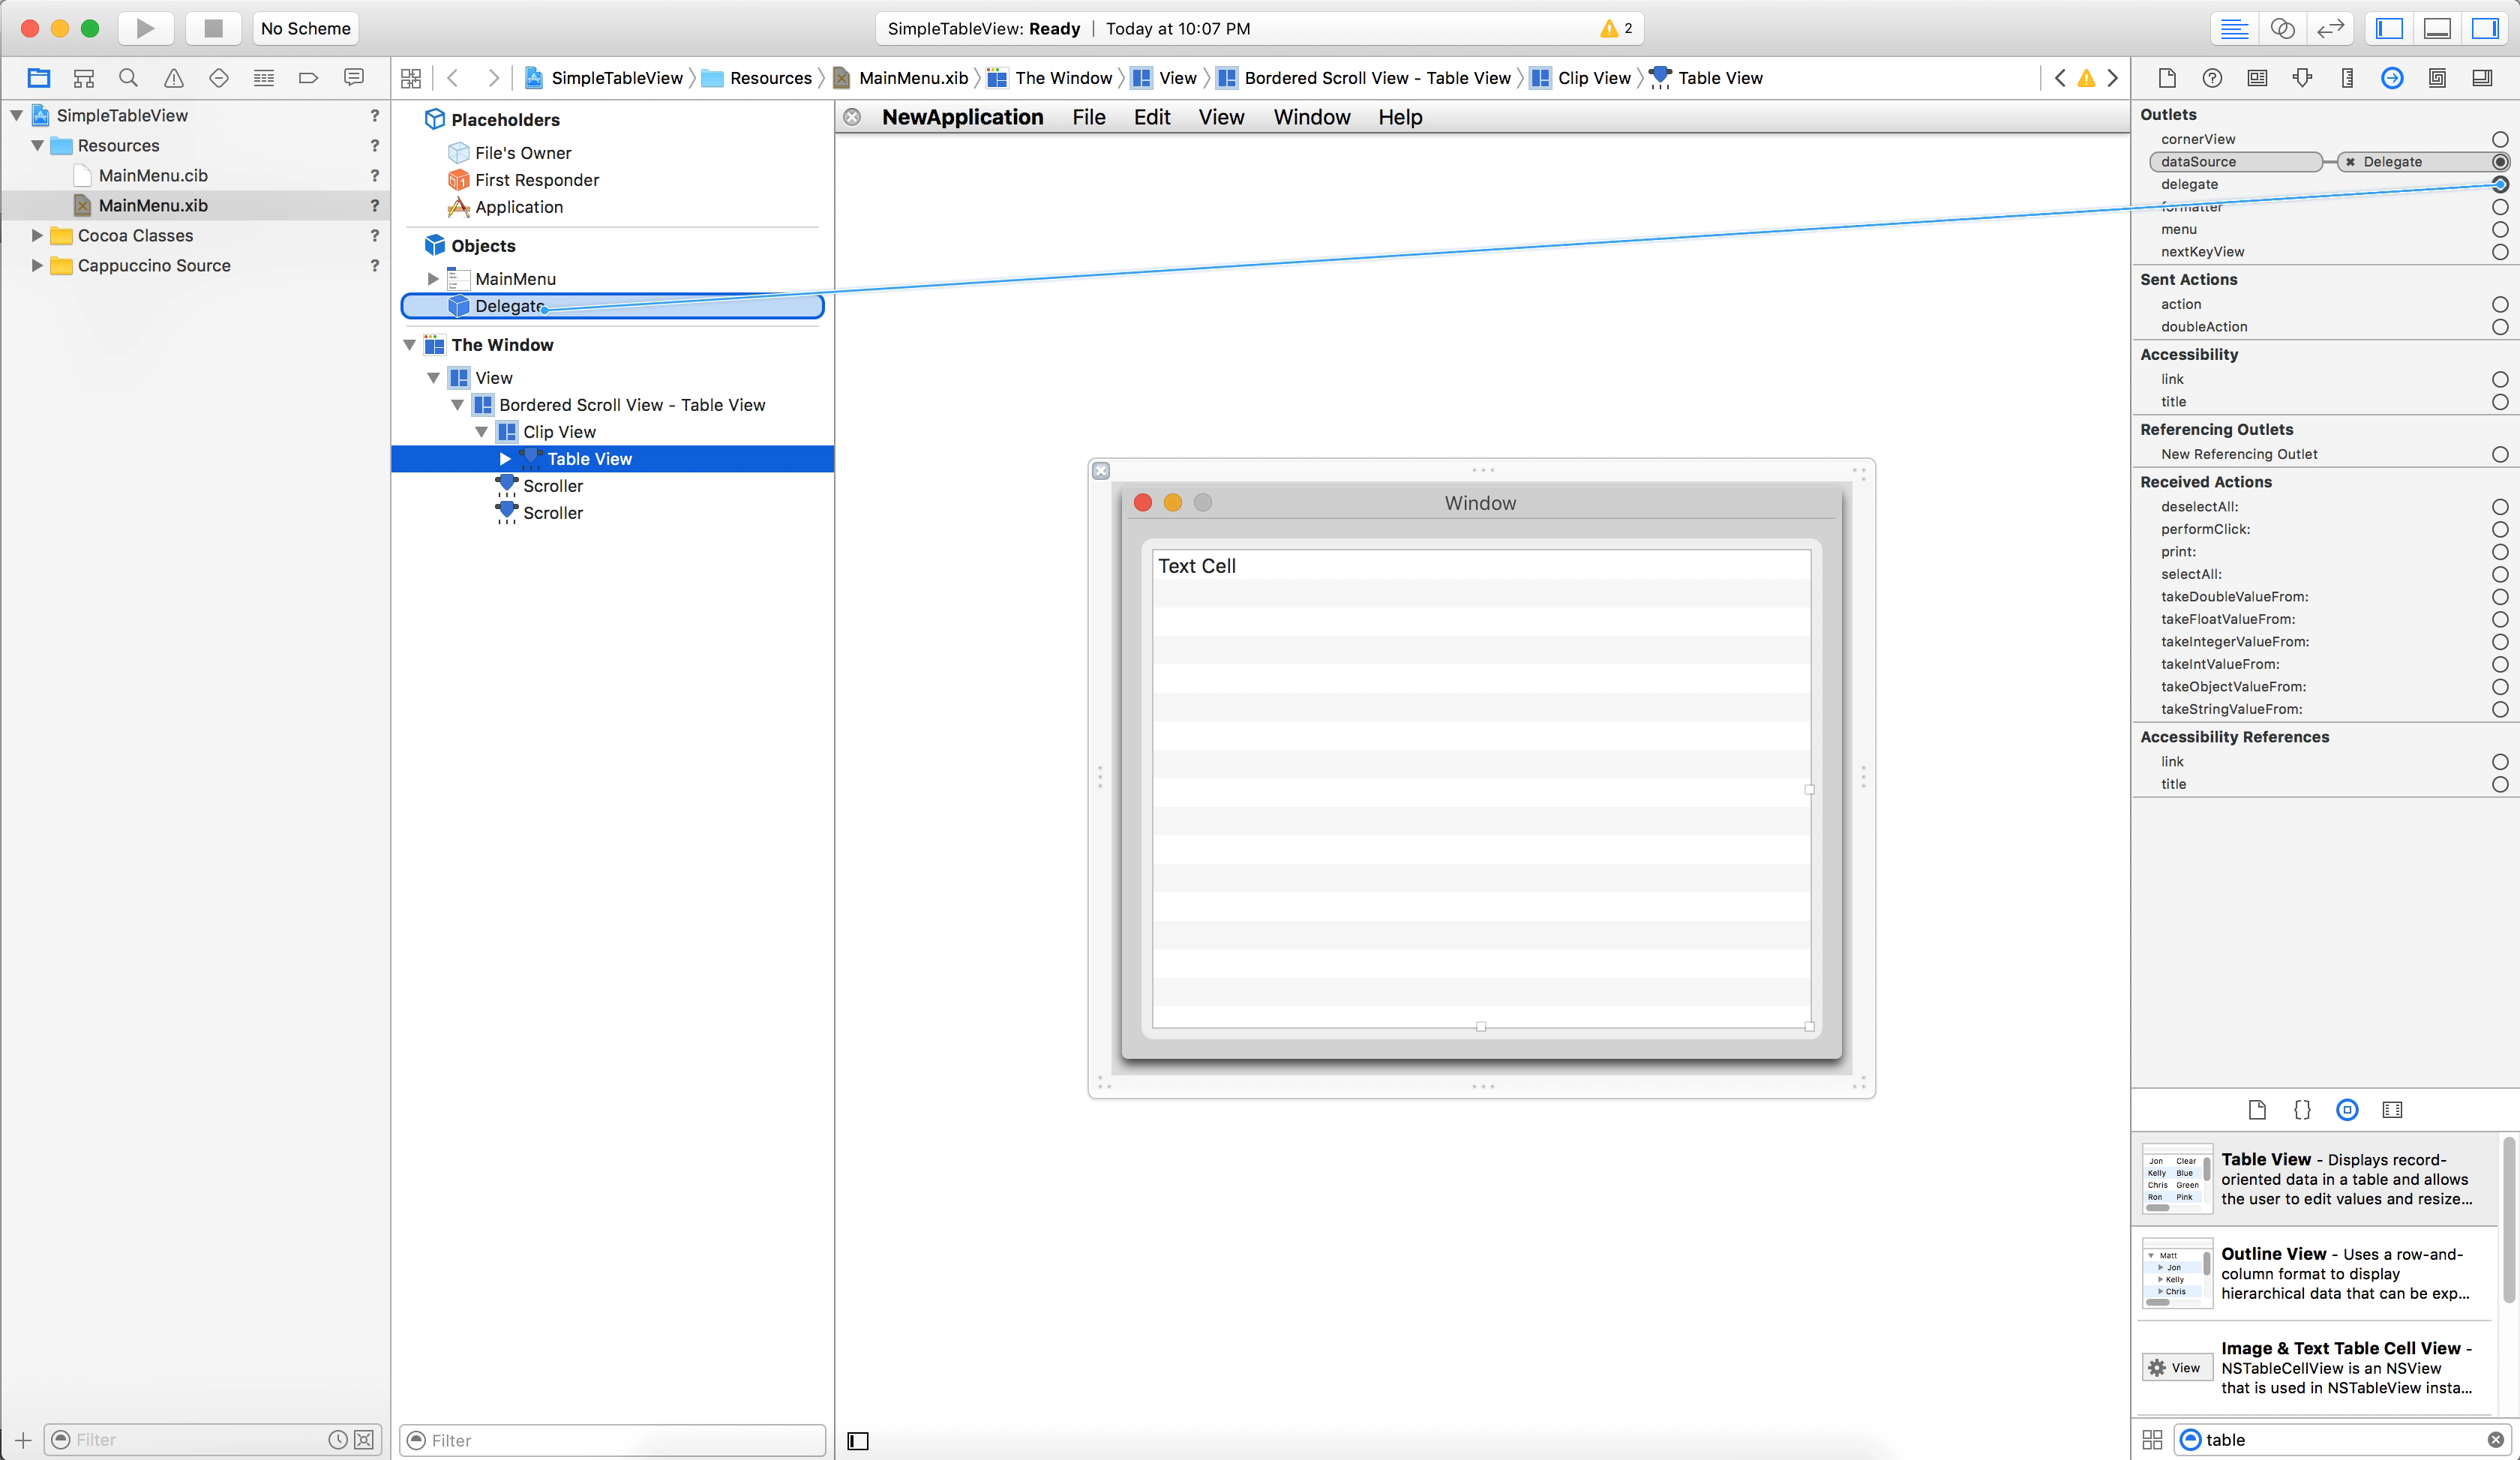
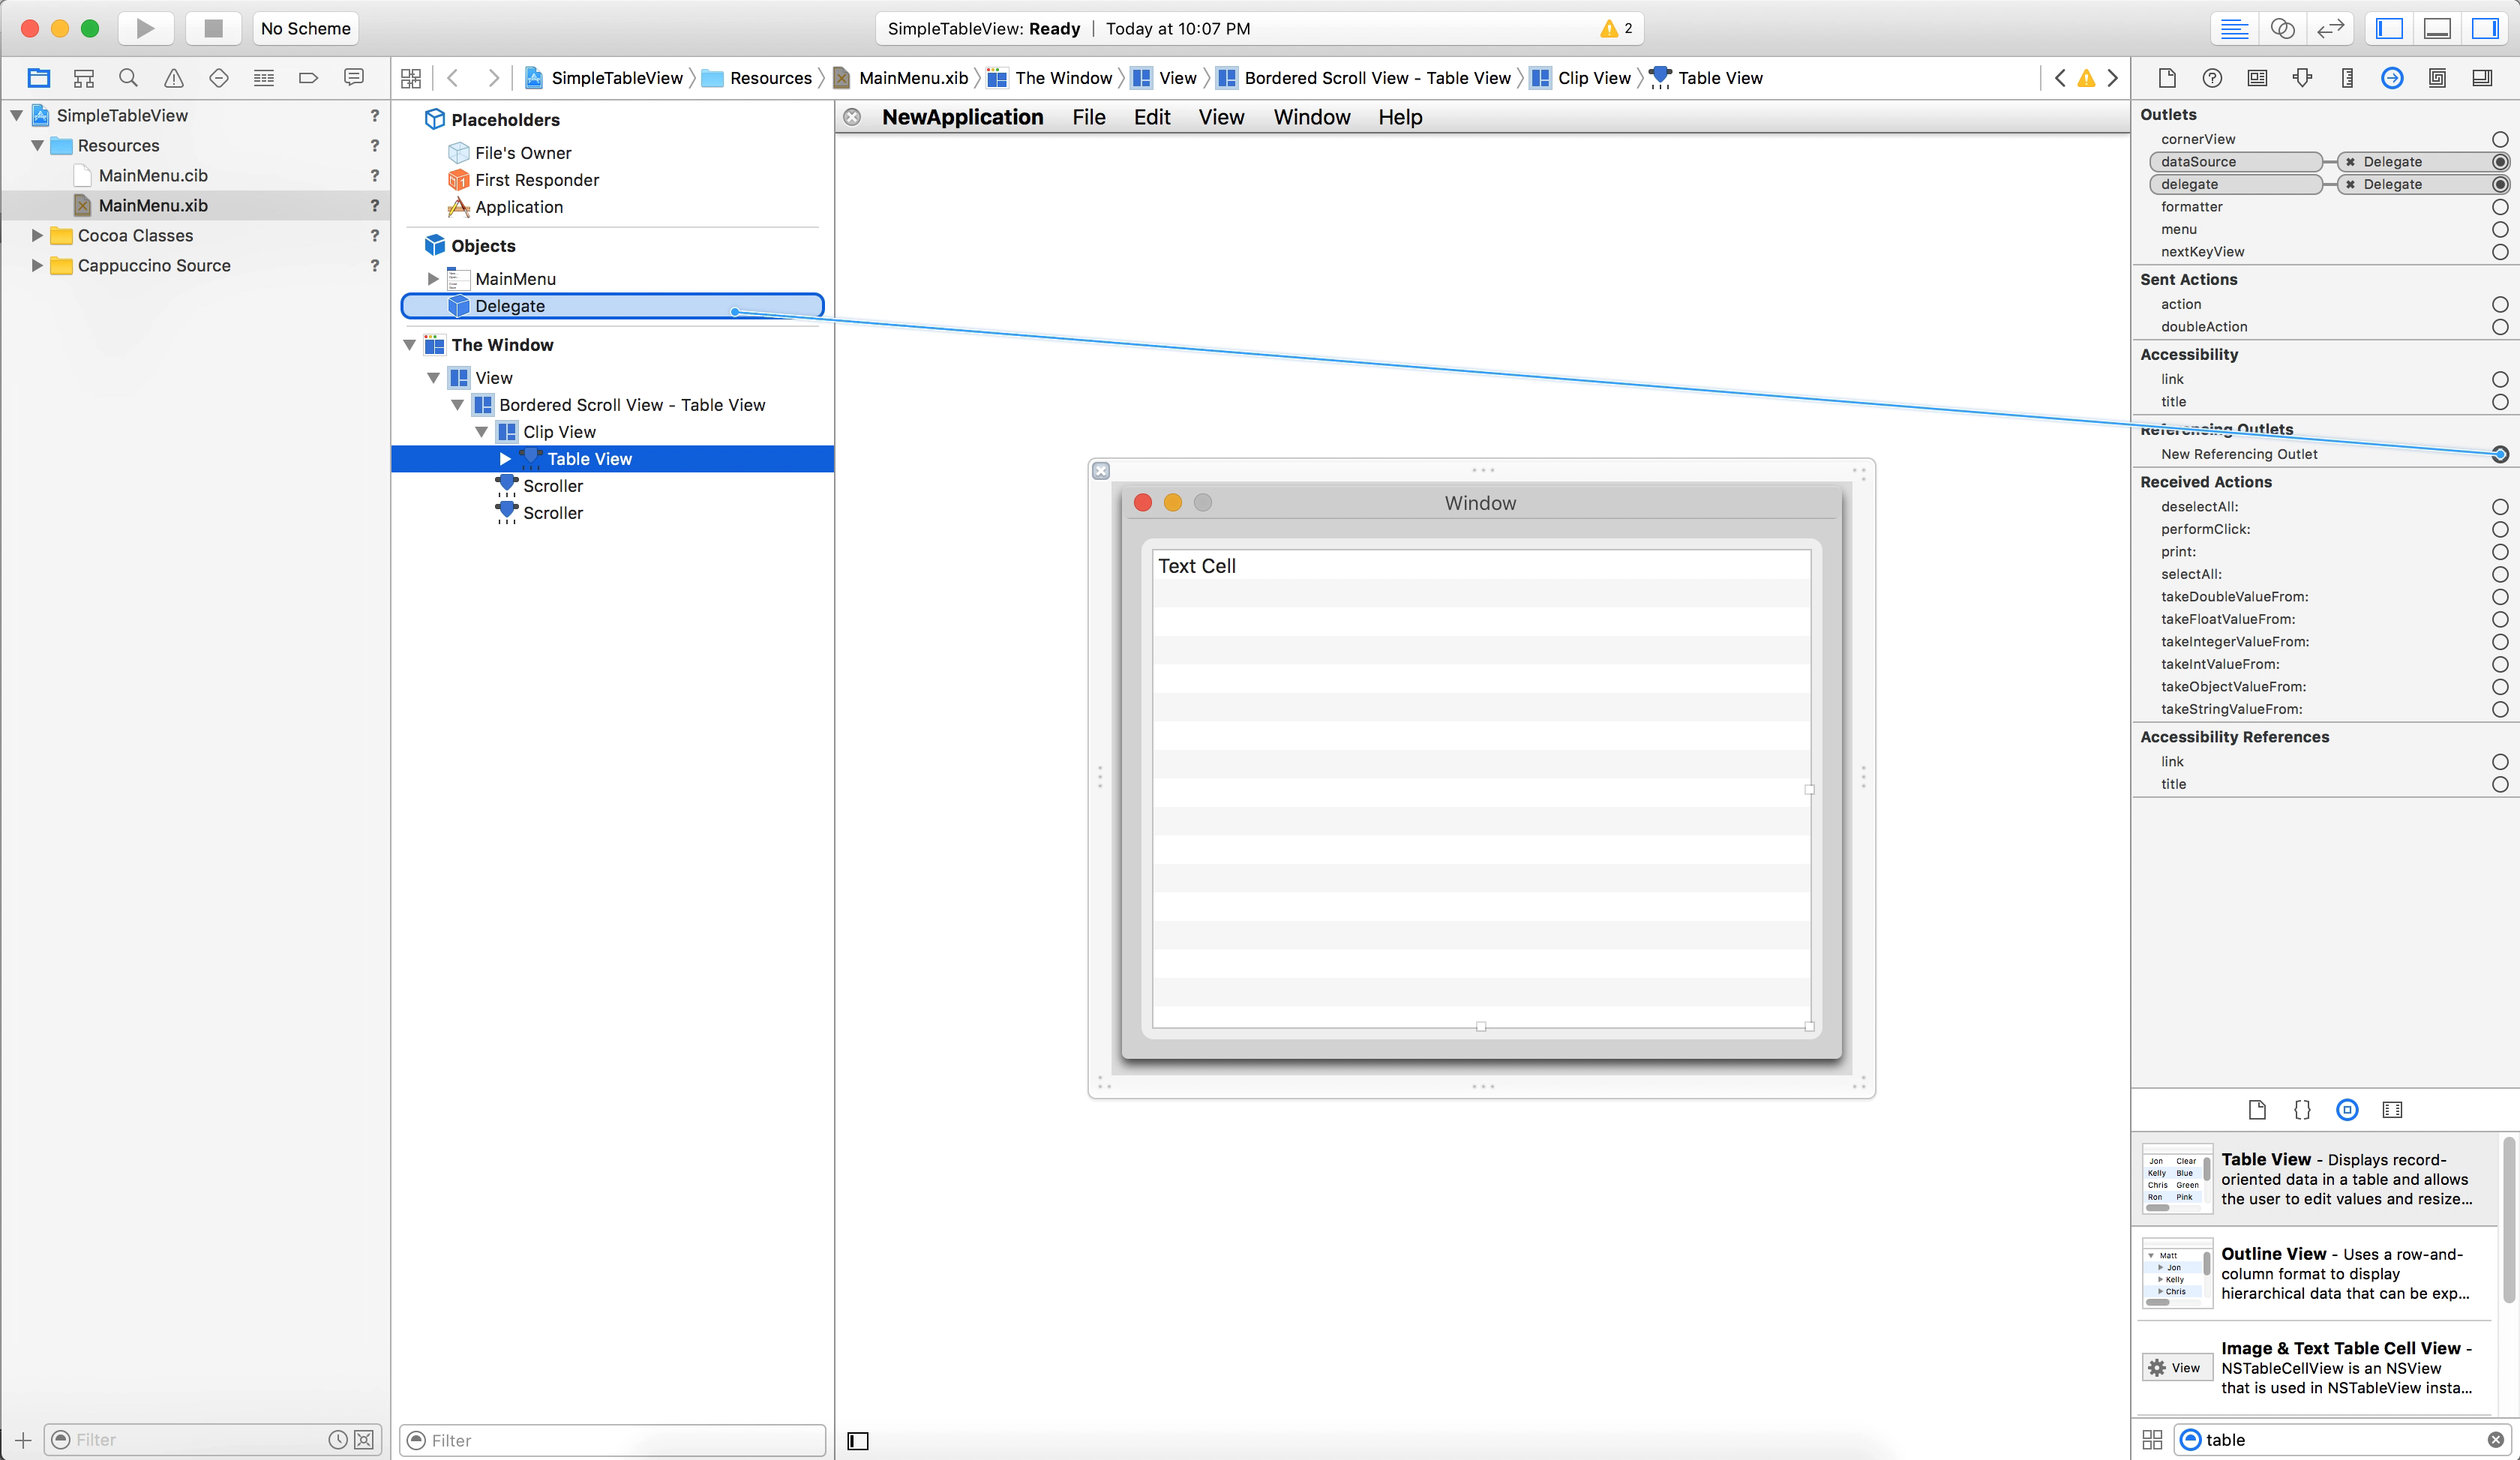
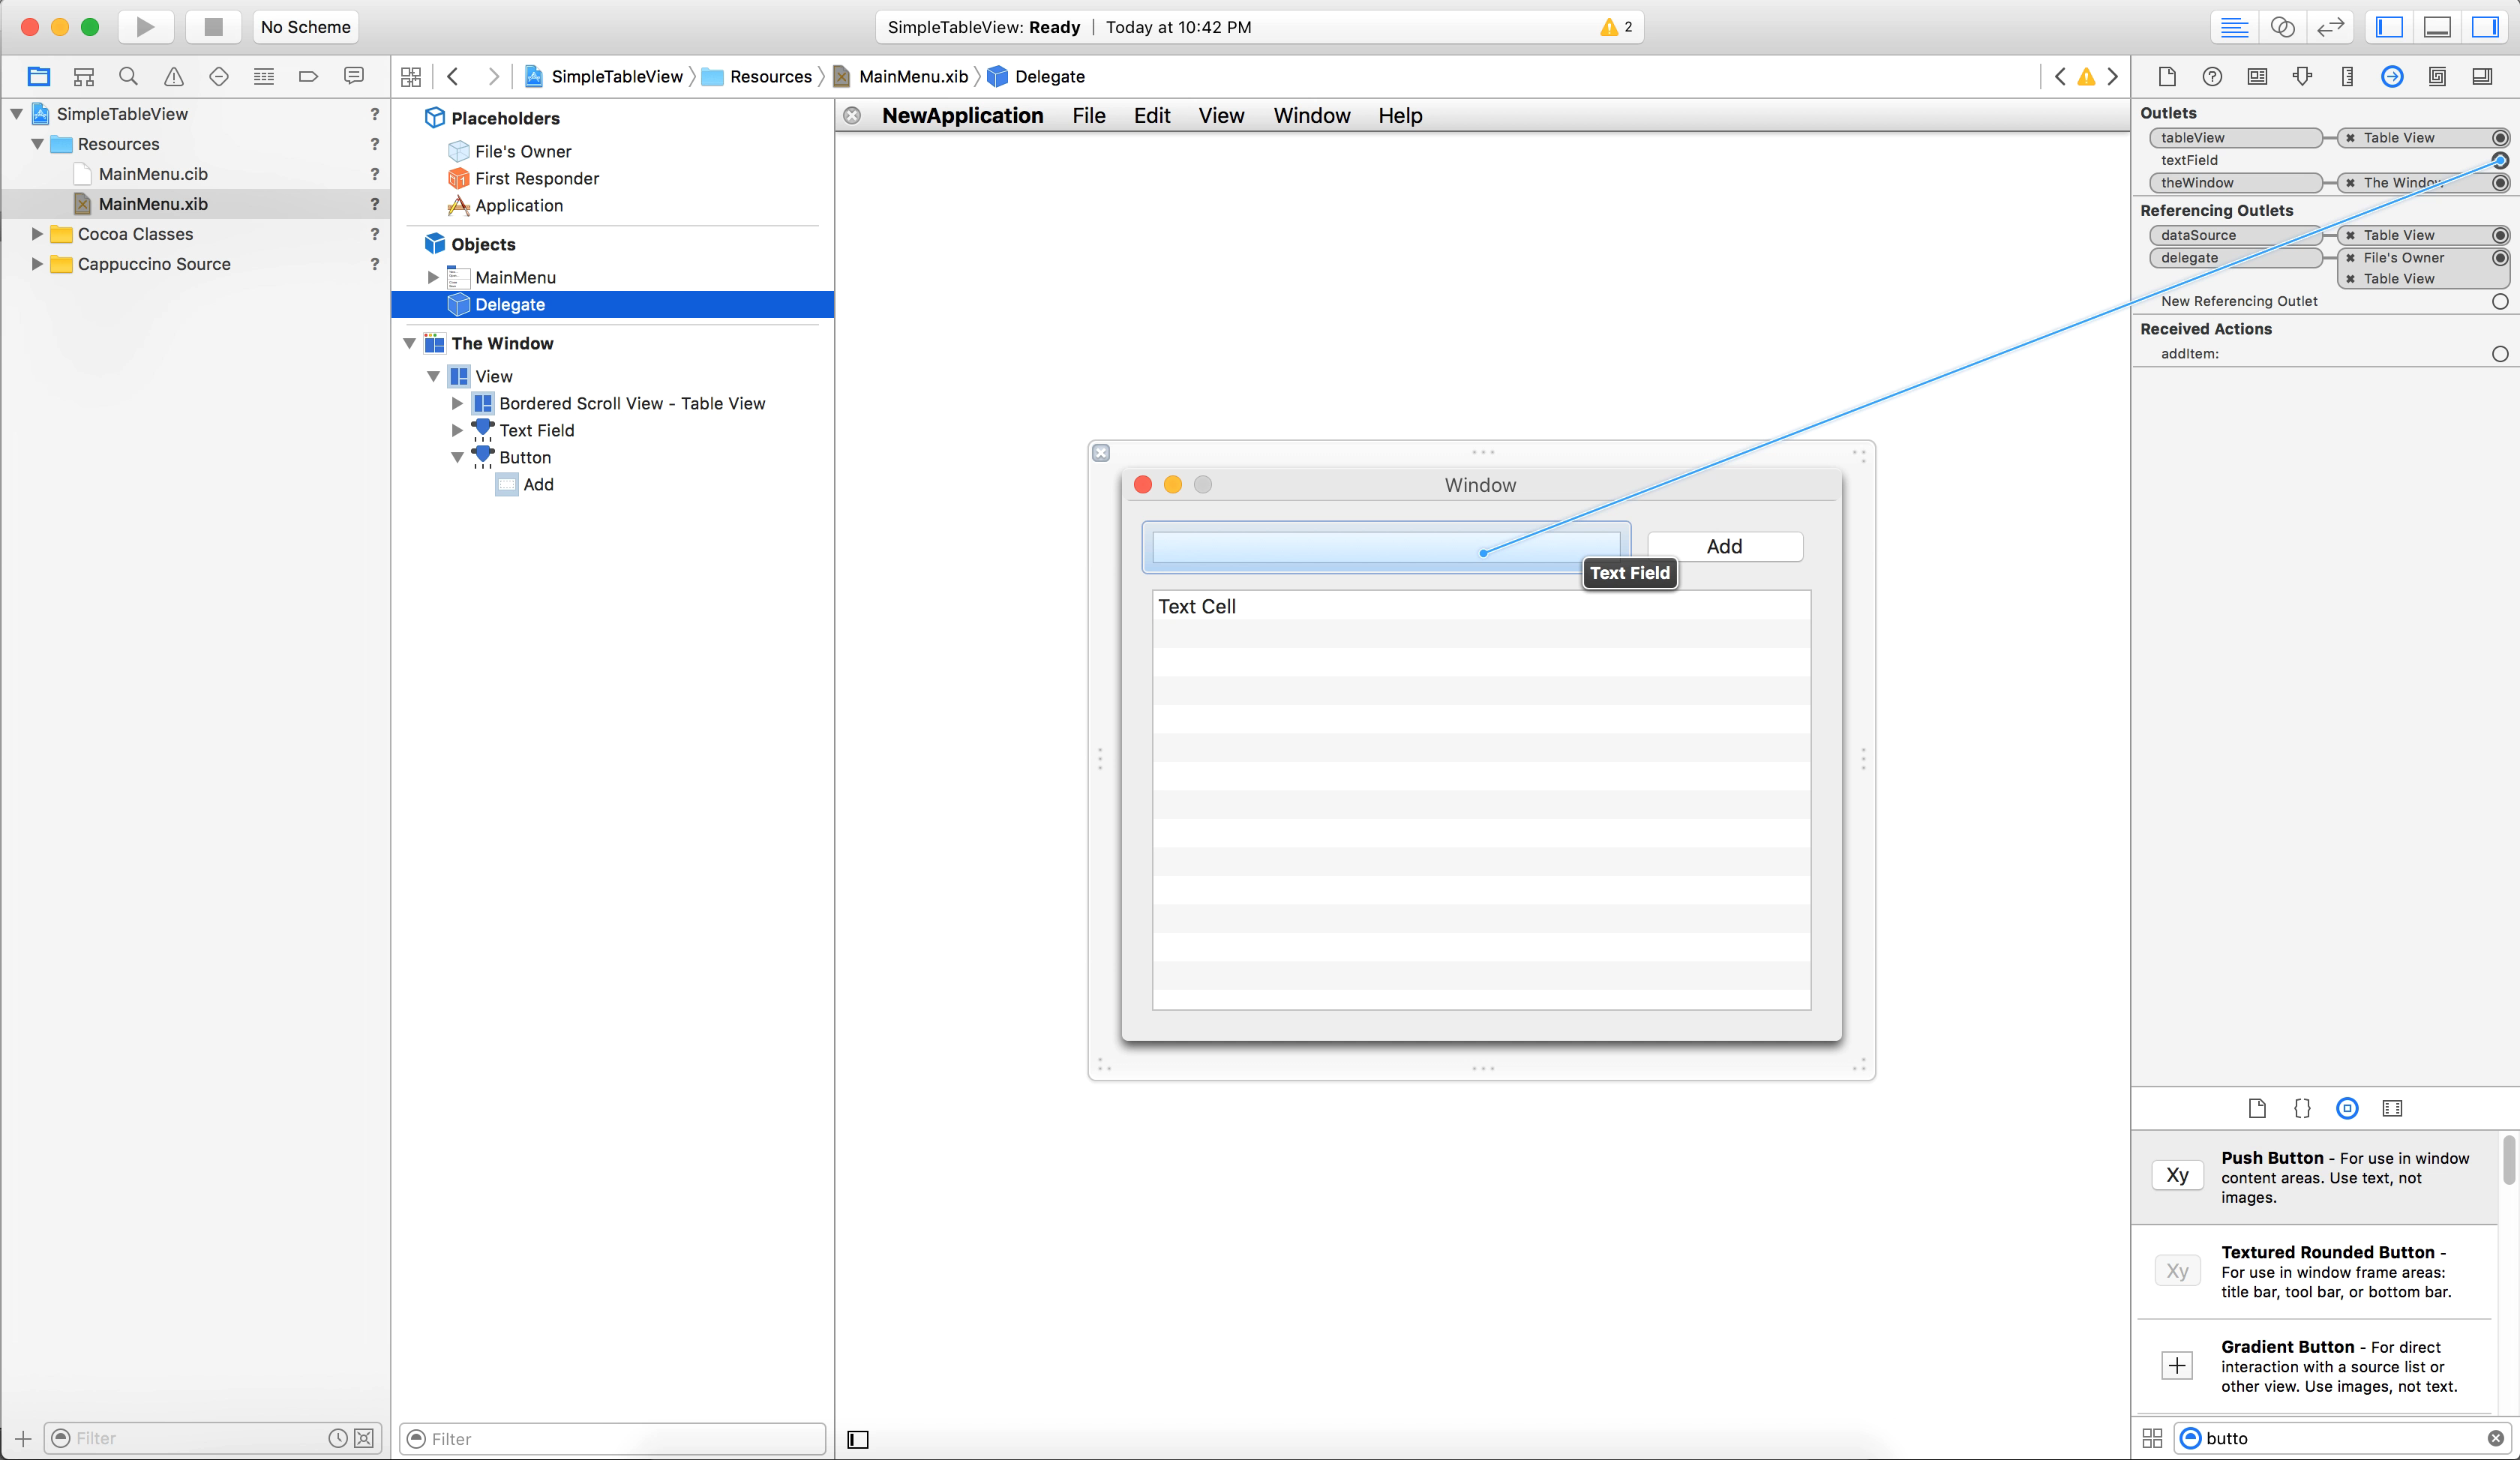
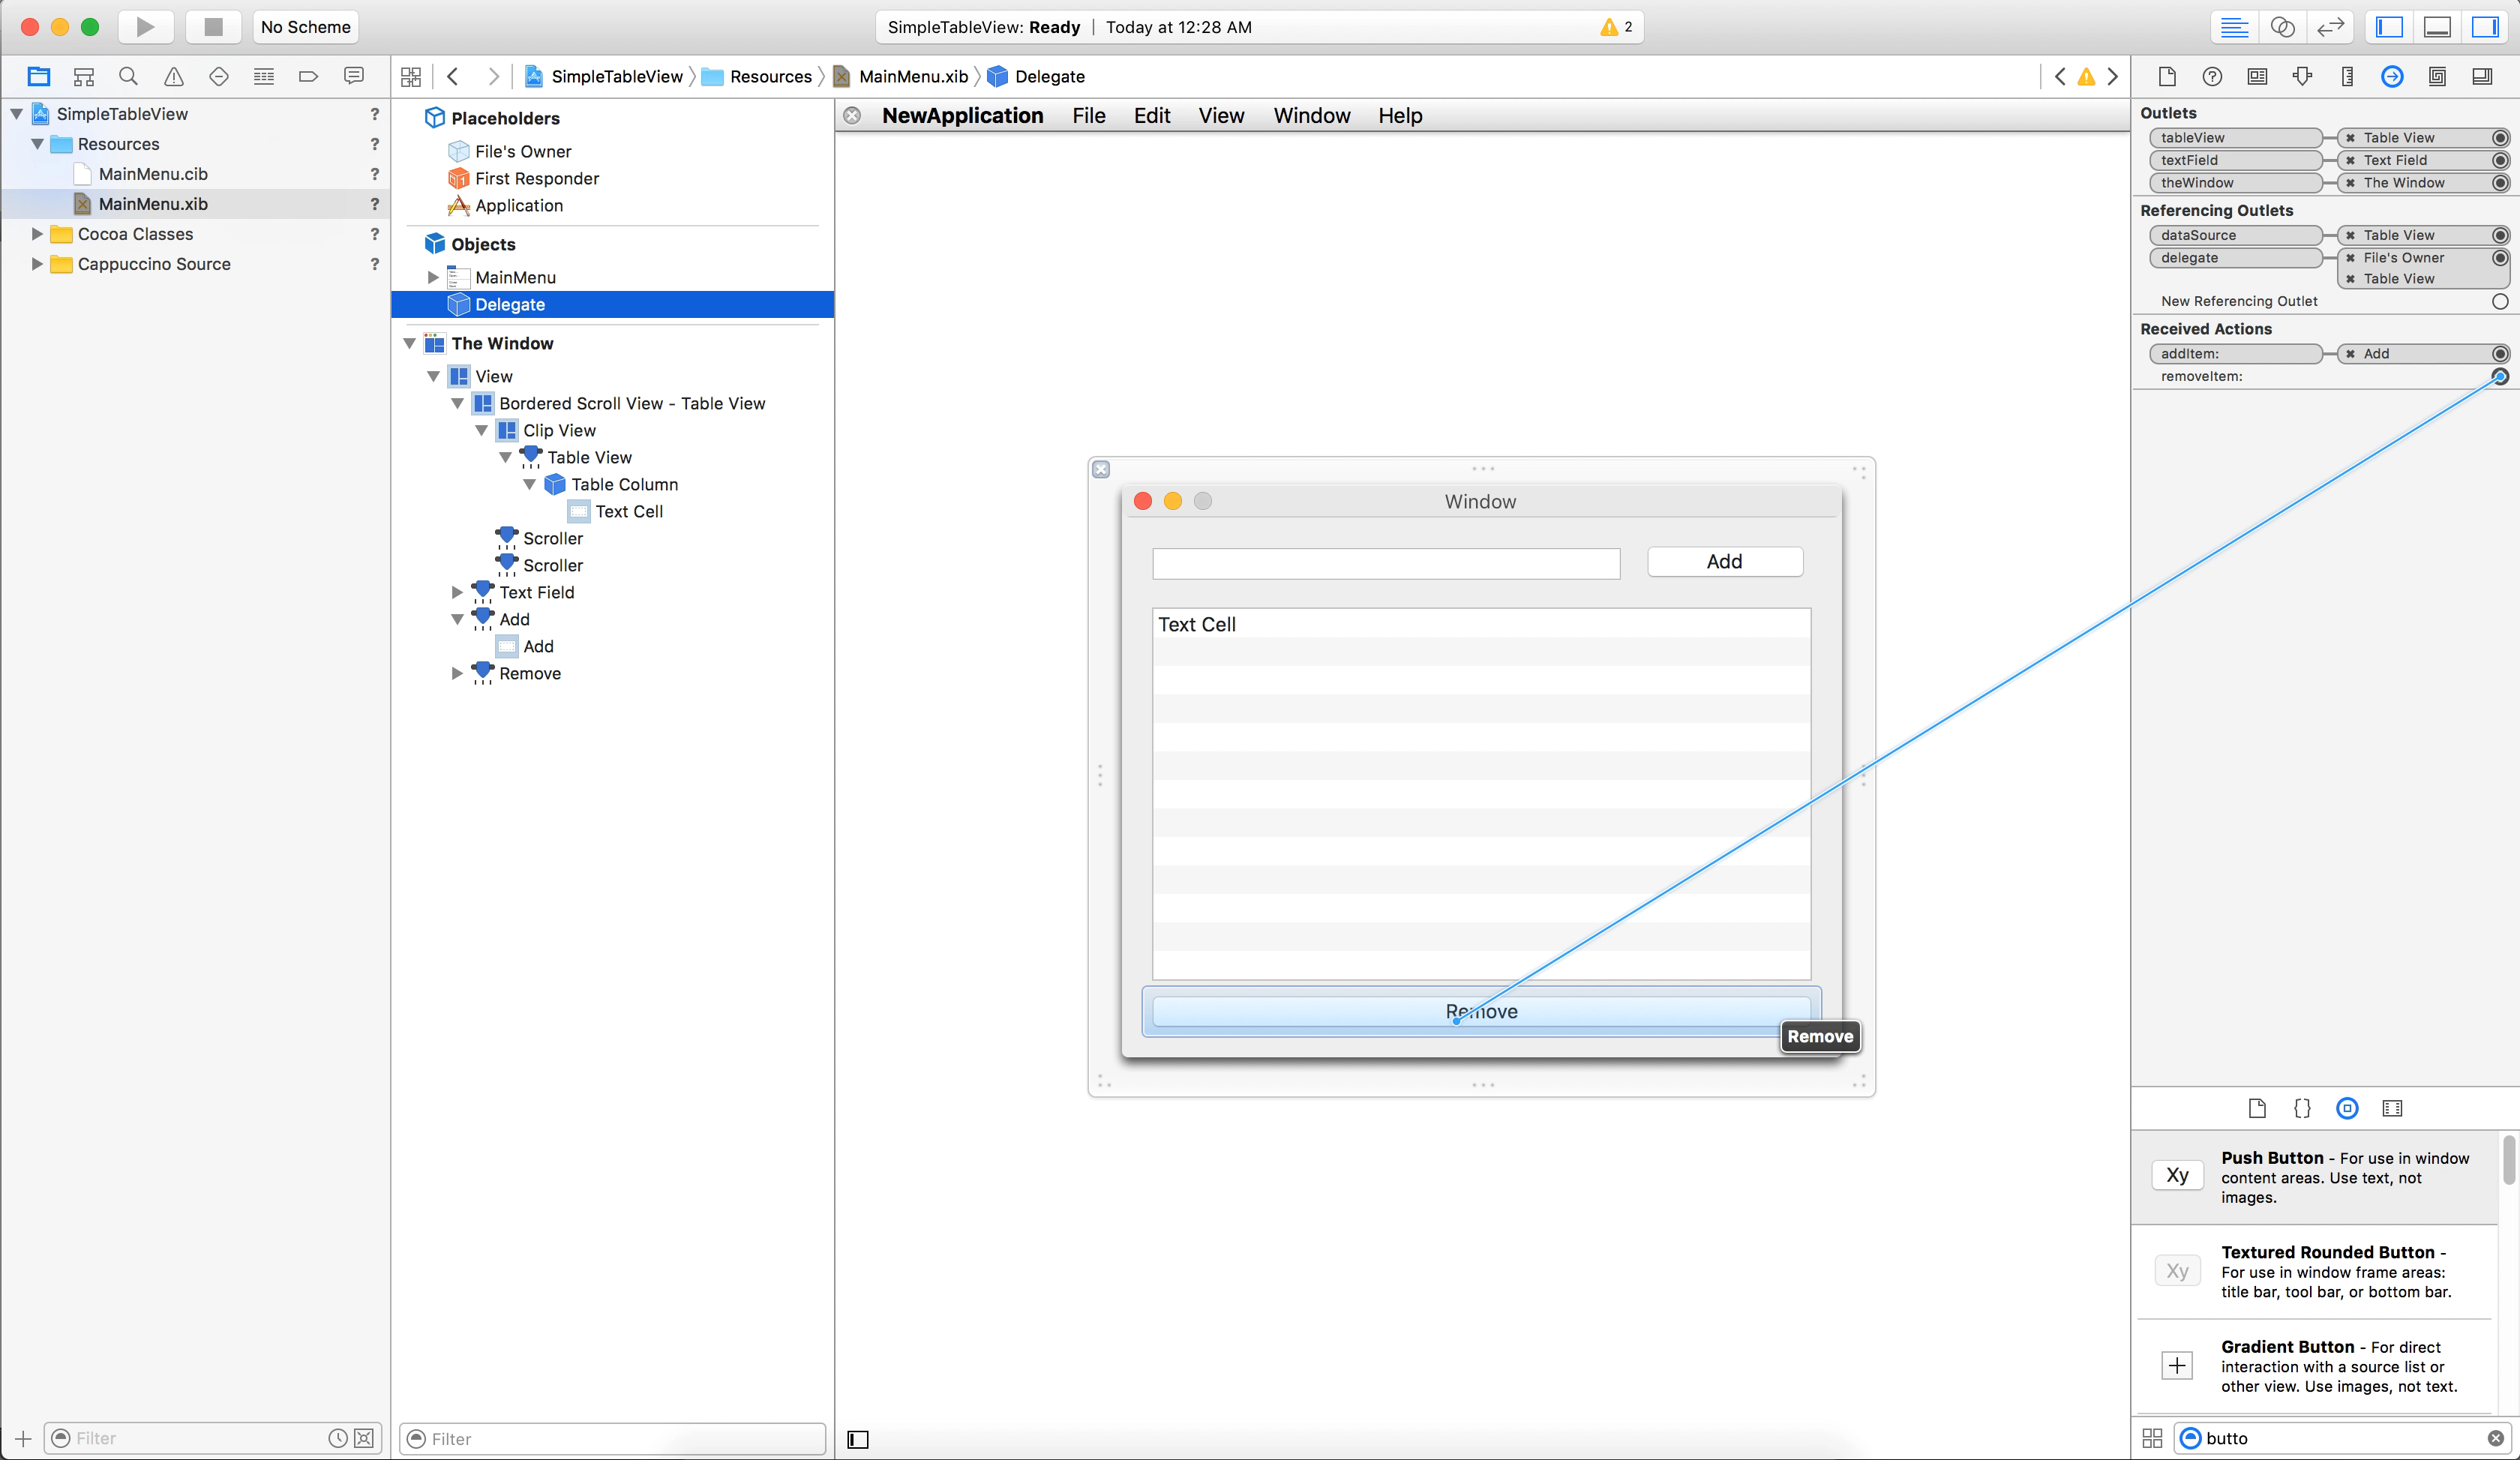
Now it’s time to make use of our new data source by connecting the dataSource and delegate outlets.
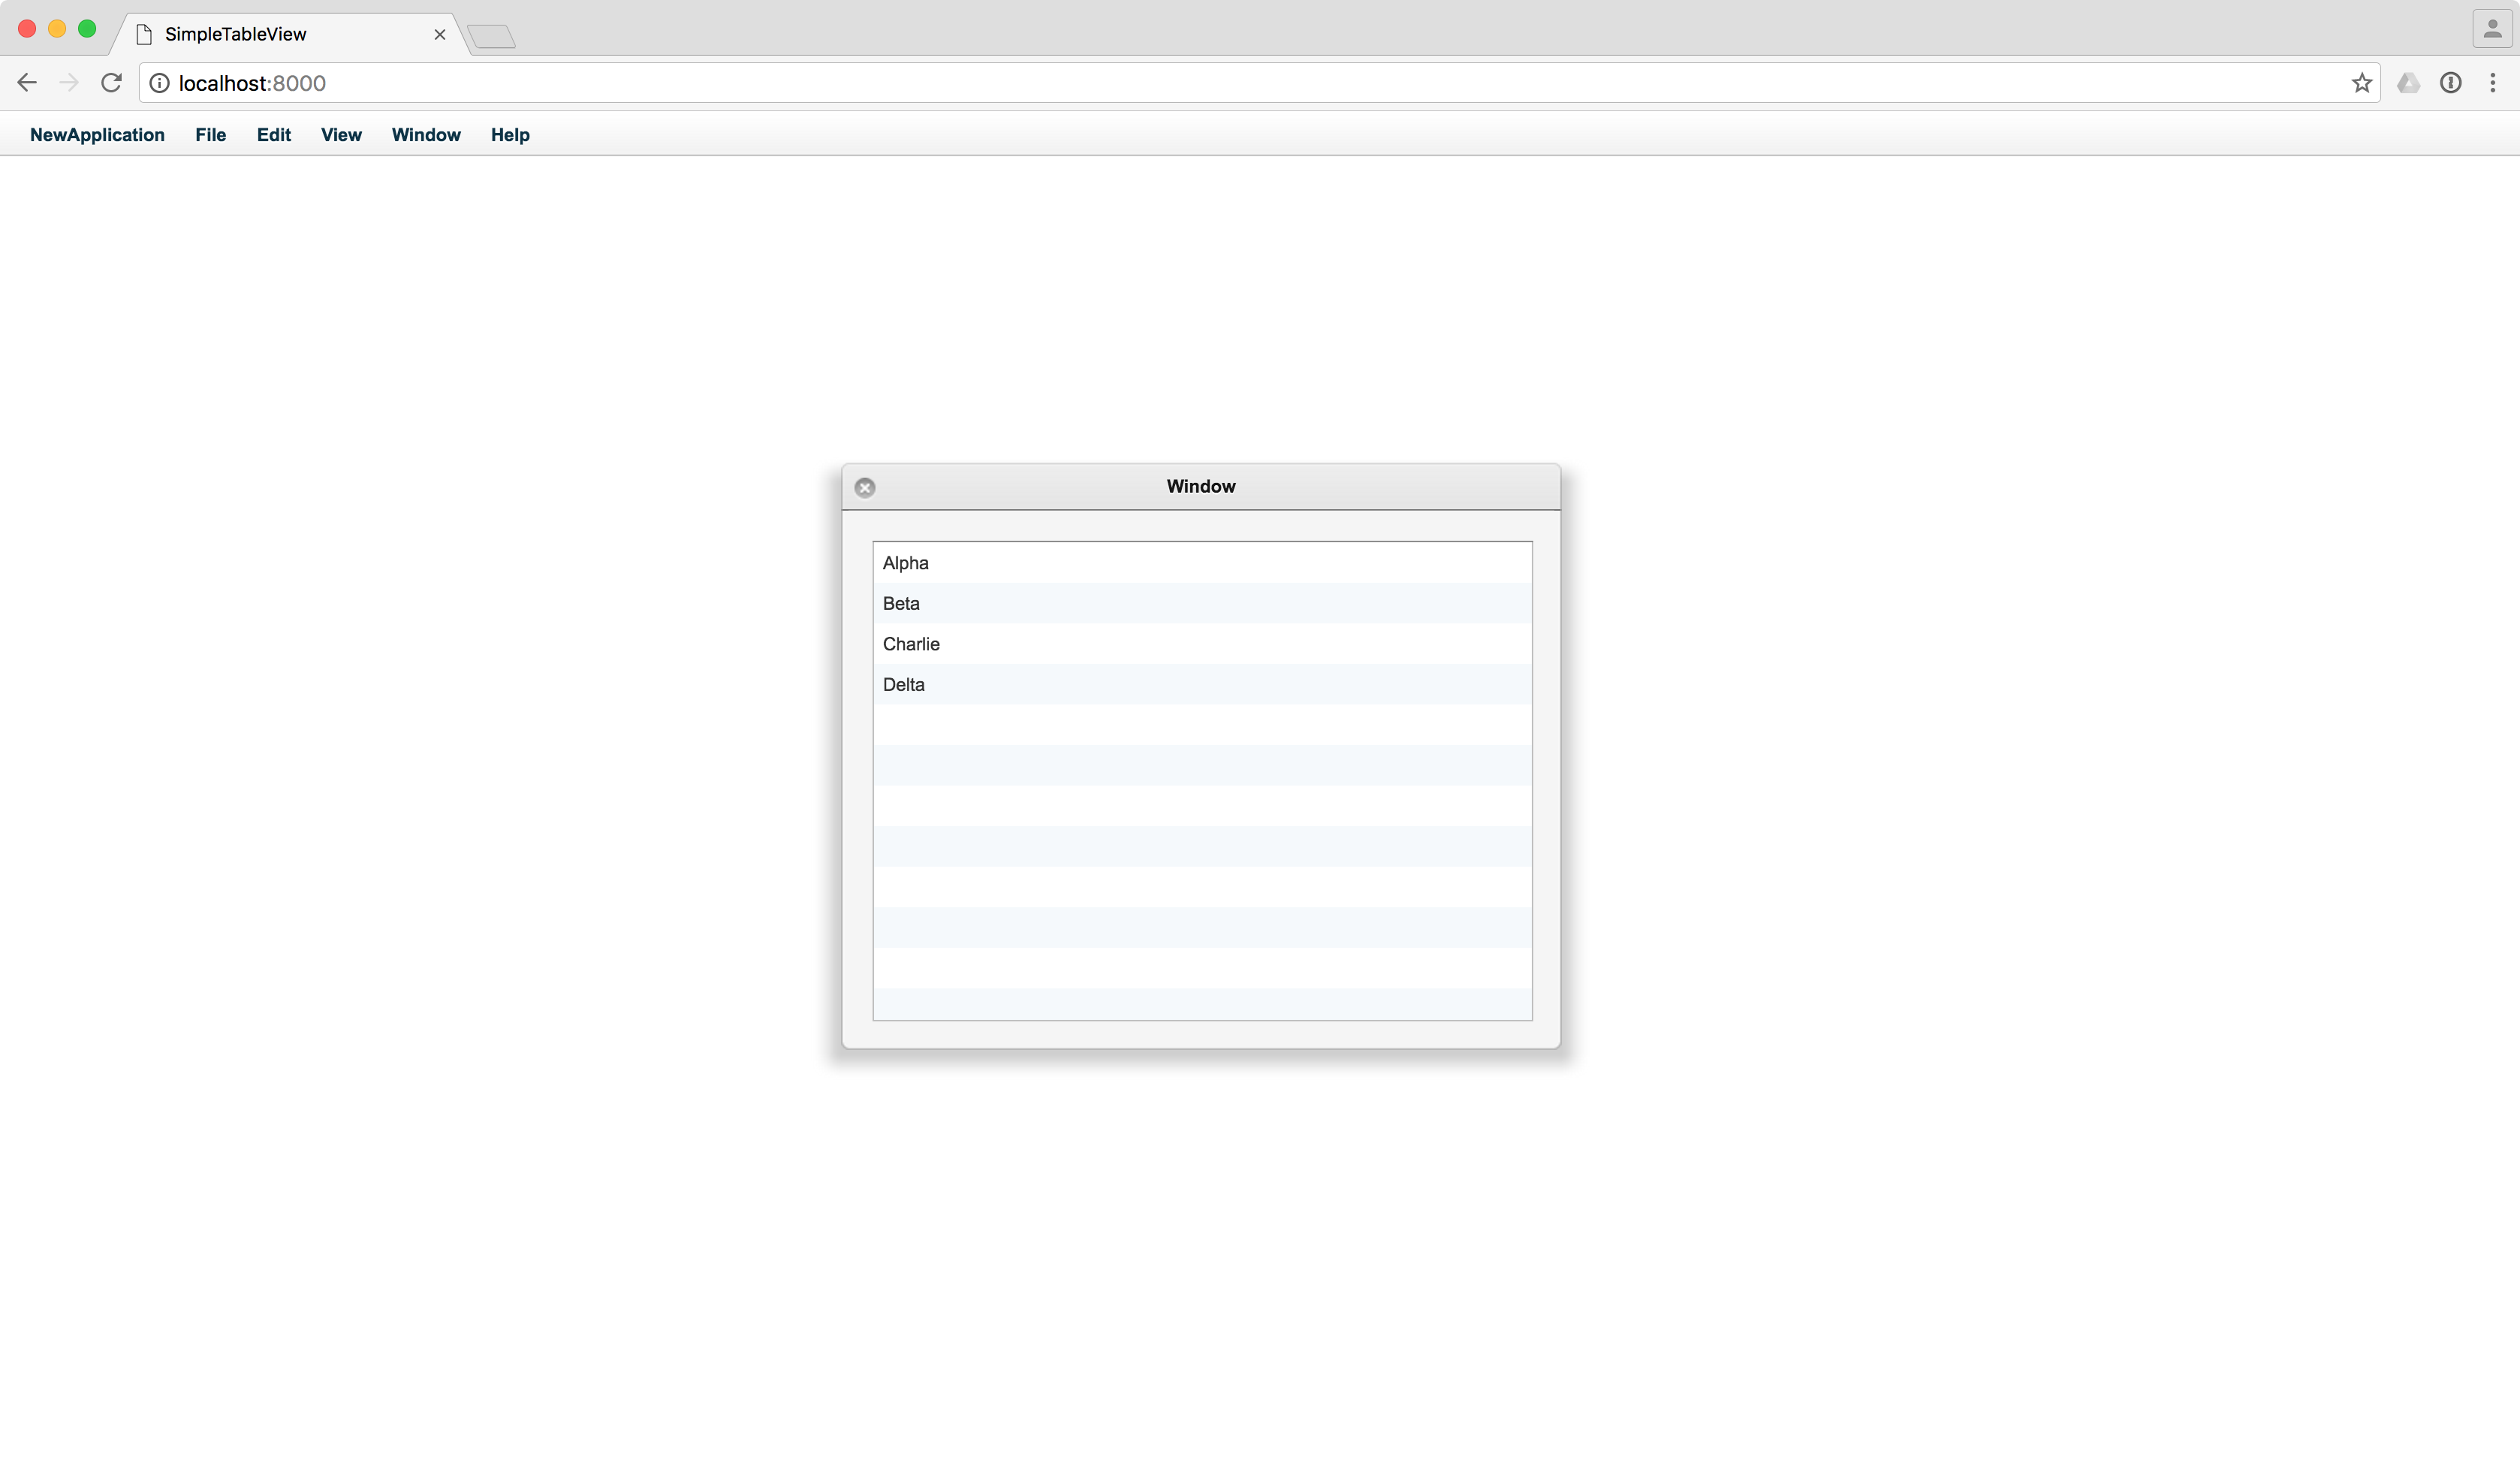
As usual the best way to run a Cappuccino app for testing is to start a local webserver. So in the root of your project folder, type:
python -m SimpleHTTPServer
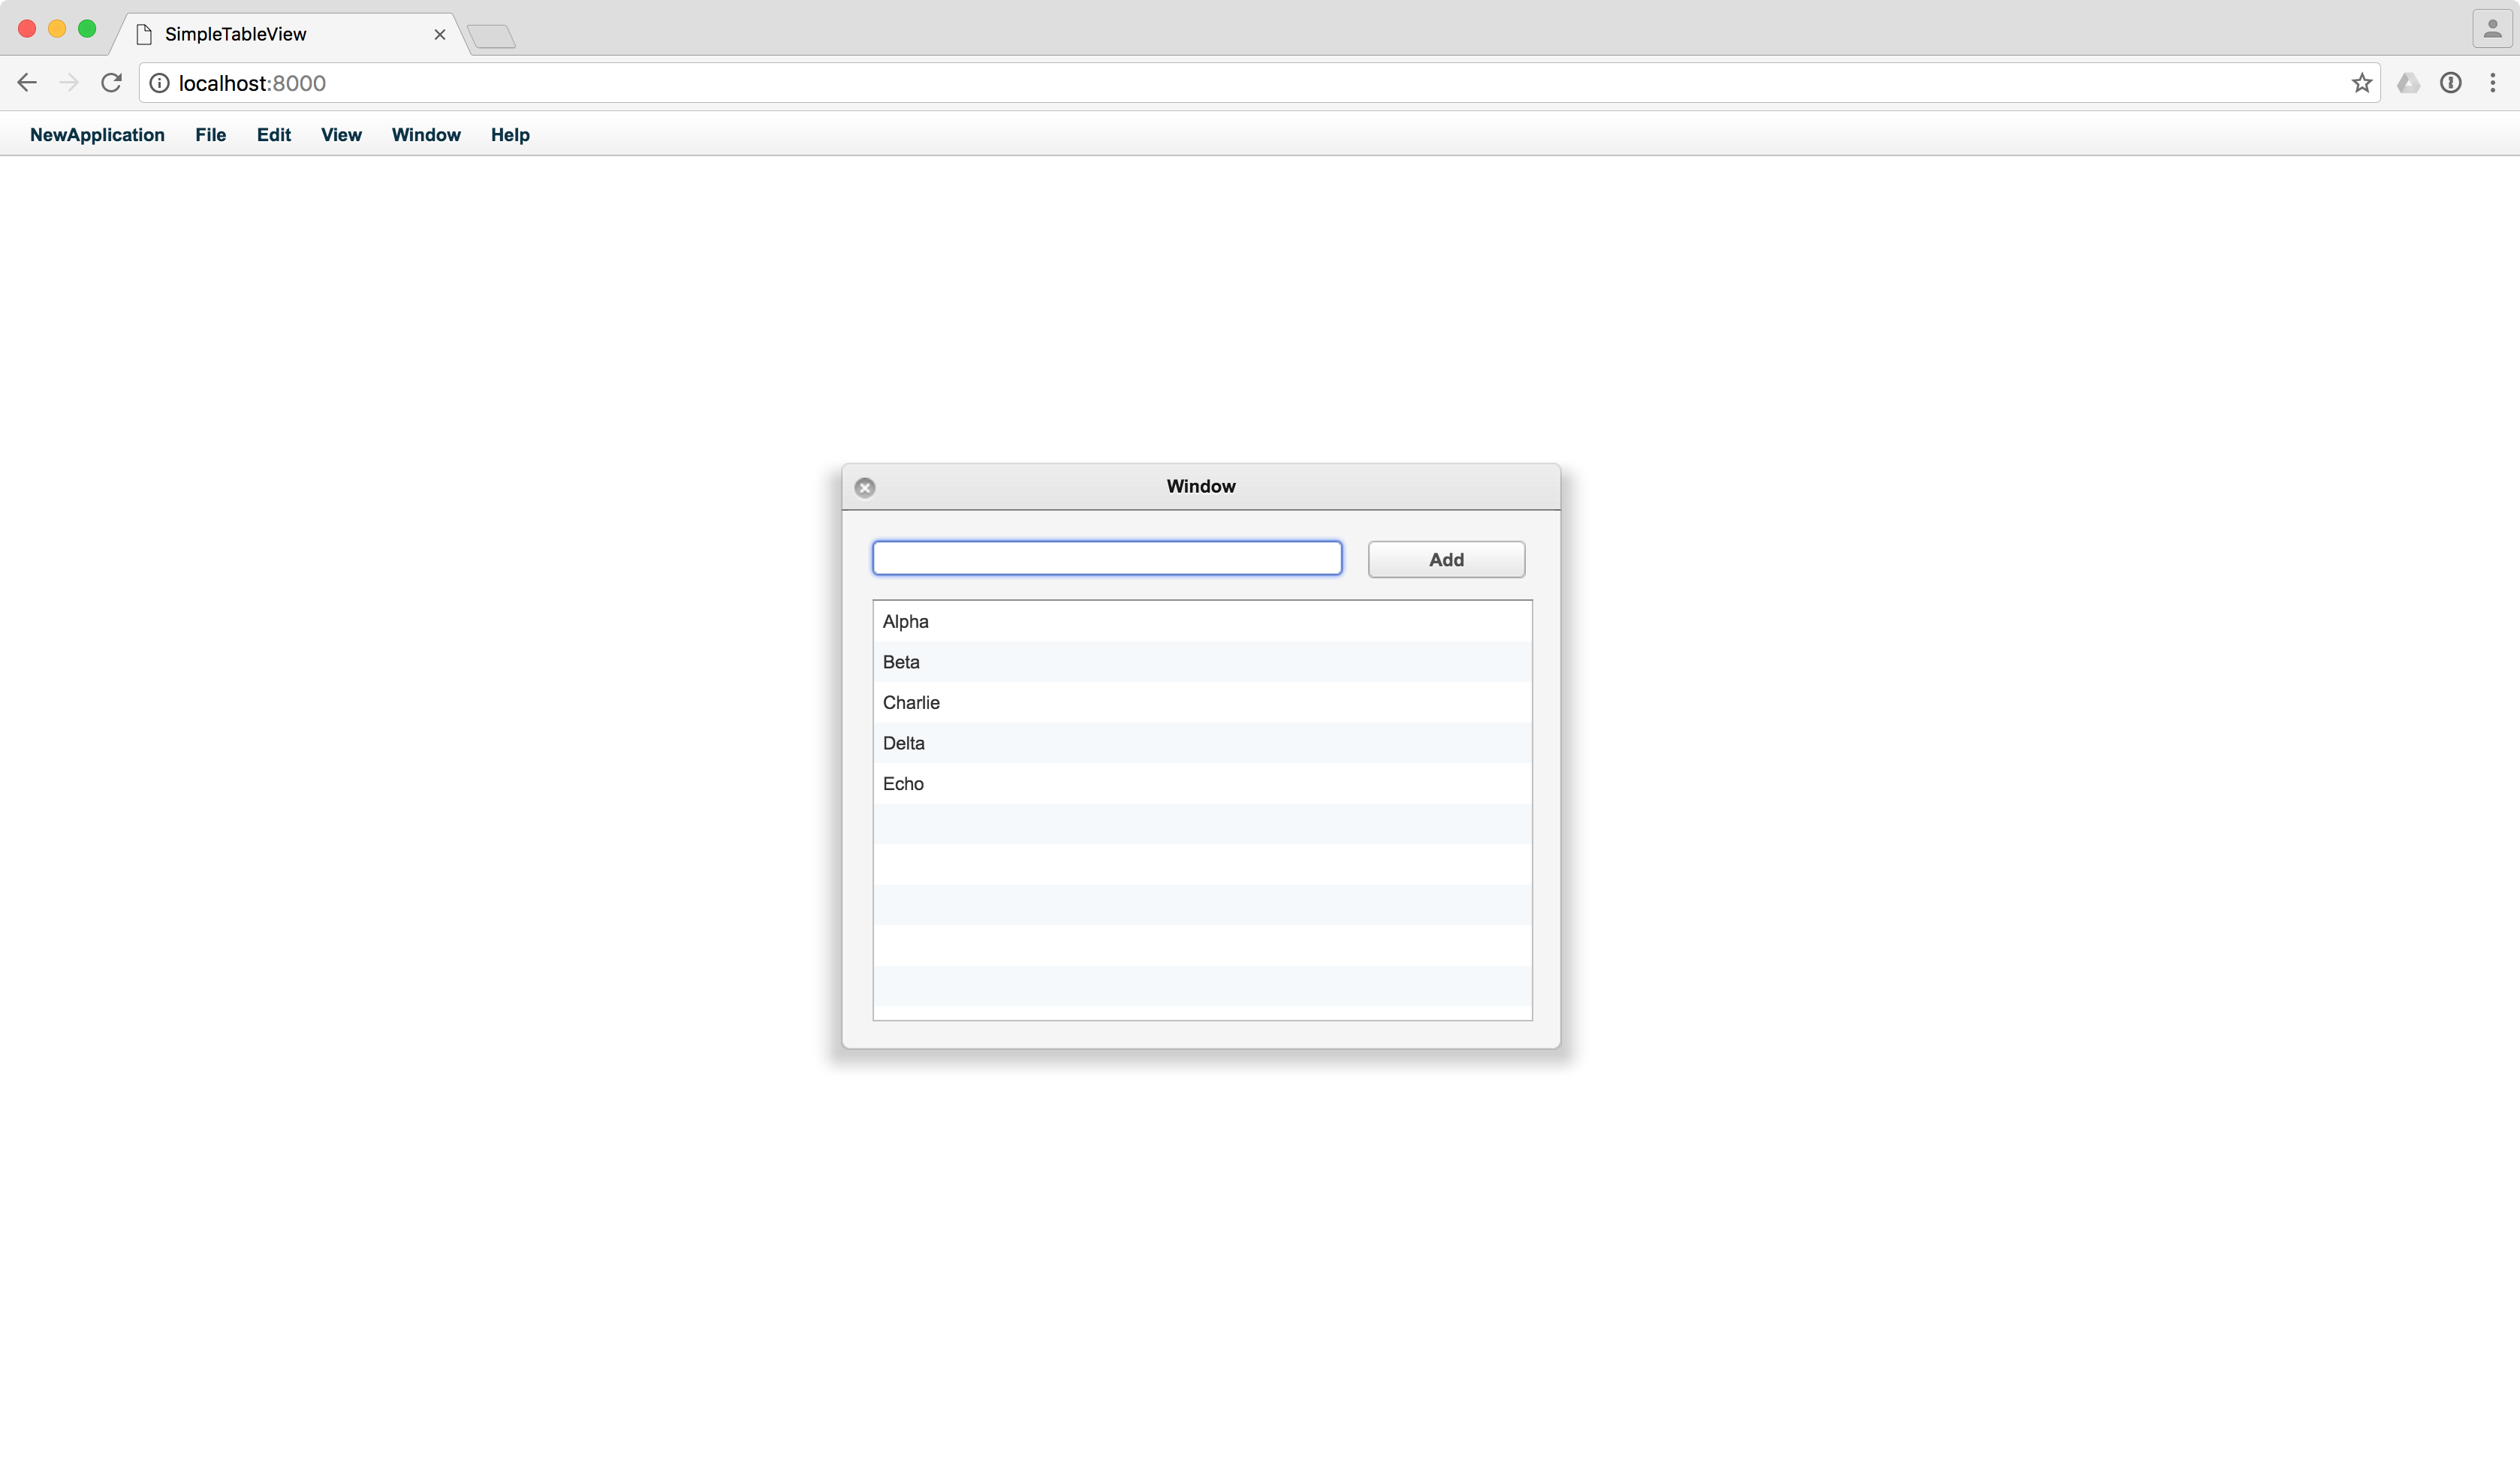
Now, open your browser and type in the address given by SimpleHTTPServer: localhost:8000
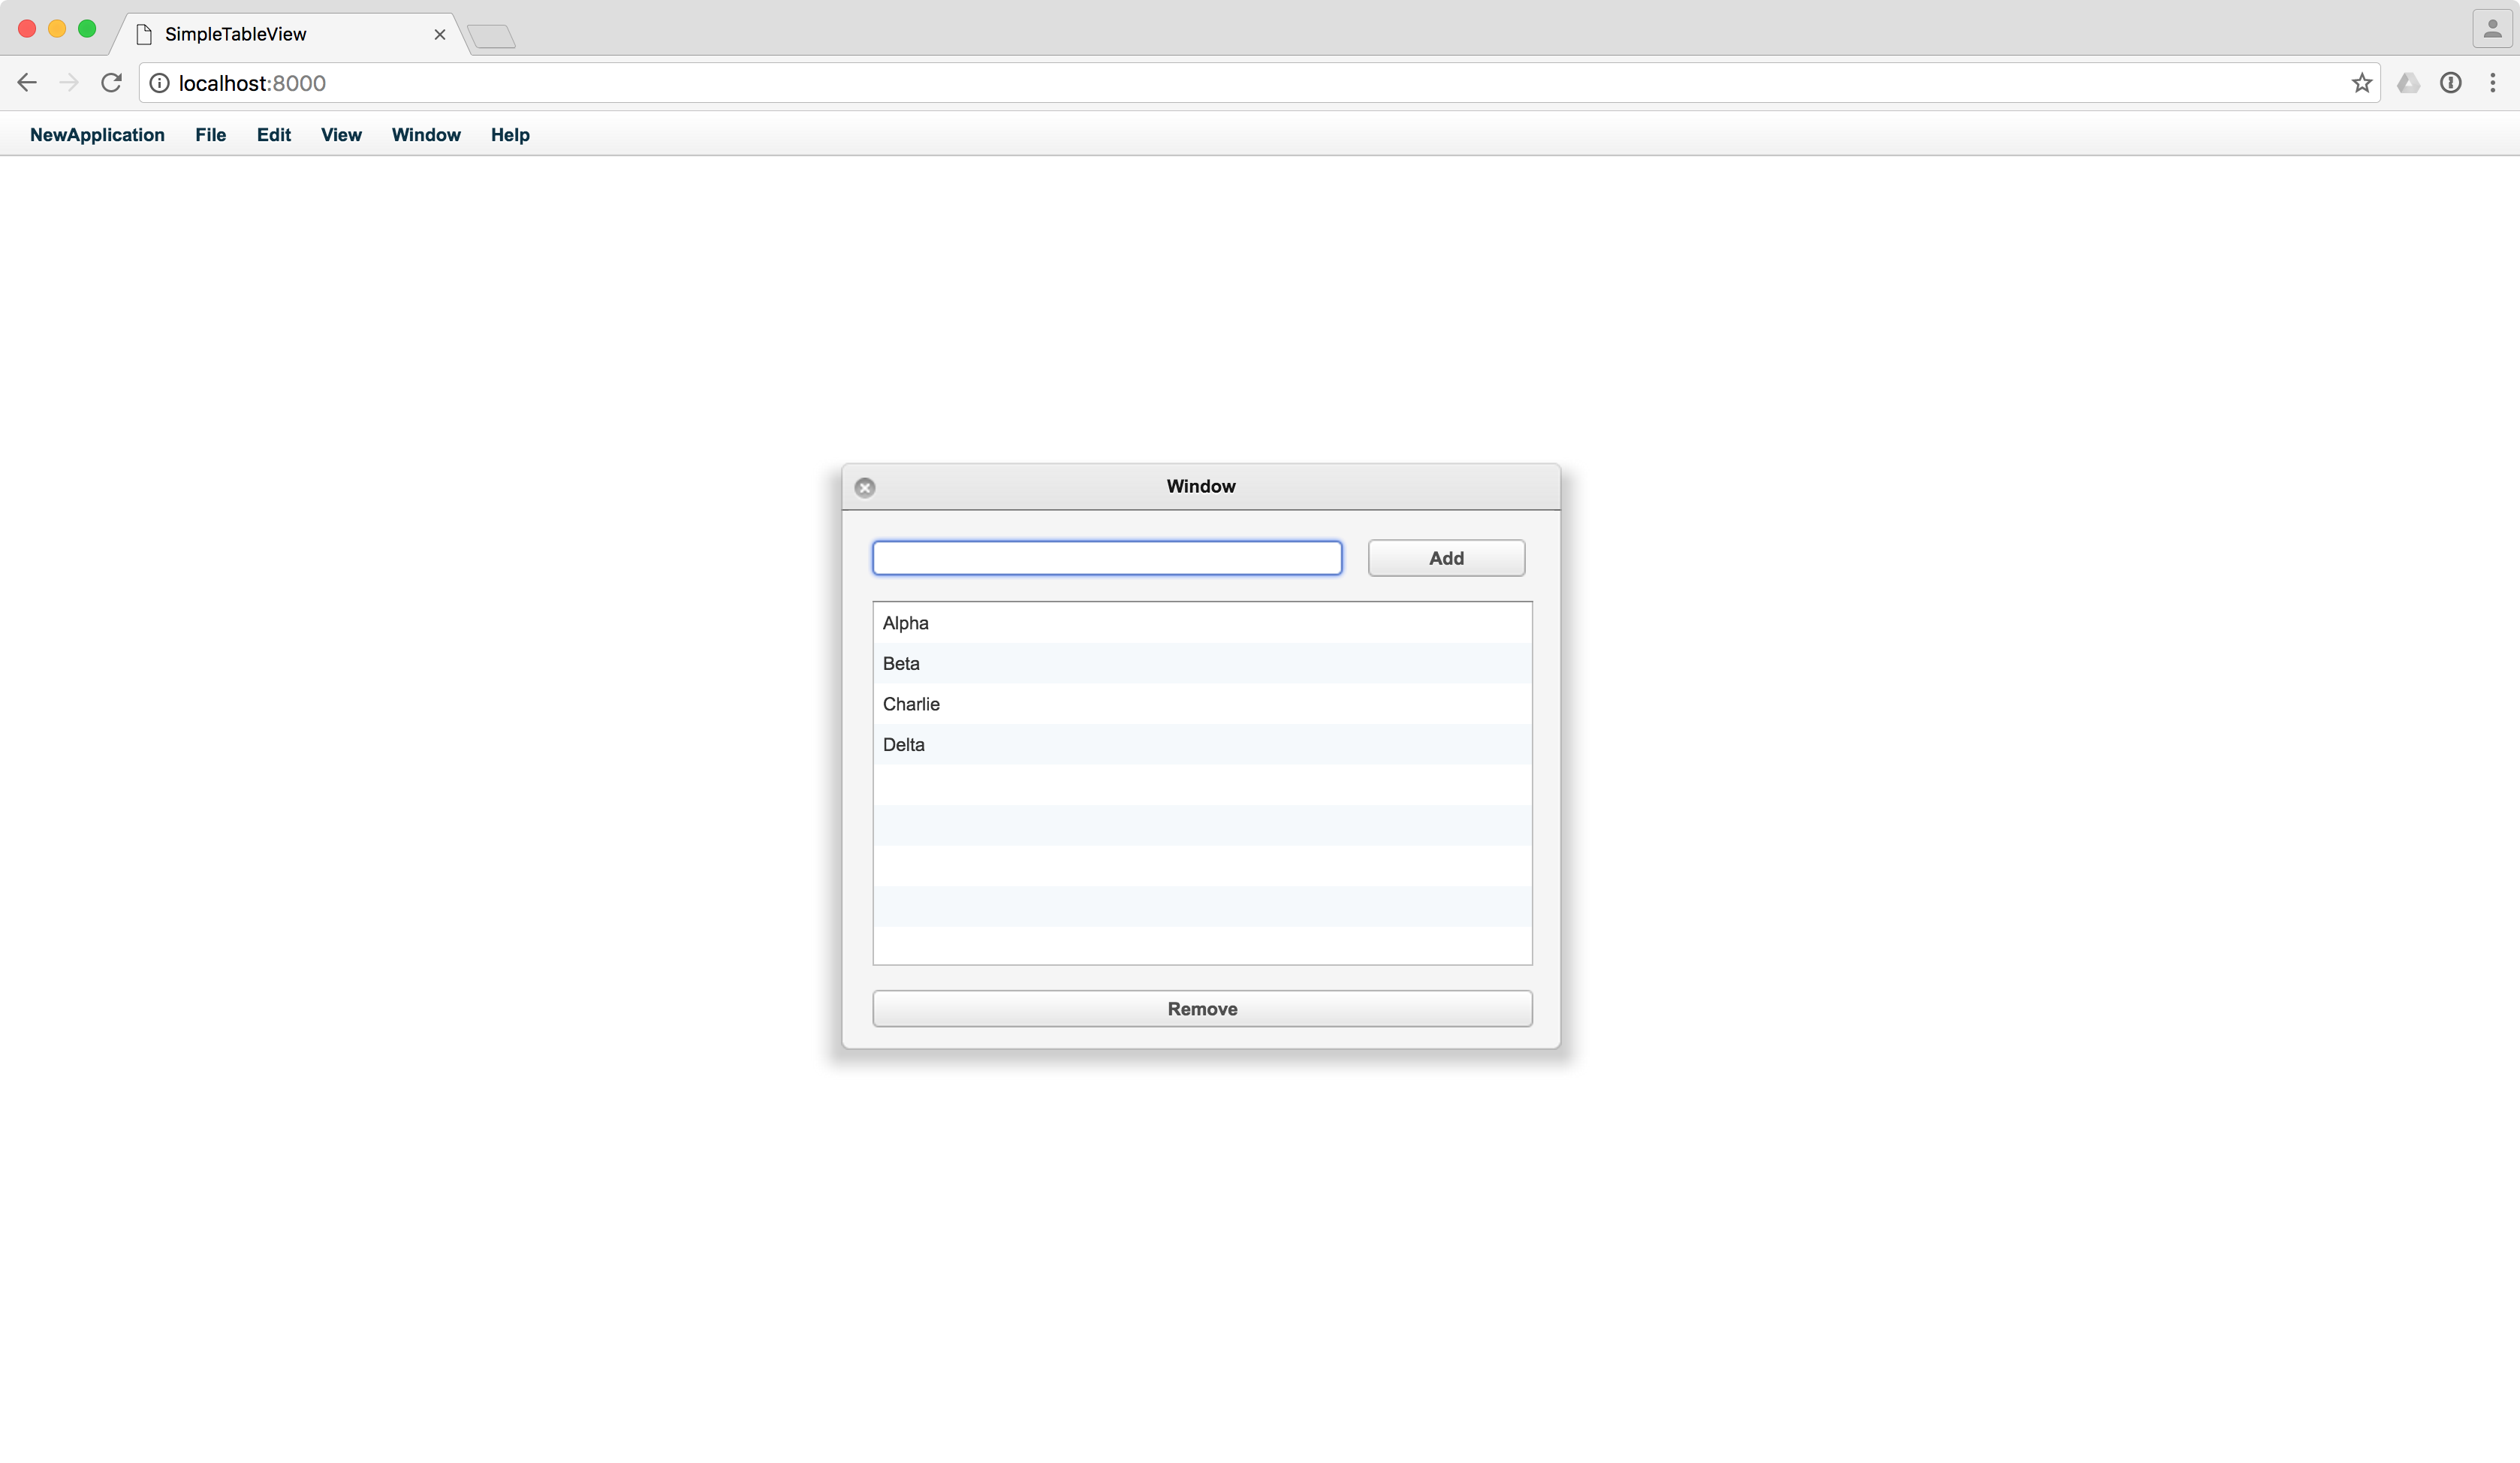
So far so good, but what if we want to add elements to our list?
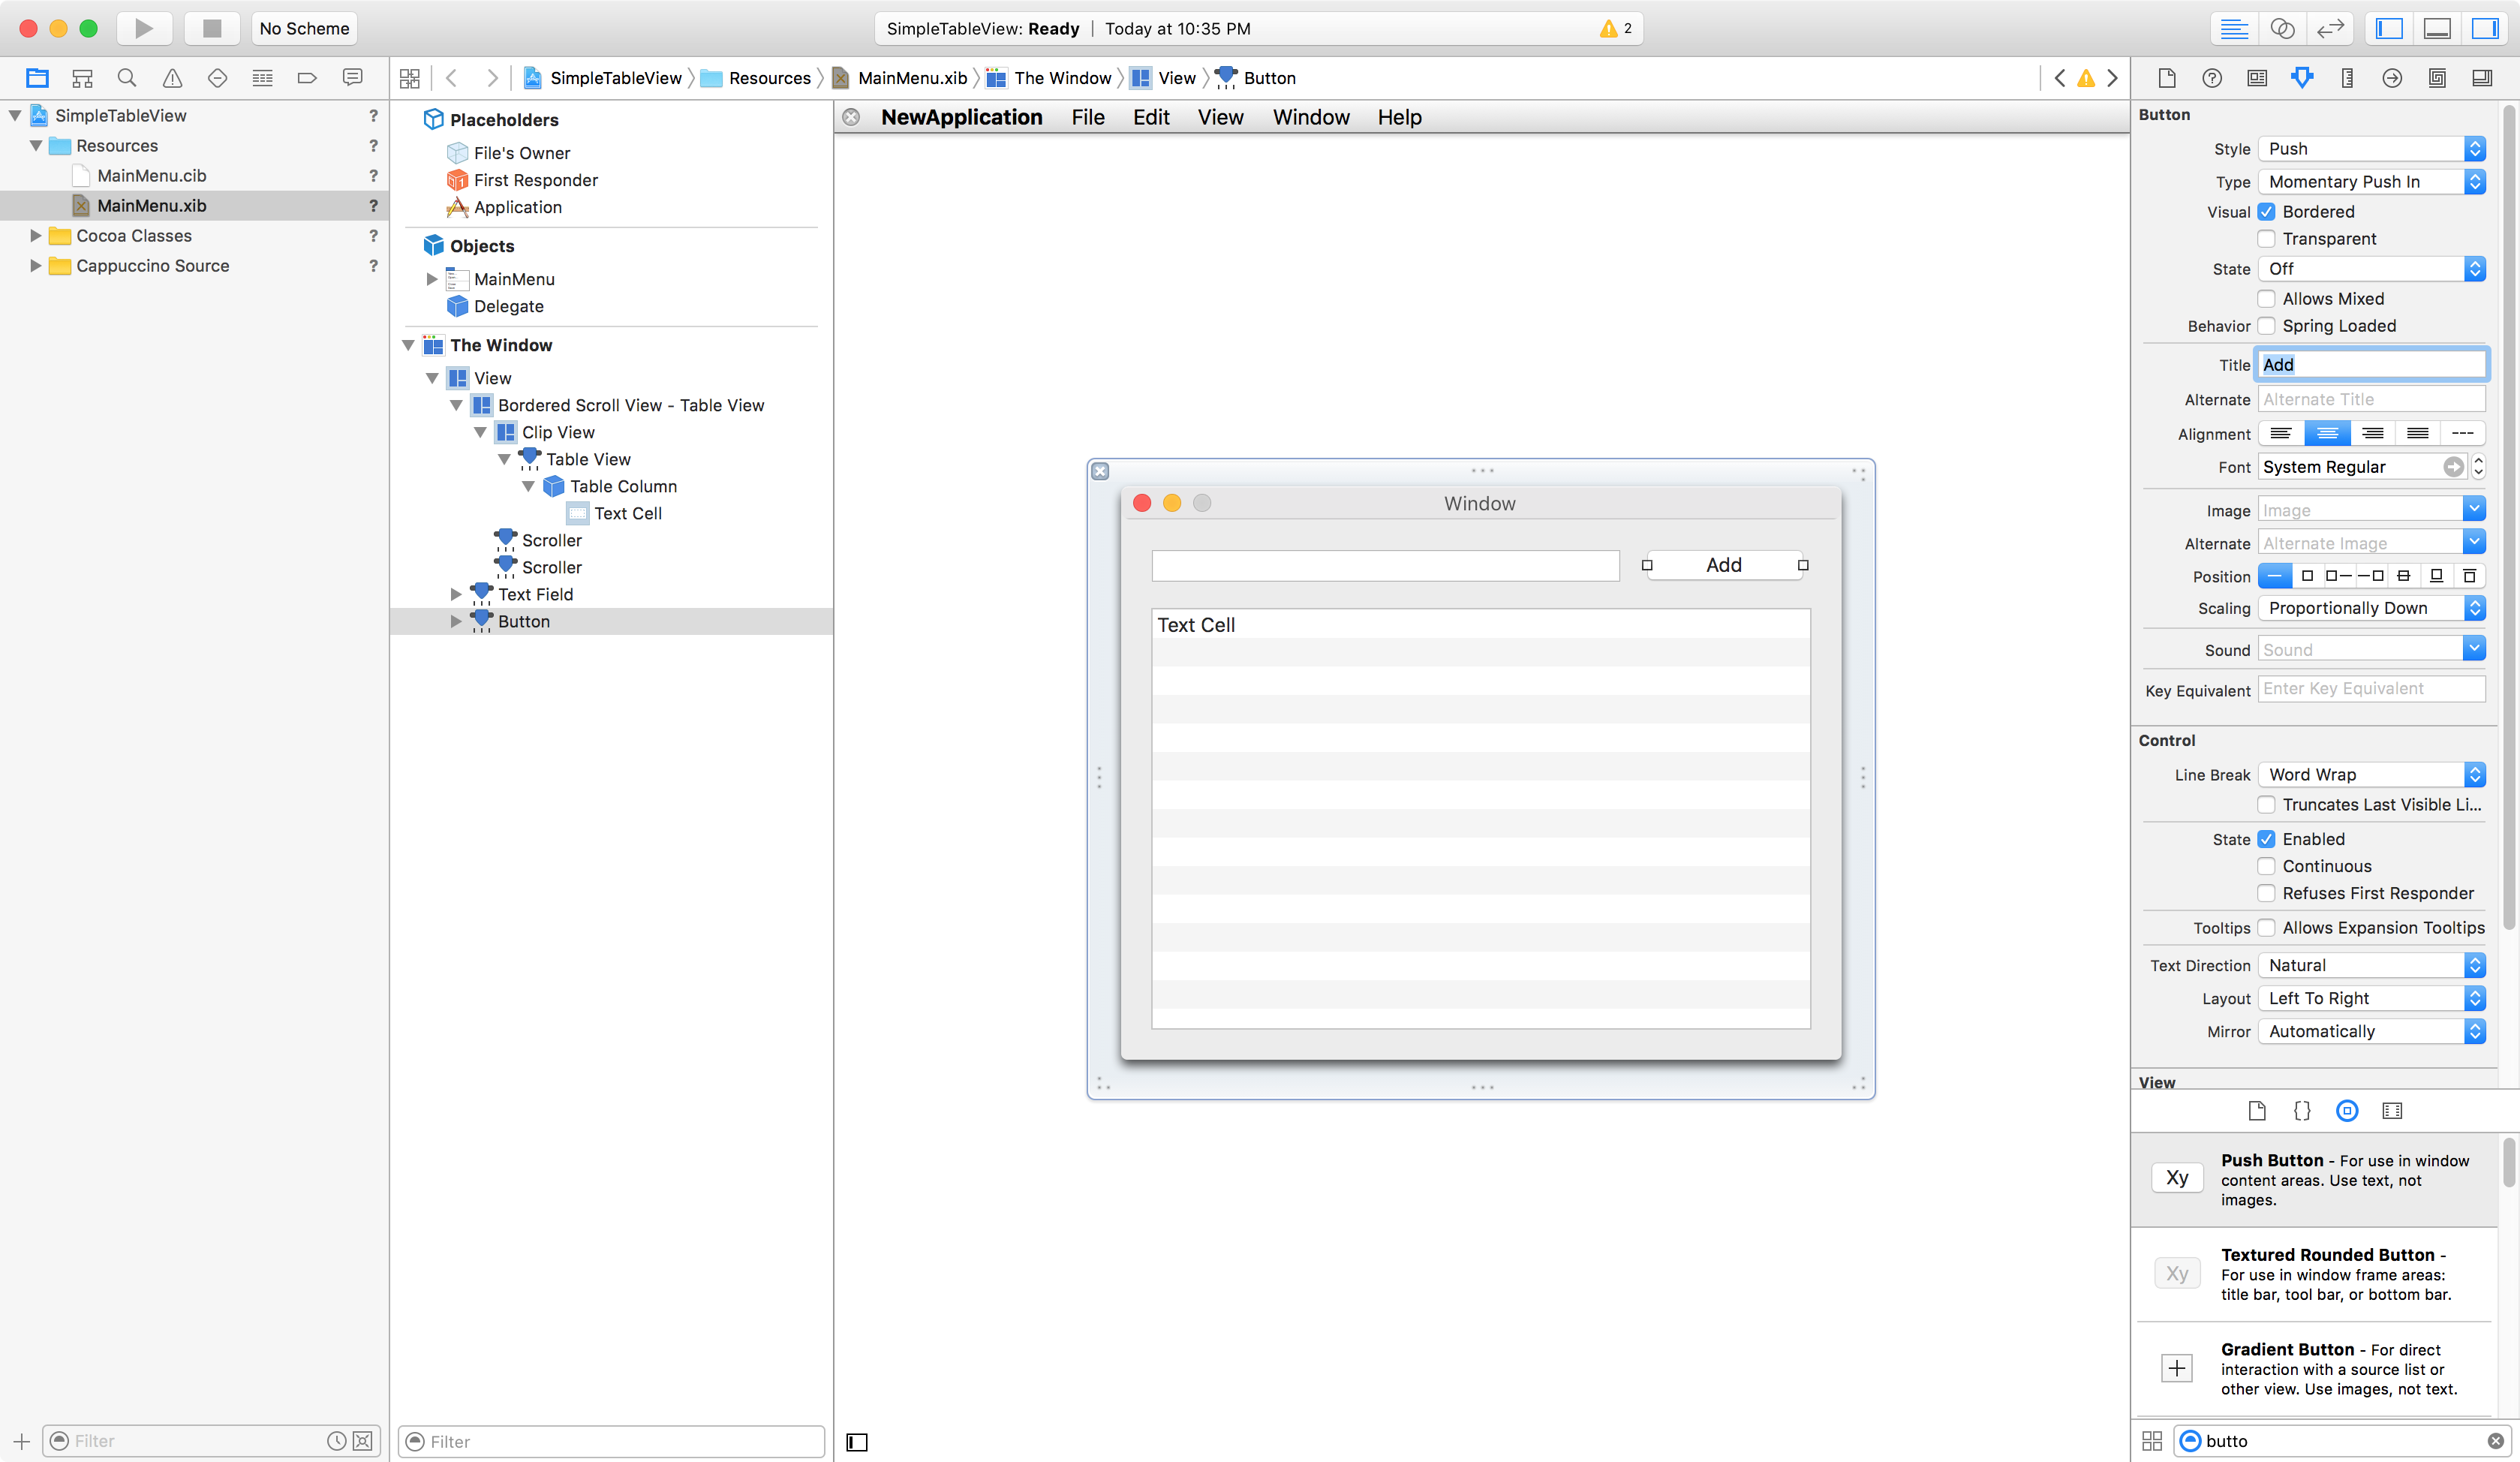
Let’s add two more controls fromthe library. One is CPTextField, the second one is CPButton.
You can change the CPButton title on the Attributes inspector tab
Define the CPTextField as an outlet in the AppController. This will help us to get its value.
@outlet CPTextField textField;
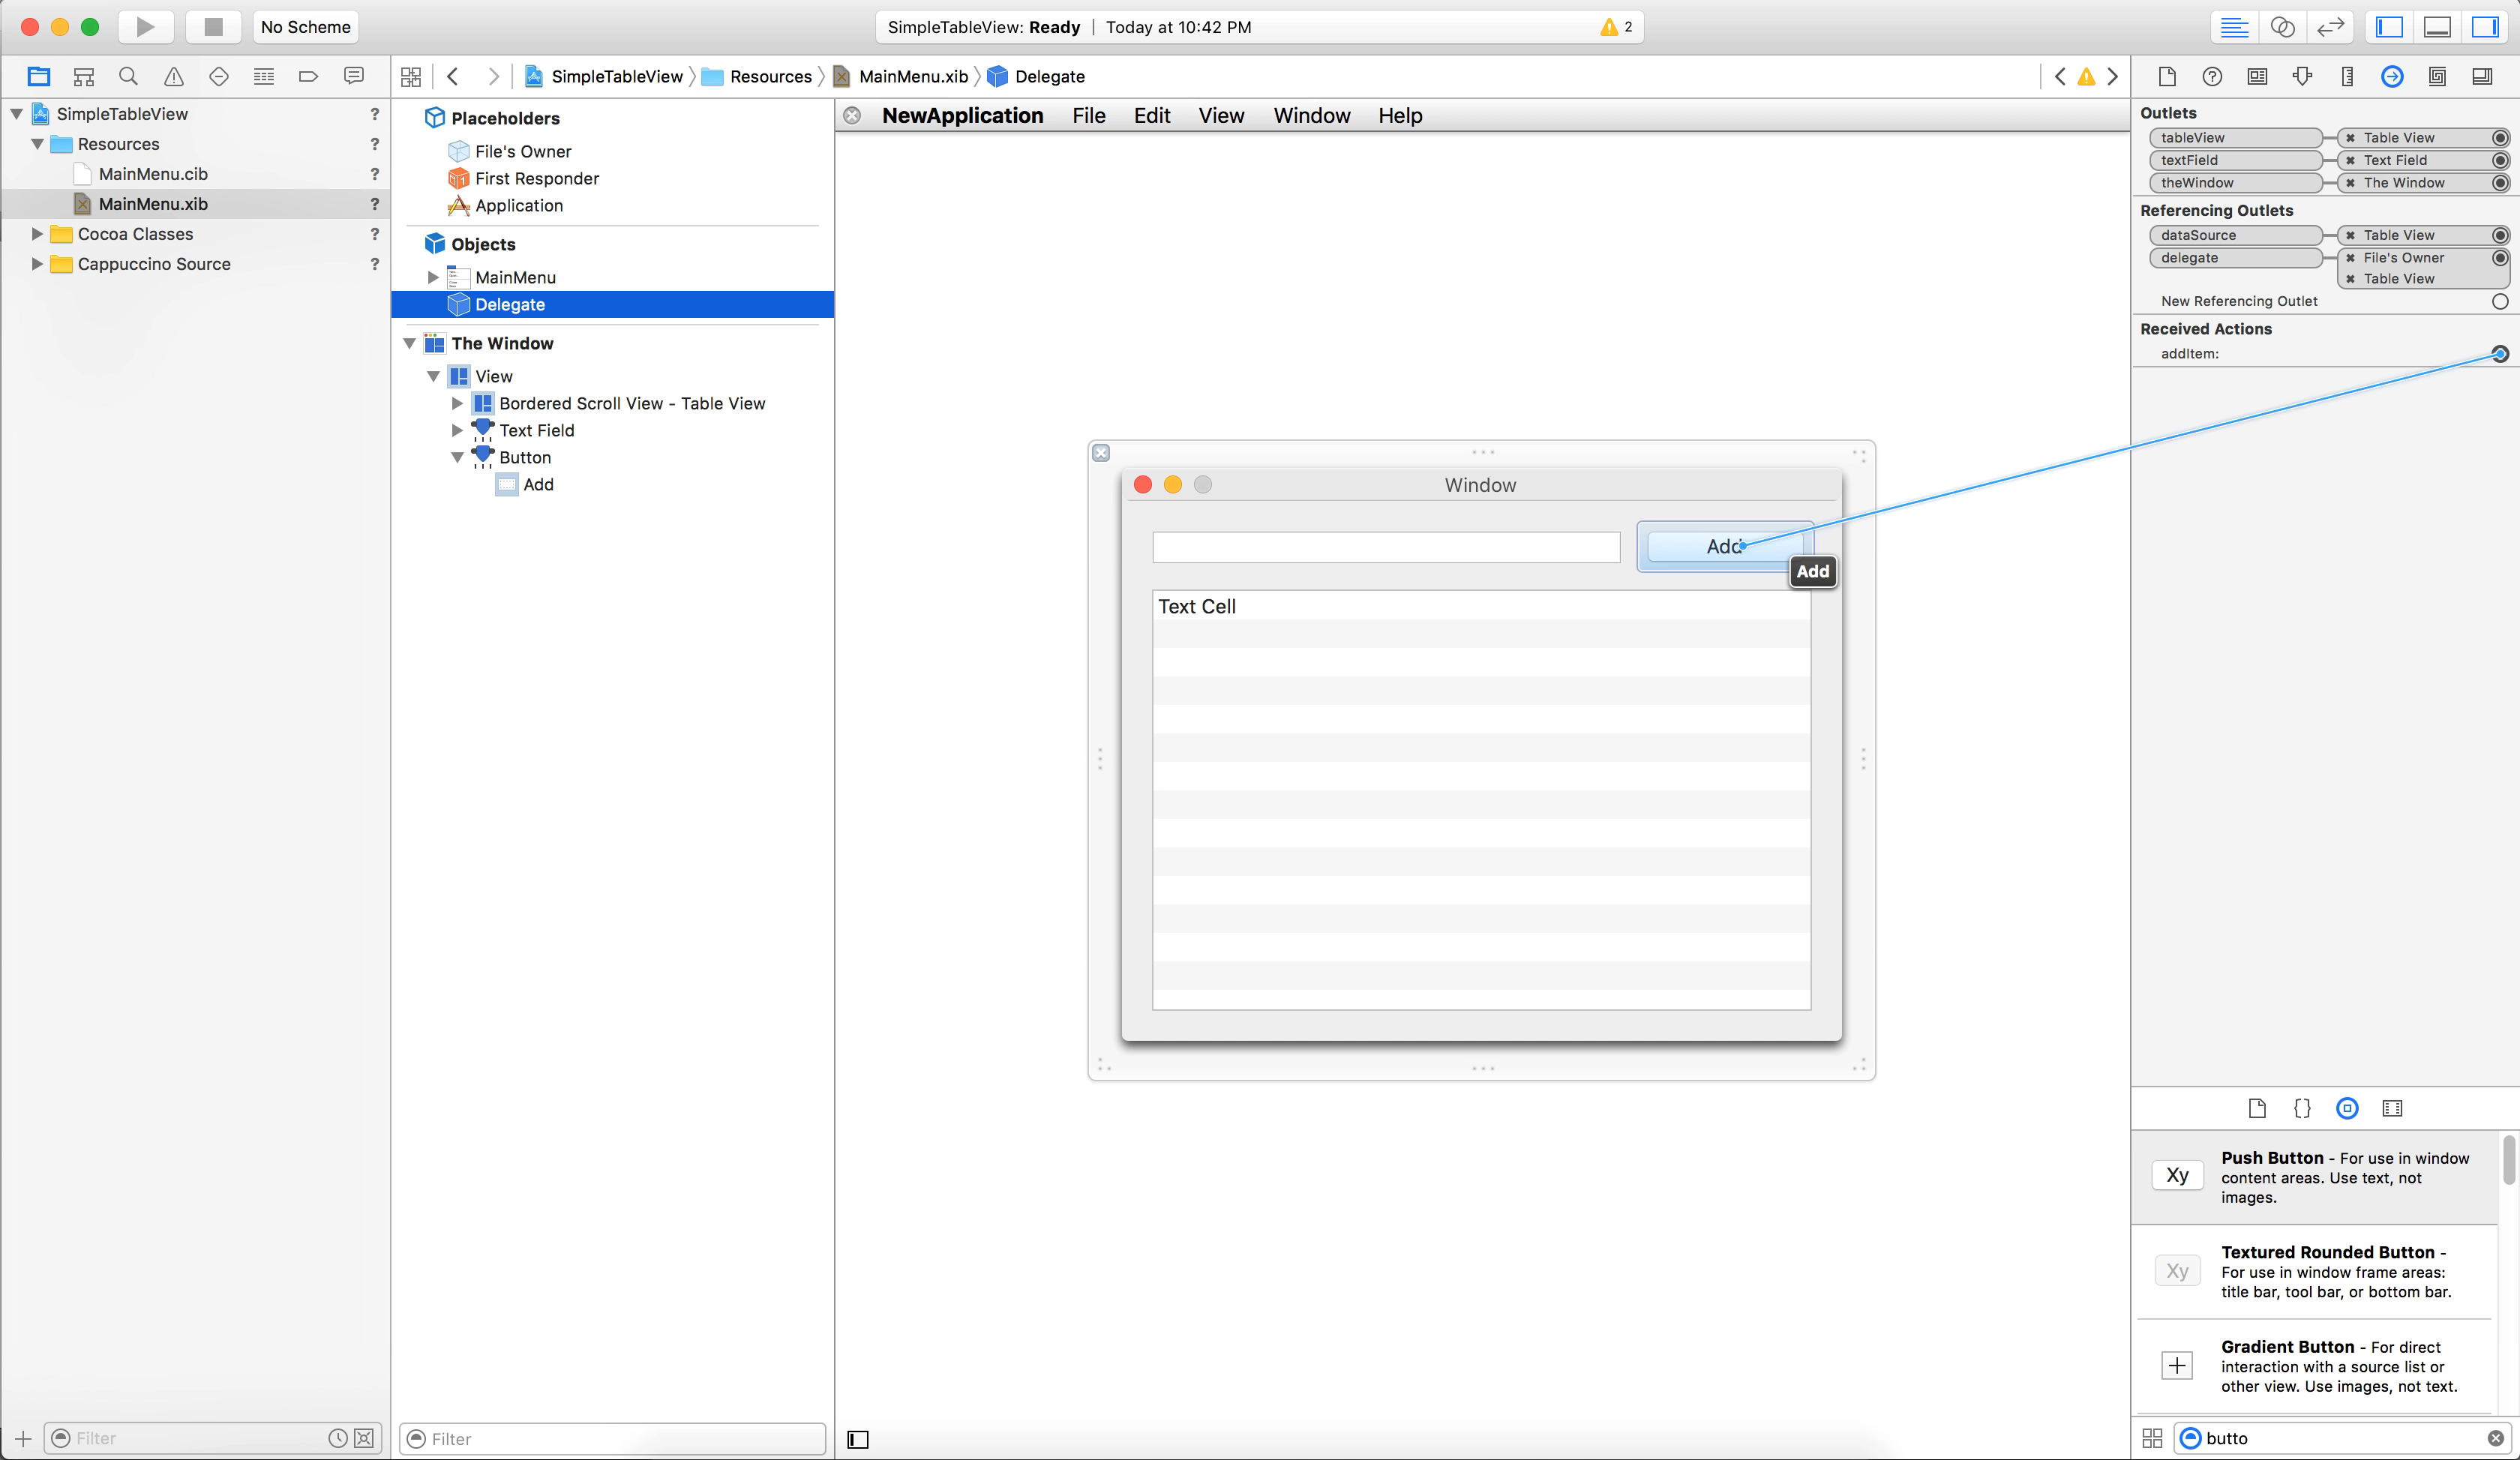
Create the CPButton as an action.
- (@action)addItem:(id)sender
{
    // Get CPTextField value and add to our CPMutableArray
    [_names addObject: [textField stringValue]];

    // Clear the CPTextField
    [textField setStringValue:""];

    // Reload CPTableView to see the changes
    [tableView reloadData];
}
Connect our newly added outlet and action.
Refresh your borwser.
Now that we are able to add, we would like to be able to remove items as well.
Let’s add another button called “Remove”.
When the user selects a row in the table, that’s the element they want to remove. Using the selectedRow attribute on the table we can find the row index to delete. Then we can delete it using CPMutableArray removeObject:. Here’s the code:
- (@action)removeItem:(id)sender
{
    // Check if any row is selected; if not the value is -1.
    if ([tableView selectedRow] > -1)
    {
        [_names removeObject:[_names objectAtIndex:[tableView selectedRow]]];
    }

    // Reload CPTableView to see the changes
    [tableView reloadData];
}
Connect the button and the action:
Now, you have a fully functioning application!
You can download the archive of this project here.

![]() Logo by Sofa. Hosted by SlevenBits. Copyright © 2013-2019 - Cappuccino Project.
Logo by Sofa. Hosted by SlevenBits. Copyright © 2013-2019 - Cappuccino Project.