In this tutorial, we will create a simple “Hello World” app using Xcode to edit the user interface. You will see that even for a small project there are big time saving benefits in graphical UI editing.
This tutorial assumes you have a Mac and that you have installed the Cappuccino toolchain using bootstrap.sh or by installing from source. It also assumes that you have installed the current master version of Cappuccino.
First, go to the folder in which you want create the project. Run
the capp command:
capp gen -l -t NibApplication AdvancedHelloWorld2
This will generate the startup project using the Nib template. If you
try to load the application you will see an error about a cib file.
This is because the template contains only a xib file for Xcode. You could run
nib2cib Resources/MainMenu.xib
to get it to work, but there’s an easier way.
XcodeCapp is a great tool that allows you to manage all necessary conversion from Xcode to Cappuccino. It is basically a bridge between these two worlds. It works completely transparently. XcodeCapp is shipped with Cappuccino. In the default installation, you’ll find it here:
/Applications/XcodeCapp.app/
Once launched, you will see a small coffee machine icon in your Mac OS X menu bar that should be grayed out. The main window of the application shold be displayed as well. There is only one button - go ahead and click it!

A standard folder chooser dialog will appear. Choose the folder of the Cappuccino project you just created. The icon will become darker, and you may notice some user notifications indicating XcodeCapp is currently loading the project. The initial time to load a project depends on the size of the project. For a new template it should be very quick.
Once loaded you should see this:

XcodeCapp will have generated a hidden folder located in your root
project folder, named .XcodeSupport and an XcodeProject named Your-Application-Name.xcodeproj. You should never need to edit
anything in it. To launch the Xcode project of your Cappuccino project,
click on the XcodeCapp icon (the hammer).
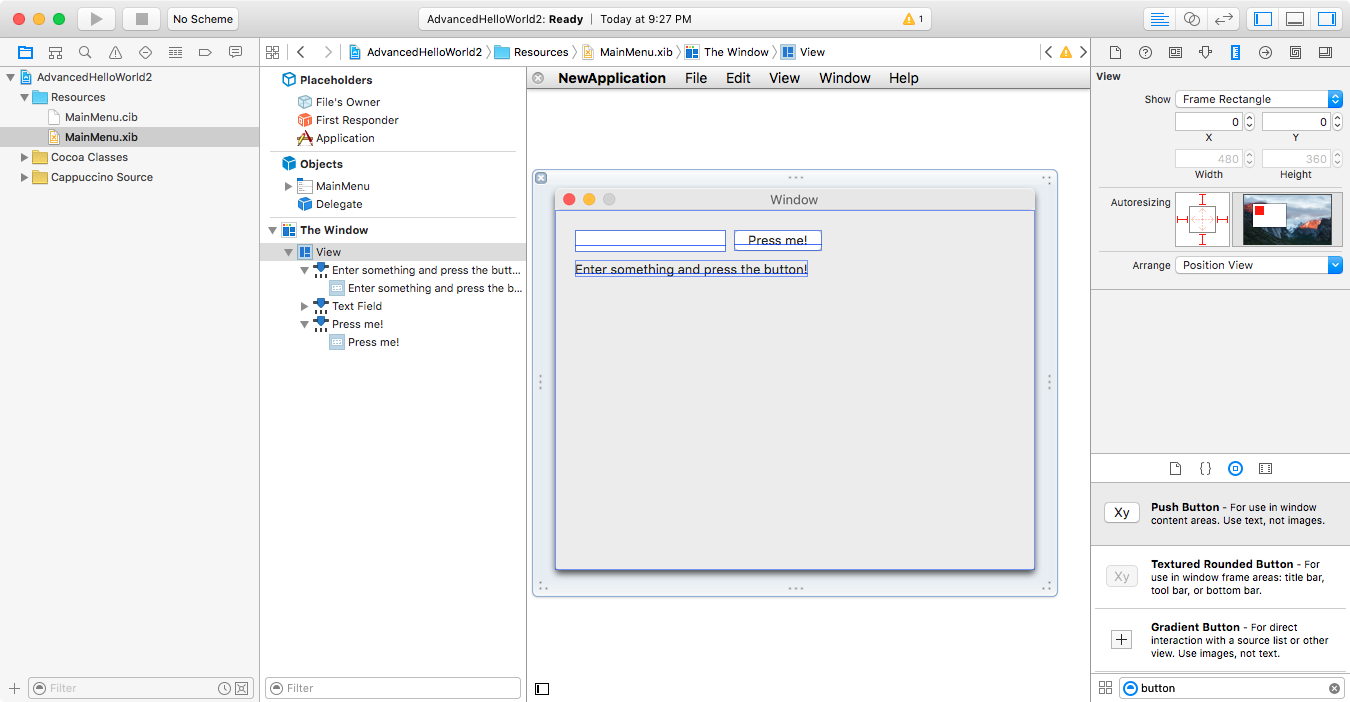
With Xcode we can place controls without writing any code. Let’s see how. First, in Xcode, go to the
Resources folder from the tree view on the left and select MainMenu.xib. It will open in the main view.
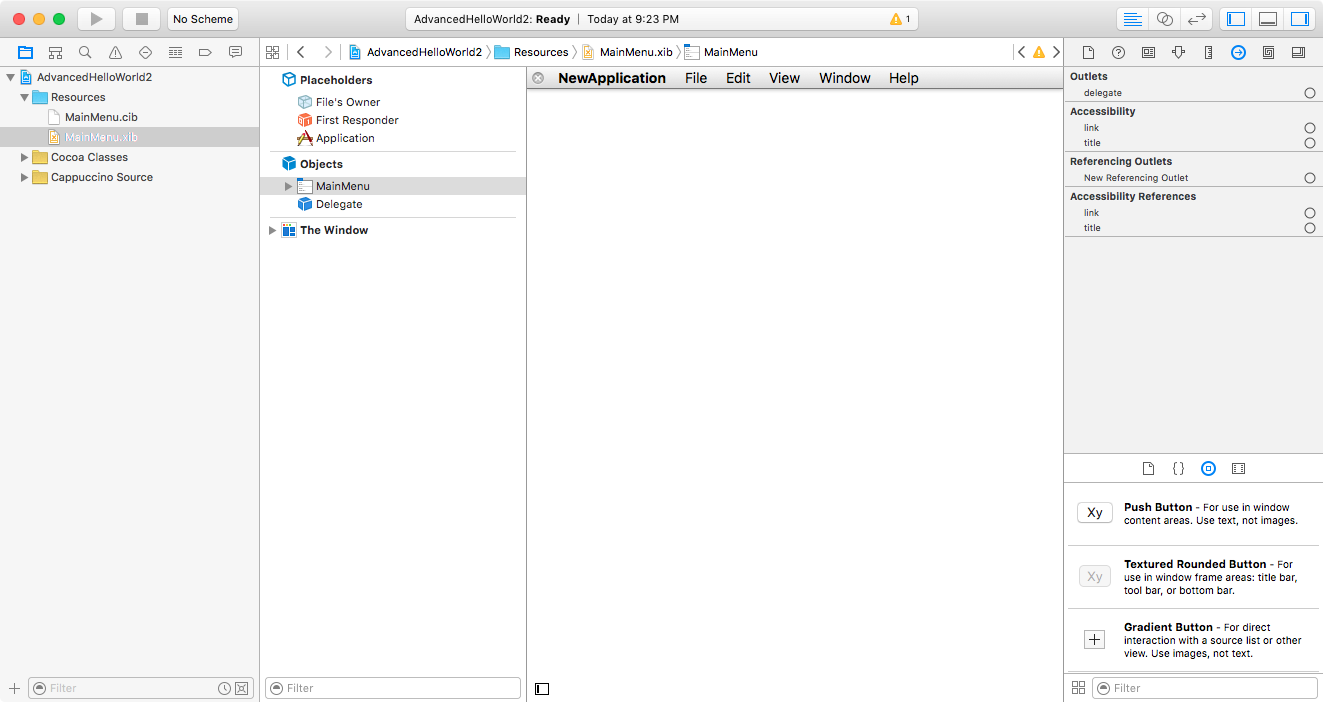
This is where you are going to build you UI.
Let’s start. First, we will add a label. To do so, open the main window, by double clicking Window - Window
in the Object navigator.
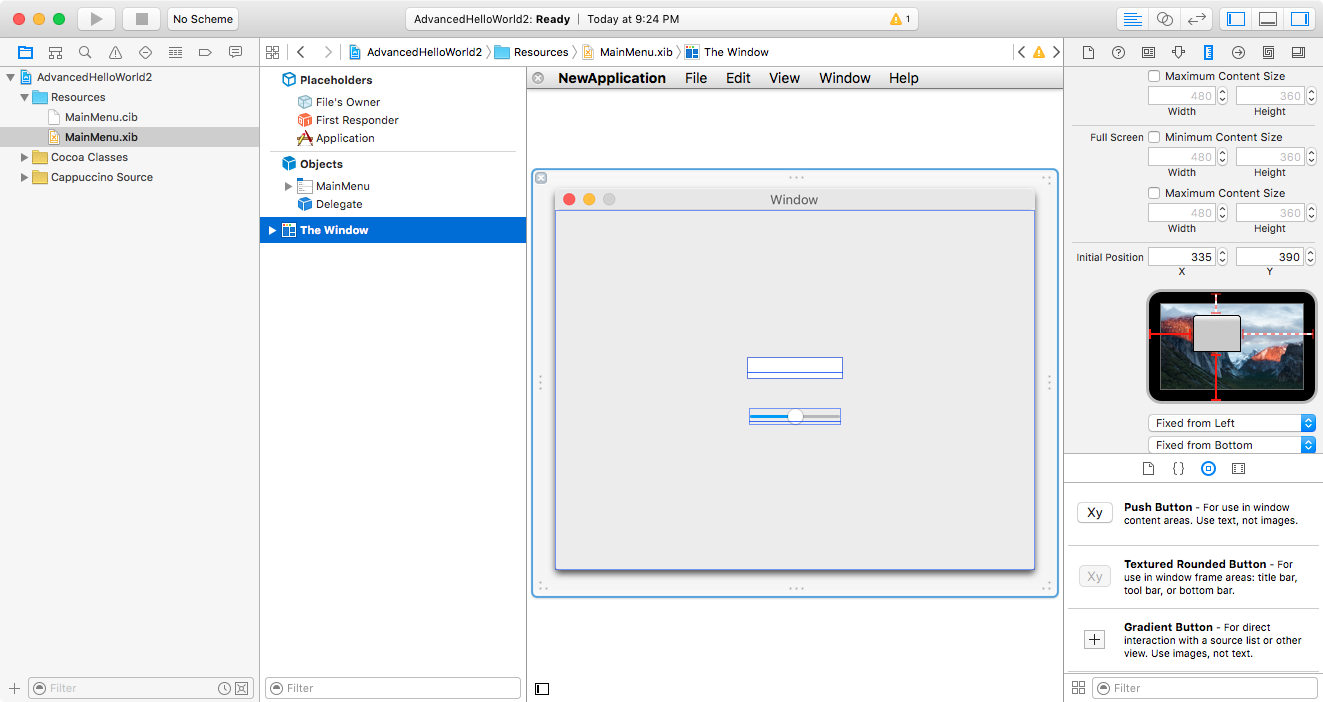
By default, there is a text field and a slider. Select them and remove them
(using the Delete key).
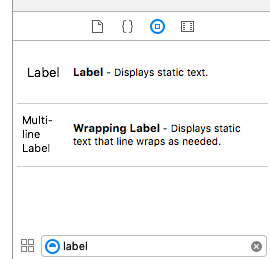
On the bottom right part of Xcode, you’ll see a library of controls.
Search for label:
Just drag and drop the label into the window, and position it where you
want to. You will see Xcode has a system of automatic rulers that will
really help you to build a nice, aligned UI.
Also add a button (search for “push button”) and a text field (search for “text field”).
Change the content of the label and the button, by double clicking on them:
Align all the controls to your pleasing. At the end you should get something like this:
When your UI is ready, we need to convert the Xib file into a Cib file. XcodeCapp will do it automatically for us. Every time you save a change to the Xib file, XcodeCapp will convert it automatically.
You will be noticed by a user notification if something goes wrong during the conversion.
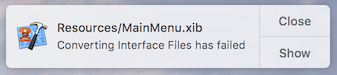
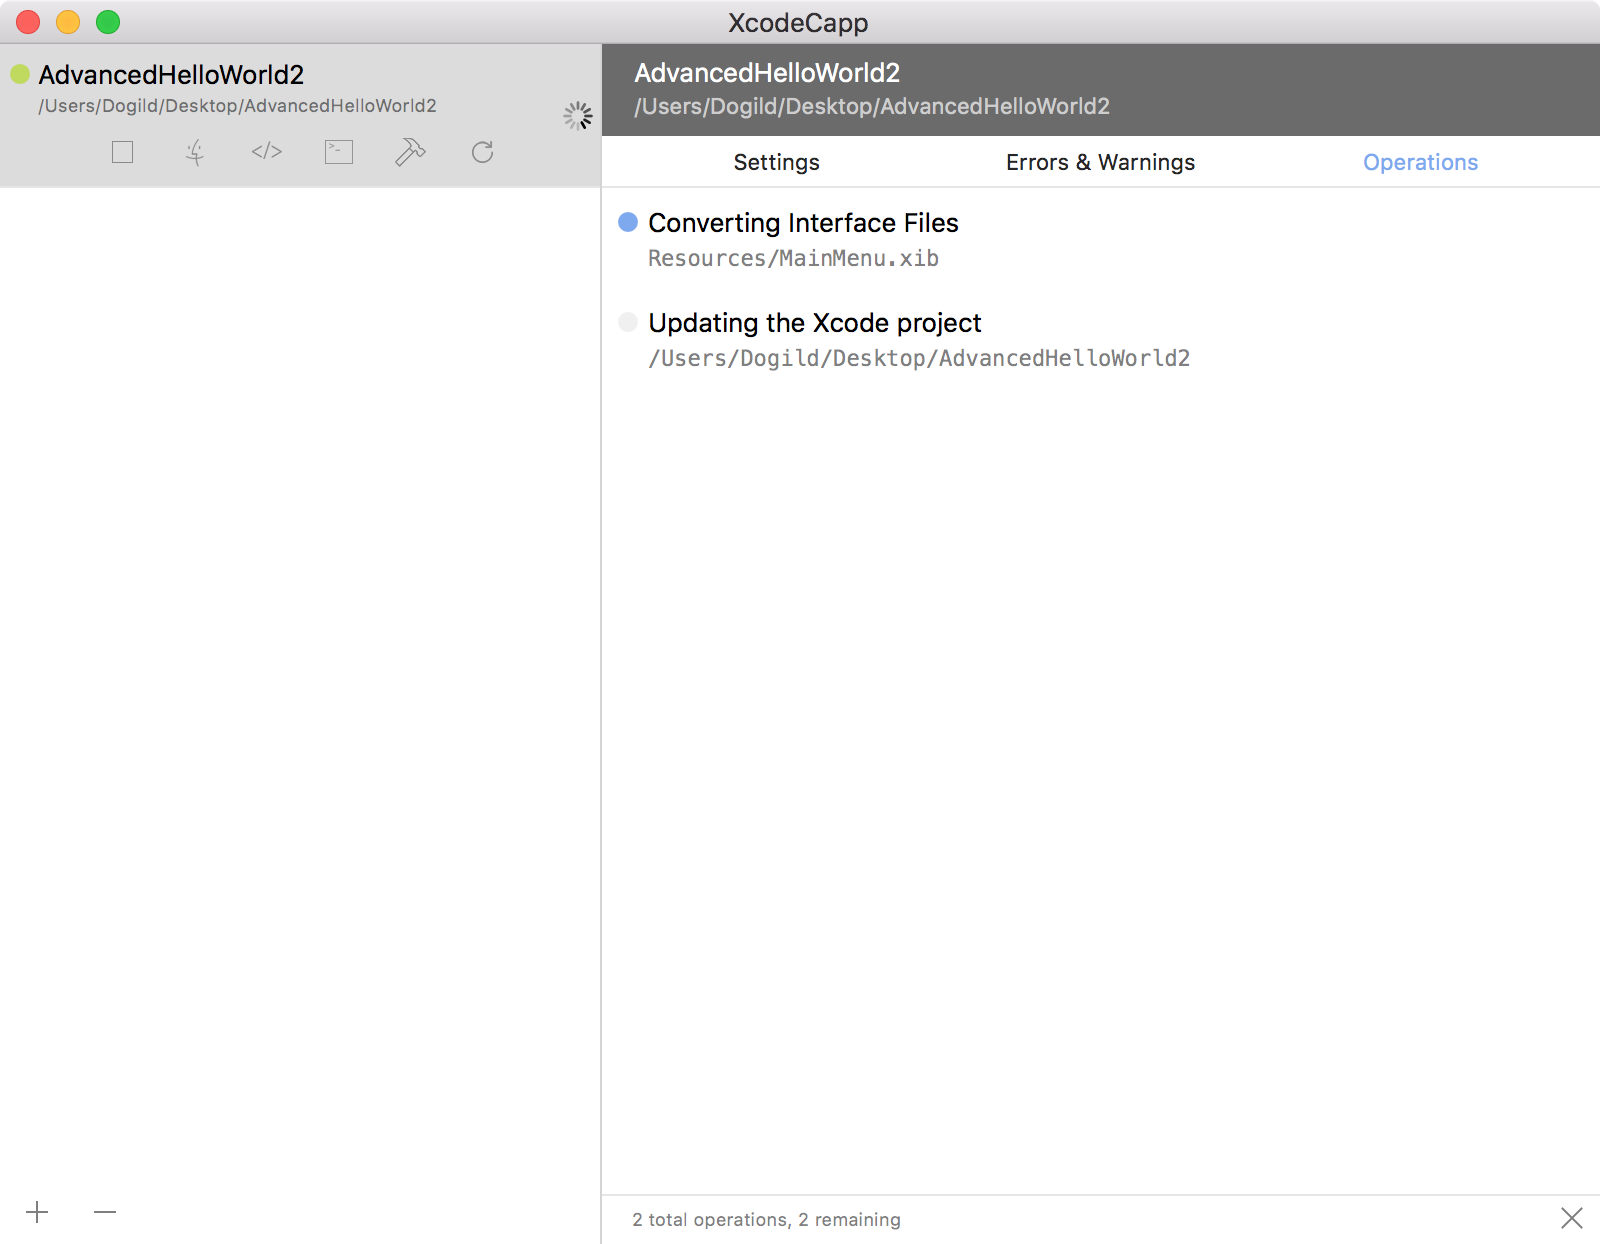
XcodeCapp will give you more information about any current errors. When there are errors or warnings, the icon will turn orange.

In the operations tab you can see what XcodeCapp is currently processing. You can cancel any ongoing operations.
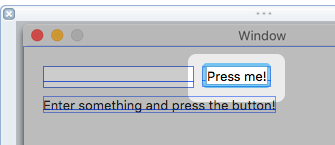
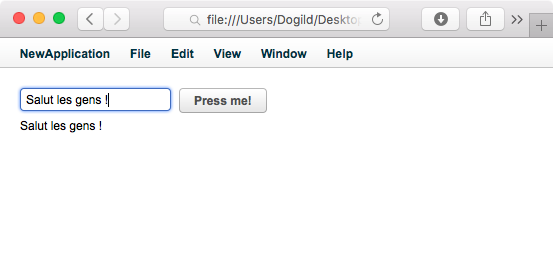
Now, the UI is ready, you can load your application and you should see your UI:
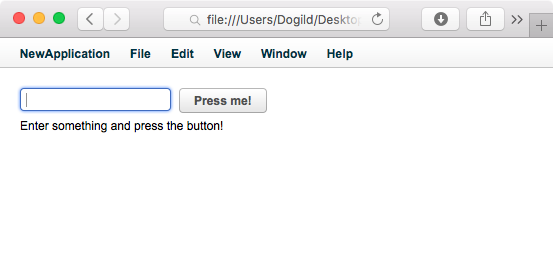
Note that you have not written a single line of code!
Now that we have a UI, we need to code the actions we want to use with our
controls. To do so, open AppController.j in your favorite editor. I will
use TextMate in in this tutorial.
Outlets are entry points between Xib/Cib files and you code. If you want to be able to access a control added using Xcode from your code, you need to create an outlet. This is not mandatory for every control. For example, our application may not interact with all the labels. So it is not necessary to create an outlet for every control.
We only need an outlet for the text field, as we want to read the text from the code and the label as we want to change its value. We don’t need an outlet for the button because, the code will not interact with it, it will be the button that will interact with the code. Let’s see:
@implementation AppController : CPObject
{
    /* this "outlet" is connected automatically by the Cib */
    @outlet CPWindow    theWindow;

    /* We create the outlets of the textfields here */
    @outlet CPTextField myTextField;
    @outlet CPTextField myLabel ;

    /* As you can see, the label is also a CPTextField, it's just not editable and not bordered.
       It is important you declare correct classes for the outlets or Xcode won't see them.
    */
}

- (void)awakeFromCib
{
    /* This is called when the cib is done loading.
       You can implement this method on any object instantiated from a Cib.
       It's a useful hook for setting up current UI values, and other things.
       In this case, we want the window from Cib to become our full browser window
    */
    [theWindow setFullPlatformWindow:YES];
}

@end
No more stuff to do for this.
We now need to create the action the button will send. So let’s add an action like we’ve seen in previous tutorials:
@implementation AppController : CPObject
{
    @outlet CPWindow    theWindow;

    @outlet CPTextField myTextField;
    @outlet CPTextField myLabel;
}

- (void)awakeFromCib
{
    [theWindow setFullPlatformWindow:YES];
}

- (IBAction)sayHello:(id)aSender
{
   // We get the content of the textfield and we set it as the value of the label.
   [myLabel setStringValue:[myTextField stringValue]];
}
@end
This is the final step. Return to Xcode in order to indicate the outlets and the actions.
Draw a line between the AppController object to the label, using right click (or cmd + click):
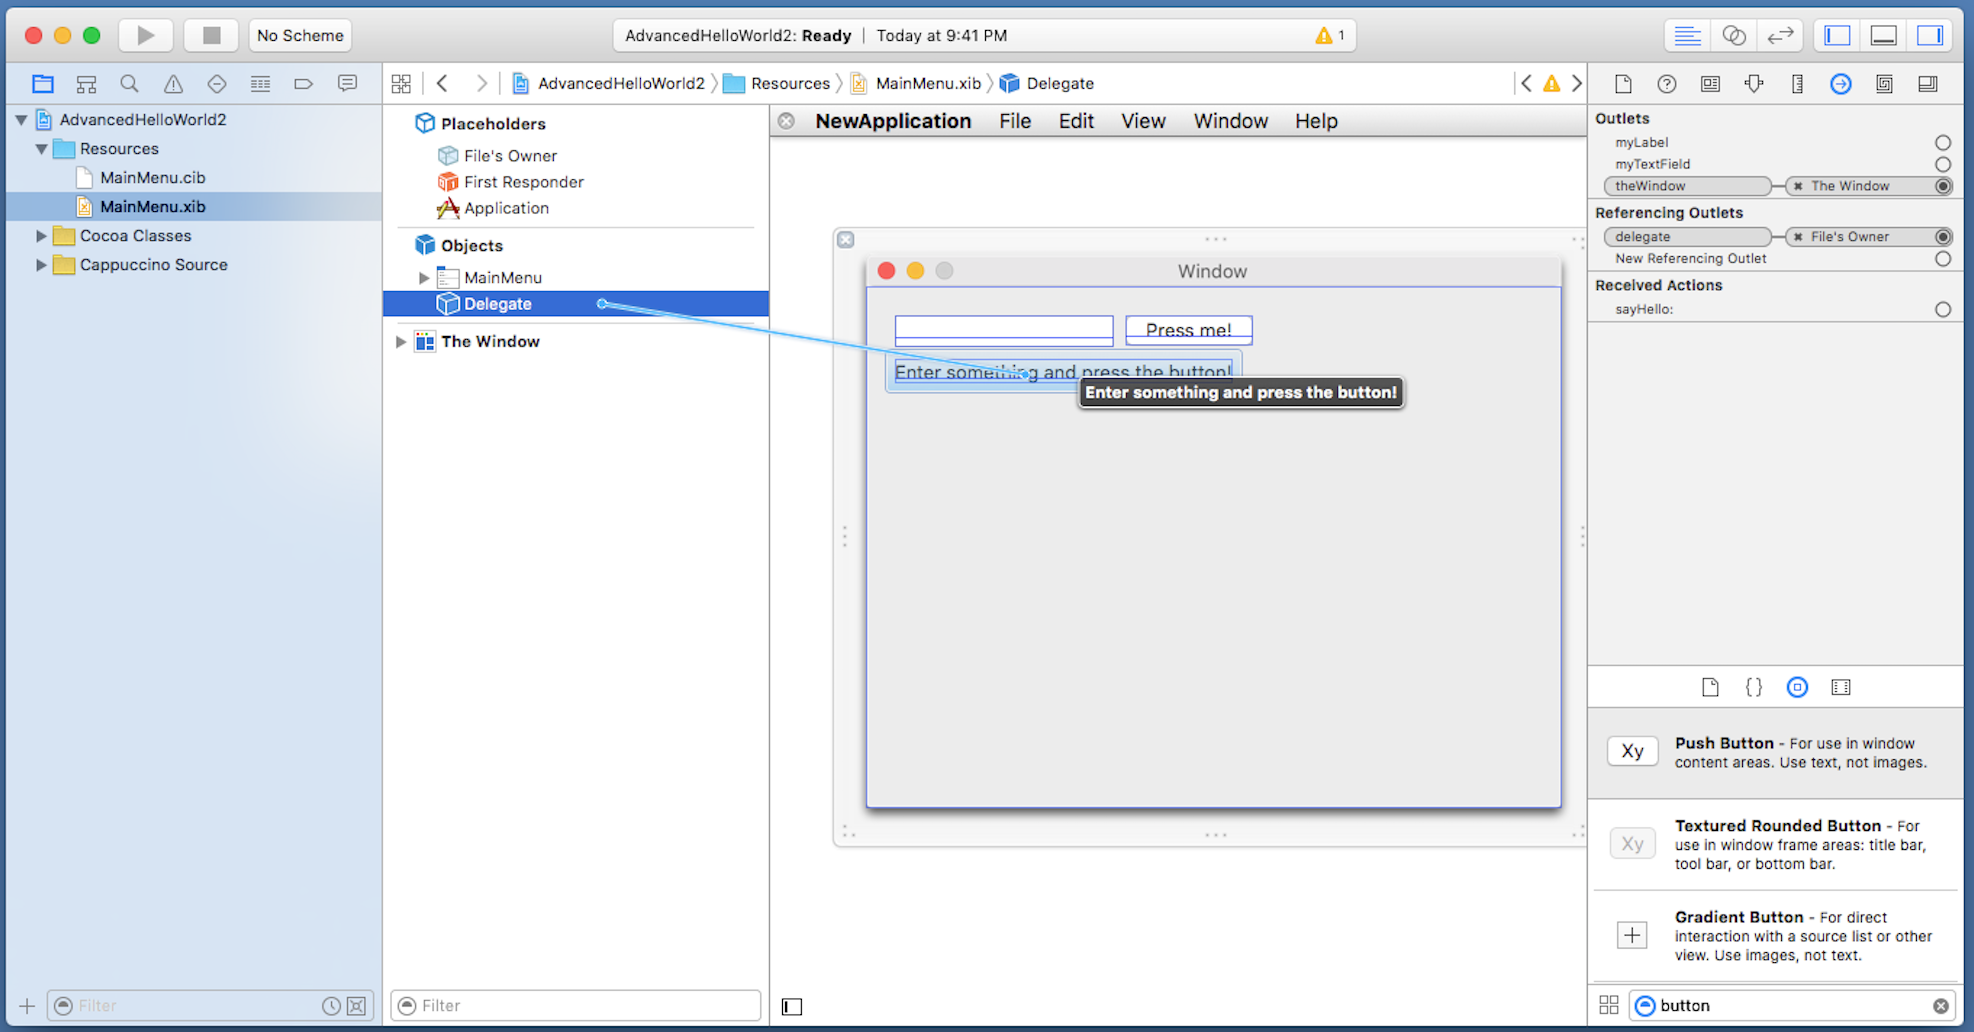
When you release the mouse button, a small dark dialog will ask you what outlet it should be:
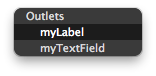
Set it to myLabel, which is what you have declared in your code.
Same process: draw a line between the AppController and the text field, then choose myTextField.
Connecting the action is the reverse process. Start the line from the sender
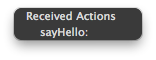
of the action (so in that case, the button), and go to AppController:
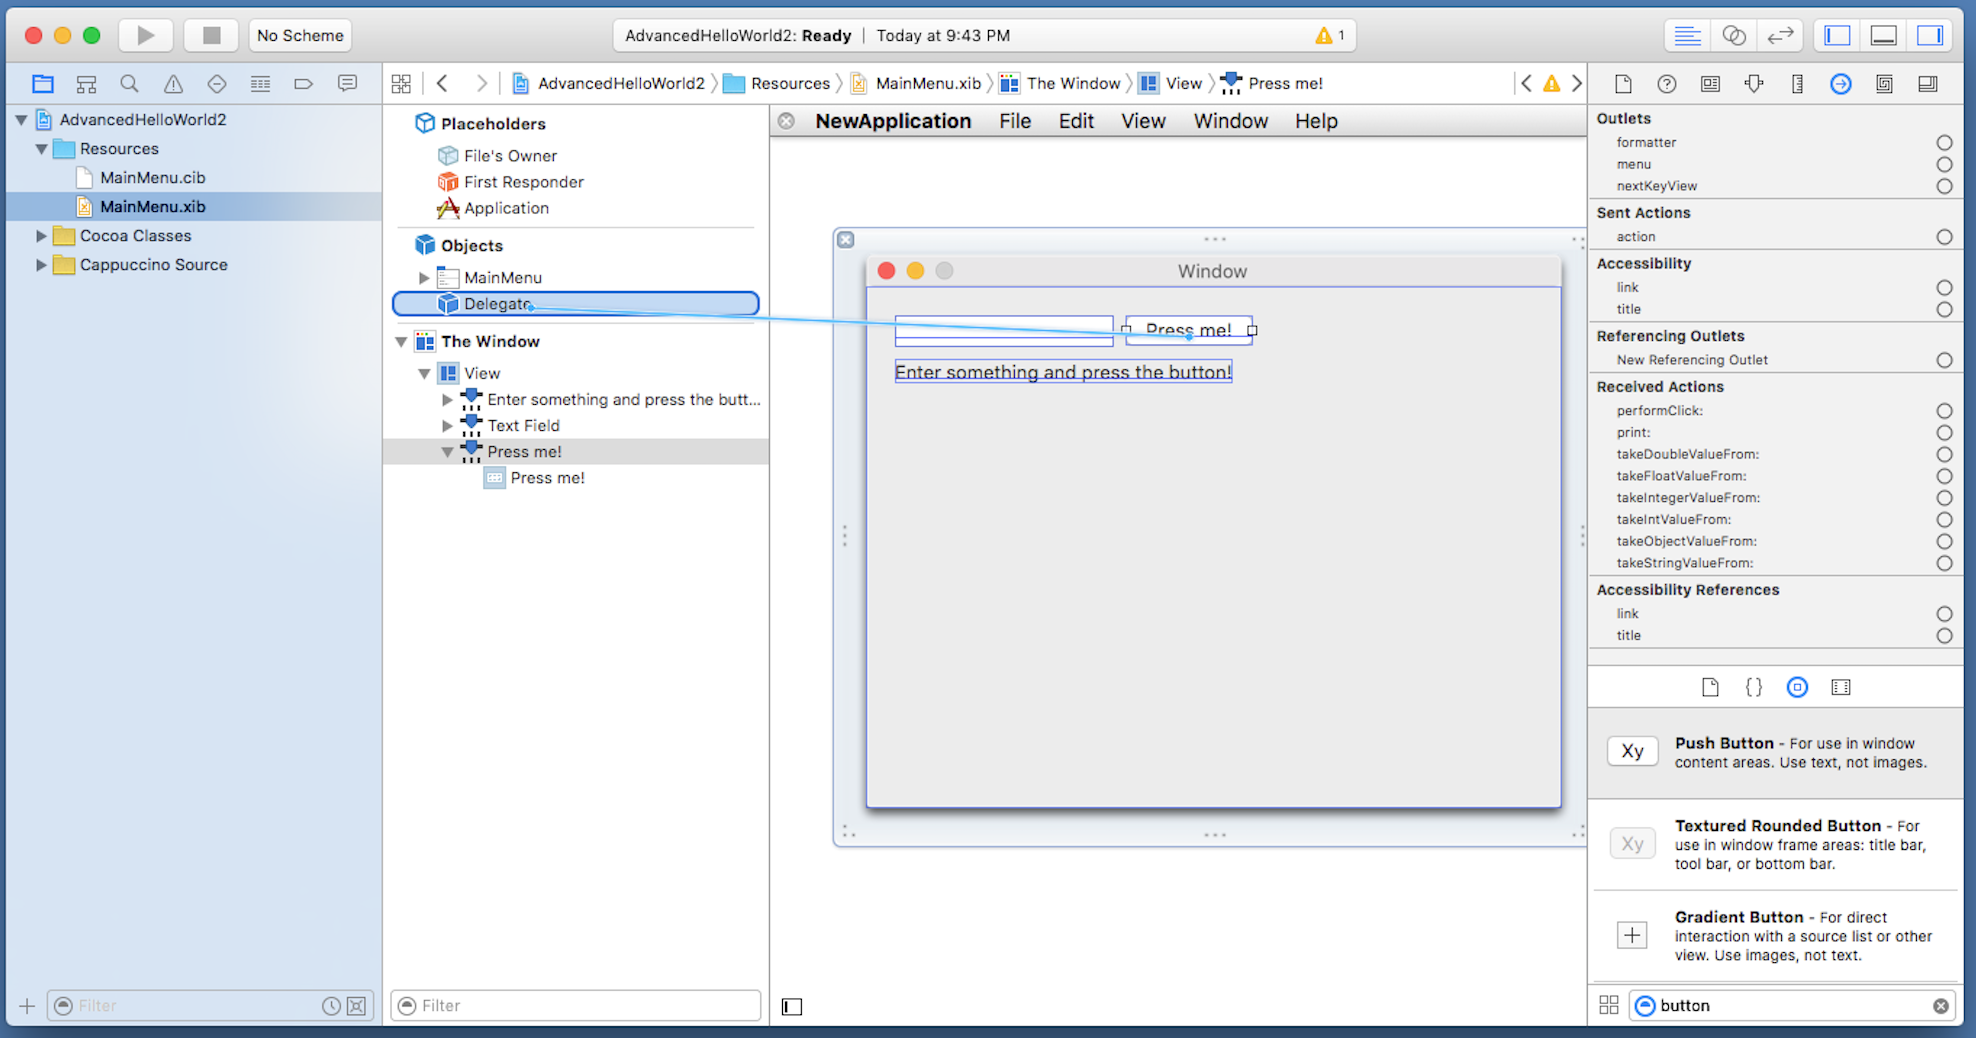
This time, the dark dialog will show all available actions exposed by the
class. Choose sayHello:.
If you want to be able to change the label when you press enter from the
text field, draw a line from the textfield to AppController, and choose
sayHello: too.
Finally, save the Xib file, wait for the XcodeCapp icon to flicker green and then become a solid black, then open index.html. You will have a fully functional application, with almost no code!
You can download the archive of this project here.

![]() Logo by Sofa. Hosted by SlevenBits. Copyright © 2013-2019 - Cappuccino Project.
Logo by Sofa. Hosted by SlevenBits. Copyright © 2013-2019 - Cappuccino Project.